This post may contain affiliate links. I try to make my posts as helpful as possible and have great products easy for you to access. The use of these links provides me a small commission at no cost to you. As an Amazon Associate, I earn from qualifying purchases.
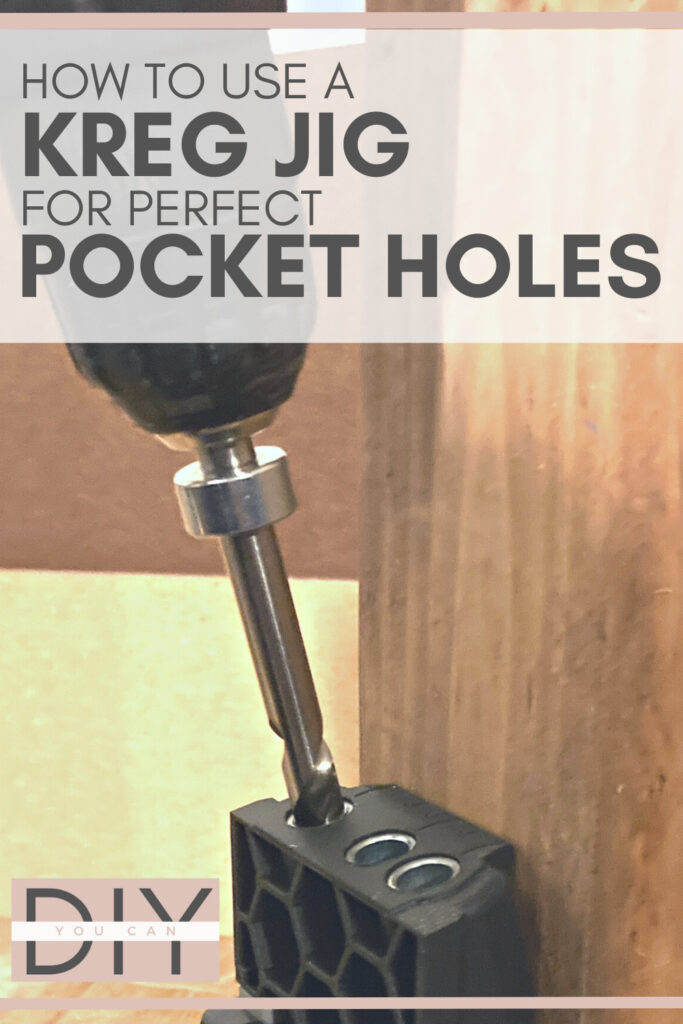
My pocket hole jig is truly one of my favorite tools! Learning how to use a Kreg Jig opens a world of opportunities for DIY builds. I gathered everything I have learned and more about pocket hole joinery in this post. I hope that it will be a helpful resource as you embark on using pocket holes in your next DIY project.
What is a Pocket Hole Kreg Jig?
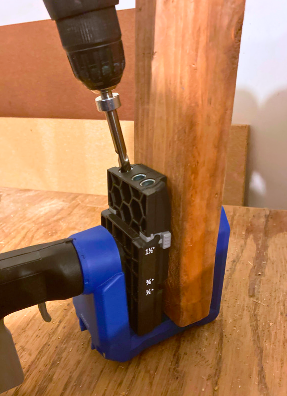
A pocket hole Kreg Jig is a tool used in woodworking to create strong and hidden joints between two pieces of wood. It consists of a drill bit, a collar, a jig, and a clamp. The tool works by drilling angled holes into one piece of wood, then screwing into another piece of wood at an angle.
There are a number of reasons why a pocket hole Kreg Jig is useful for woodworking projects. It allows for strong, durable joints that are hidden from view. Which can make a project look more professional and polished.
Because the screws are driven in at an angle, they are less likely to pull out over time. This is especially important for furniture and other items that will be subjected to wear and tear.
Pocket hole joinery is relatively quick and easy compared to traditional joinery methods like mortise and tenon or dovetail joints. This makes it a good option for new woodworkers or for those who want to complete a project quickly.
Overall, a pocket hole Kreg Jig is a valuable tool for any woodworker who wants to create strong, hidden joints quickly and easily.
In this post you will find:
- Understanding the Kreg Jig
- Types of Pocket Hole Jigs
- What Can You Use Pocket Hole Joinery On?
- Making Pocket Holes
- Using Pocket Hole Screws
- Pocket Hole Screw Guide
- Pocket Hole FAQ
Understanding the Kreg Jig
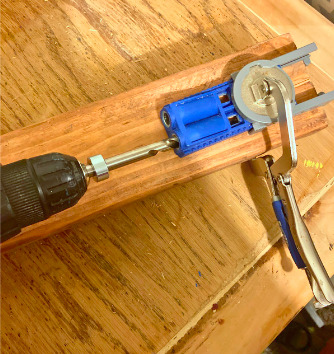
A pocket hole Kreg Jig consists of four basic components: a drill bit, a collar, a jig, and a clamp. Here’s a brief explanation of each component:
- Drill bit: The drill bit is the tool that creates the hole in the wood for the pocket hole screw.
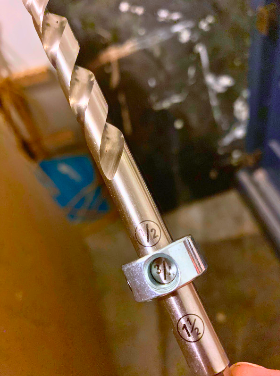
- Collar: The collar is a small metal ring that fits around the drill bit and is used to adjust the depth of the pocket hole.
- Jig: The jig is the main body of the Kreg jig and serves as a guide for the drill bit. It’s typically made of plastic or metal and has two or three guide holes that hold the drill bit in place as it drills the pocket hole at a specific angle (usually 15 degrees or 30 degrees).
- Clamp: The clamp is used to secure the jig to the workpiece being drilled. It helps keep the workpiece stable and prevents it from moving while the pocket hole is being drilled.
Types of Pocket Hole Jigs
Kreg Pocket-Hole Jig 320: This is the smallest compact model. It features a simple design with a drill guide block, a toggle clamp, and a stepped drill bit.
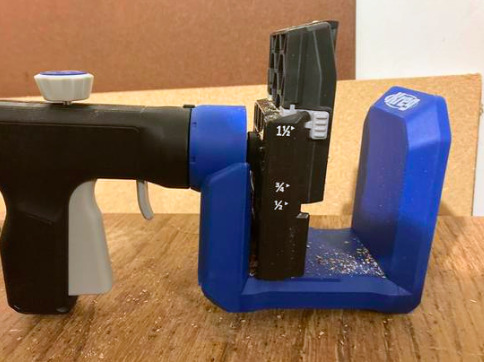
Kreg Pocket-Hole Jig 520 PRO: This jig features a clamp release lever and a ratcheting clamp mechanism that adjusts to fit various workpiece thicknesses. It allows you to drill pocket holes at four angles: 0°, 15°, 30°, and 45°, providing you with maximum versatility. This is the model I just upgraded to, and I’m loving it!
Kreg Pocket-Hole Jig 720 PRO: This jig features a quick-release mechanism and an adjustable clamp. The clamp automatically adjusts to different workpiece thicknesses. This model allows you to drill pocket holes at three different angles: 0°, 15°, and 30°. The jig also has several advanced features, such as a workpiece stop, a repeatable stop, and a material support stop.
Kreg Foreman Pocket-Hole Machine: This is a more advanced pocket-hole jig system, featuring an electric drill and automatic clamping. It’s designed for professional woodworkers or anyone who needs to make a large number of pocket holes quickly and efficiently.
What can you use pocket hole joinery on?
Pocket hole joinery can be used on a wide variety of materials, including hardwoods, softwoods, and plywood.
Here are some examples of projects you can use pocket hole joinery on:
- Cabinets: Pocket hole joinery is commonly used in cabinet making. It allows for quick and easy assembly of cabinet boxes, face frames, and other components.
- Furniture: Pocket hole joinery can be used to assemble a wide range of furniture pieces, such as tables, chairs, and bookcases. It can also be used to attach legs and other components to furniture frames.
- Frames: Pocket hole joinery is an excellent technique for assembling frames, such as picture frames, mirror frames, and window frames.
- Outdoor Projects: Pocket hole joinery is also suitable for outdoor projects such as decks, fences, and outdoor furniture. It creates strong, durable joints that can withstand the elements.
- Toys: Pocket hole joinery can be used to assemble toys and other small woodworking projects, such as birdhouses, planters, and decorative boxes.
Making Pocket Holes
- Determine the thickness of your workpiece: First, measure the thickness of the board you will be joining. This will help you to set the Kreg Jig at the right depth.
- Adjust the drill guide: The drill guide is the metal sleeve on the Kreg Jig that guides the drill bit. Loosen the screw on the side of the drill guide and slide it until the tip of the drill bit lines up with the depth collar marking that corresponds to the thickness of your workpiece. Tighten the screw to secure the drill guide in place.
- Set the drill bit collar: The drill bit collar controls the depth of the pocket hole. Loosen the set screw on the collar, slide the collar up or down the drill bit until it aligns with the depth collar marking on the drill guide, and then tighten the set screw.
- Test the setup: It’s a good idea to test the setup on a scrap piece that is the same thickness as your workpiece. Clamp the scrap piece of wood in the Kreg Jig and drill a pocket hole. Check to see if the hole is at the right depth and if the screw fits snugly in the pocket hole.
- Repeat for different thicknesses: If you need to join boards of different thicknesses, repeat the process above for each thickness. Remember to adjust the drill guide and collar to the appropriate settings for each thickness.
Using Pocket Hole Screws
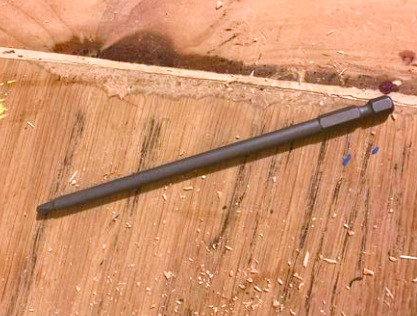
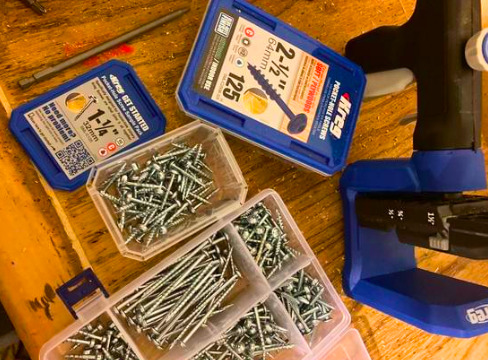
Pocket hole screws have a square tip. Most Kreg Jig kits will come with a 6″ square driver bit. The long driver bit allows you to reach into the pocket holes.
One precaution to keep in mind when screwing your pocket hole screws is to avoid over-rotating. You don’t want to strip the screw or break through the hole you drilled.
Pocket hole screw guide
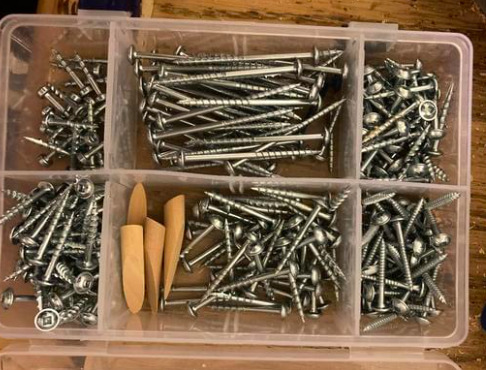
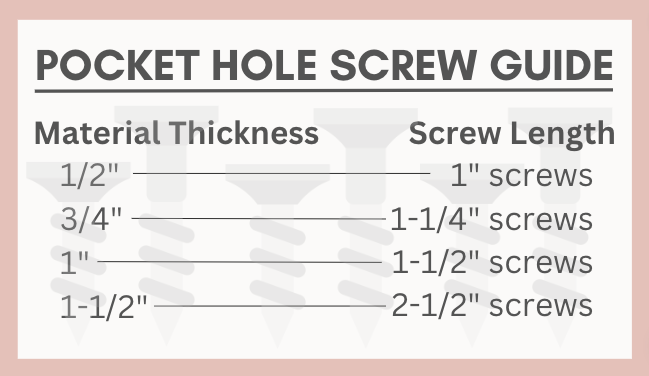
Depending on the thickness of the material you are working with, you will need to adjust the length of the pocket hole screws you use.
Use the pocket hole screw guide below for some guidance.
Pocket Hole FAQ
How many pocket holes per foot/how many pocket holes do I need?
The number of pocket holes you need per foot or for a specific project depends on several factors, including the thickness of the material, the length of the joint, and the weight or stress that the joint will bear.
As a general rule, you should aim to place a pocket hole every 6 to 8 inches along the length of the joint. This means that for a 4-foot board, you would need to place 6 to 8 pocket holes.
If you are building something that will be put under more stress/hold more weight, aim for a screw every 4-6 inches.
What Kreg Jig settings do I use for 3/4 plywood pocket holes?
When making pocket holes in 3/4″ plywood set the collar to 3/4″ and the jig to 3/4″. This may look a little different depending on your Kreg Jig model.
What Kreg Jig setting should I use for 2×4?
Again, these settings will look different depending on the Kreg Jig model you have. But your collar and jig should be set to 1 1/2″. This is because the thickness of a 2×4 is actually 1 1/2″ inches.
Hopefully, this helps you on your way to mastering your Kreg Jig and pocket hole joinery! What are you going to build with these skills? I want to know in the comments!
