This post may contain affiliate links. I try to make my posts as helpful as possible and have great products easy for you to access. The use of these links provides me a small commission at no cost to you. As an Amazon Associate, I earn from qualifying purchases.
Gel staining has become a popular technique for enhancing woodwork, furniture, and other surfaces. One crucial aspect of gel staining is understanding its drying time. In this blog post, we’ll delve into the factors affecting how long it takes for gel stain to dry and offer extra tips to ensure your gel staining projects turn out beautifully.
In this post you’ll find:
- How Long Does Gel Stain Take to Dry?
- How to Use a Gel Stain
- Gel Stain Over Paint
- How to Gel Stain Cabinets
How Long Does Gel Stain Take to Dry?
The drying time of gel stain can vary depending on several factors, including the brand of the stain, the type of wood or surface being stained, and environmental conditions. In general, gel stains typically take longer to dry compared to traditional liquid stains.
On average, gel stain can take anywhere from 6 to 12 hours to dry.
But one time when I applied gel stain to a dresser in my garage during the winter, it didn’t dry completely until I brought it inside my house. I learned the hard way to follow the recommended temperature range of 65 degrees to 80 degrees for the application…
So keep in mind that factors such as humidity, temperature, and ventilation can influence drying time.
To be safe, it’s a good idea to allow the gel stain ample time to dry before applying any additional coats or finishing products. Always refer to the product label or instructions for the most accurate information on drying times and proper application techniques.
How to Use a Gel Stain
Using gel stain is a straightforward process, but it’s essential to follow the proper steps to achieve the best results. Here’s a step-by-step guide on how to use a gel stain:
Step 1: Prepare the Surface: Ensure that the wood or surface you want to stain is clean, dry, and free from any dust or debris. I like to use tac cloth for a nice dust-free surface.
If the wood is rough, you may want to sand it to smooth out the surface. Use sandpaper with a grit between 120 and 220. Learn more about sandpaper grits here.
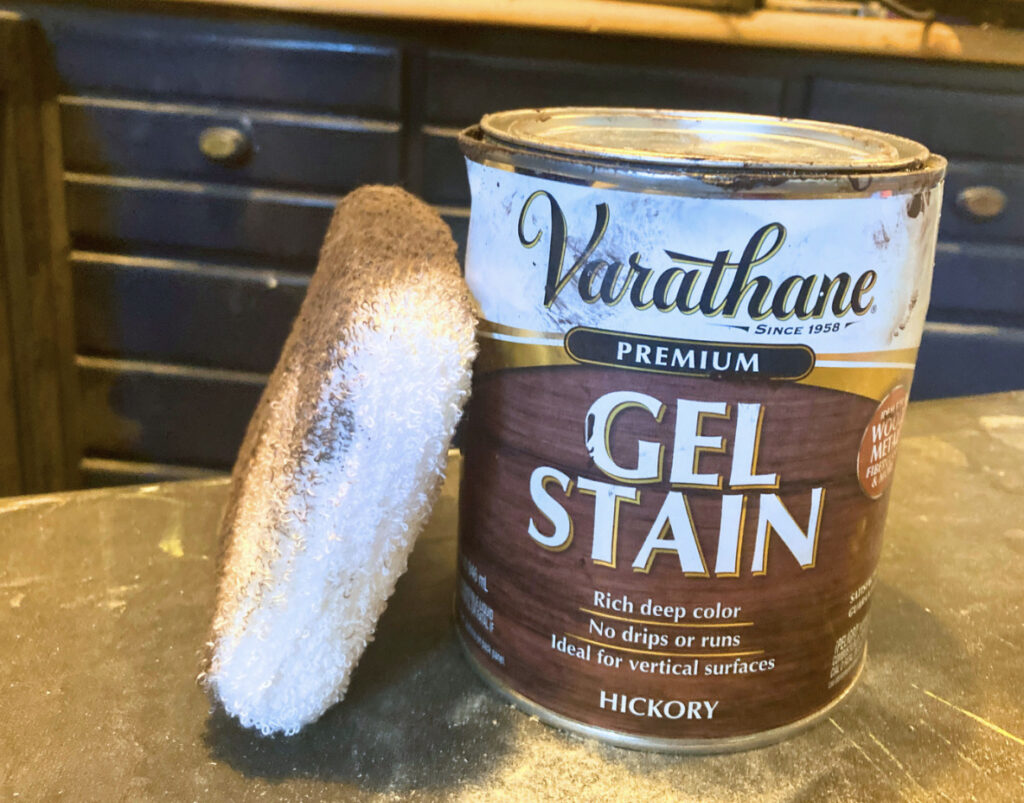
Step 2: Stir the Gel Stain: Open the container of gel stain and use a stir stick to thoroughly mix the contents. Gel stains tend to separate over time, so mixing it well ensures you get a consistent color and finish.
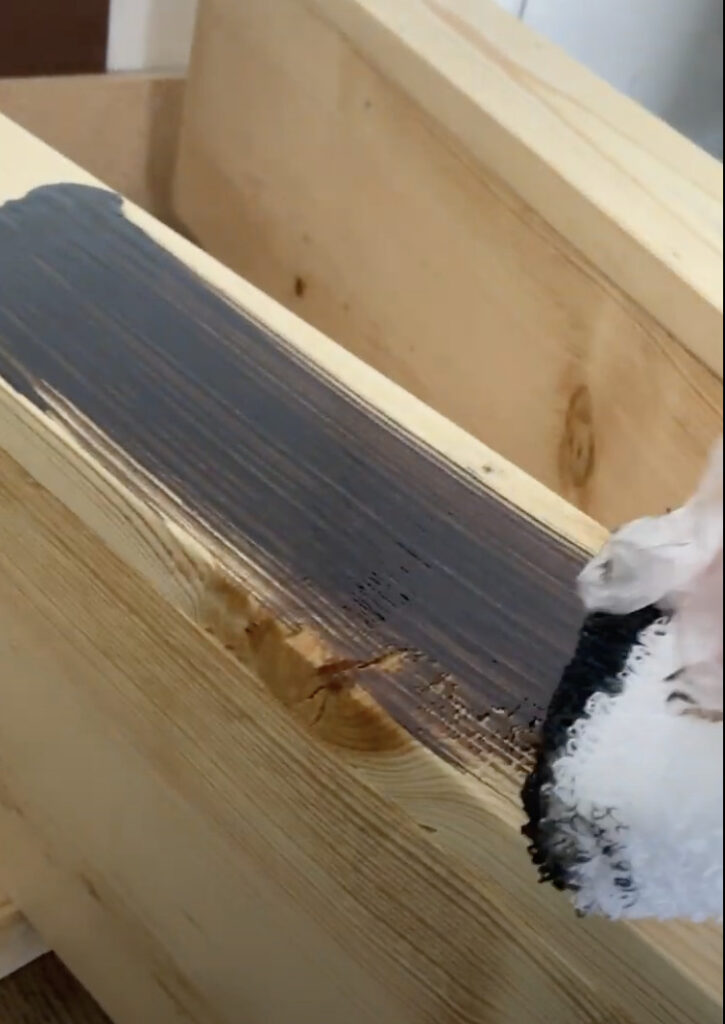
Step 3: Apply the Gel Stain: Wear protective gloves to avoid staining your hands. Dip a clean cloth or brush into the gel stain and apply it evenly onto the wood’s surface in the direction of the wood grain.
Step 4: Wipe Off Excess Stain: After applying the gel stain, let it sit on the wood for a few minutes (refer to the instructions on the can for recommended wait time). Then, use a clean cloth to wipe off the excess stain gently. Wipe in the direction of the wood grain to achieve an even finish.
Step 5: Allow Drying: Allow the gel stain to dry according to the manufacturer’s recommended drying time. As mentioned earlier, this can take anywhere from 6 to 12 hours, depending on various factors.
Step 6: Optional Additional Coats: If you want a darker color, you can apply additional coats of gel stain following the same process as before. Be sure to let each coat dry before applying the next one.
Step 7: Seal the Stained Surface (Optional but recommended): Once the final coat of gel stain has dried completely, you can choose to seal the stained surface with a clear topcoat or finish. This step is optional but can help protect the wood and enhance its appearance. Use a product suitable for your project, such as polyurethane or protective wax.
Gel Stain Over Paint
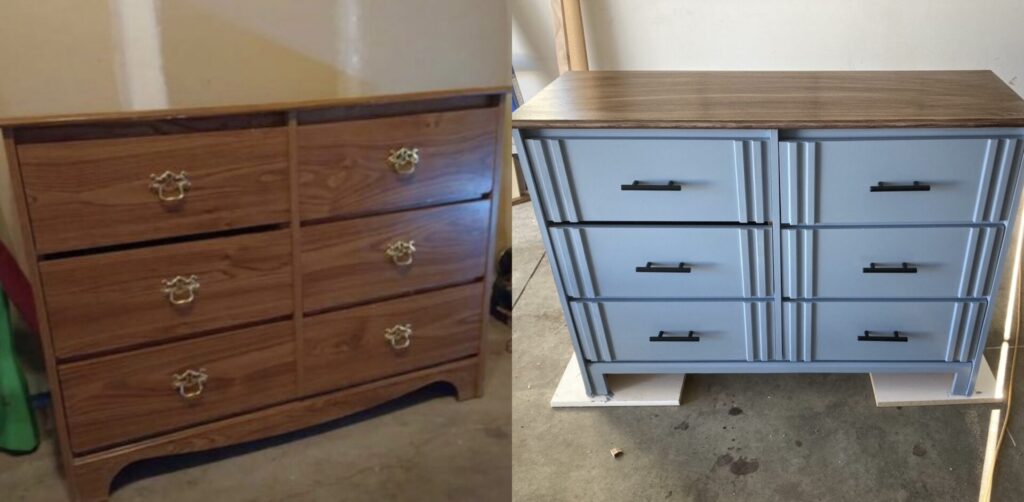
Applying gel stain over paint is one of my favorite ways to use gel stain! With a little attention to detail, you can apply gel stain over paint to get a “faux wood” look.
Simply start with a light brown or tan paint color. Allow it adequate drying time.
Then apply your gel stain over the paint. With a bristle brush, lightly brush over the gel stain to create “wood grain”.
I have loved using this method on dresser flips, here is an example of one I used this method on.
For more tips on dresser flips, make sure to visit my post on Successfully Flipping Dressers.
Gel Staining Kitchen Cabinets – How to Gel Stain Cabinets
If you’re not a fan of your cabinet color, get stain is a great option! But you want to make sure to do it correctly, or it could end up looking worse.
The steps to gel stain your cabinets is similar to the steps described above but we will review them here with a few extra tips.
Step 1: Prepare the Cabinets:
- Remove cabinet doors and hardware (handles, knobs, etc.) using a screwdriver.
- Clean the cabinet surfaces thoroughly to remove grease, dirt, and any residues. The Pink Stuff is a great option for this step.
- Lightly sand the cabinet surfaces using fine-grit sandpaper (around 220-grit). This step helps the gel stain adhere better and creates a smooth surface for application. Be sure to sand in the direction of the wood grain.
Step 2: Protect Surrounding Areas: Use painter’s tape and drop cloths to cover and protect the surrounding areas, including countertops, walls, and floors, from accidental spills or drips.
Step 3: Stir the Gel Stain: Open the container of gel stain and stir it well.
Step 4: Apply the Gel Stain:
- Dip a clean cloth or brush into the gel stain, and apply a thin, even coat to the cabinet surfaces.
- Apply the gel stain in the direction of the wood grain for a smooth finish.
- Pay special attention to any crevices, corners, and edges to ensure complete coverage.
Step 5: Wipe Off Excess Stain:
- After applying the gel stain, let it sit on the surface for a few minutes (see the instructions on your can for the recommended wait time).
- Gently wipe off the excess stain using a clean cloth. Wipe in the direction of the wood grain to achieve an even finish.
Step 6: Allow Drying:
- Allow the gel stain to dry. As mentioned previously, gel stains typically take longer to dry than liquid stains, so be patient. It’s worth the wait!
Step 7: Apply Additional Coats (Optional):
- If you want a darker or more intense color, you can apply additional coats of gel stain following the same process. Let each coat dry before applying the next one.
- Keep in mind that gel stain is buildable, so start with lighter coats and add more until you achieve the desired color.
Step 8: Seal the Cabinets (Optional):
- Once you’re satisfied with the stained finish, you can choose to seal the cabinets with a clear topcoat or finish. This step adds protection and durability to the stained surfaces.
Step 9: Reassemble Cabinets:
- After the gel stain and topcoat have dried completely, reattach the cabinet doors and hardware.
Save these gel staining tips and tricks to Pinterest!