This post may contain affiliate links. I try to make my posts as helpful as possible and have great products easy for you to access. The use of these links provides me a small commission at no cost to you. As an Amazon Associate, I earn from qualifying purchases.
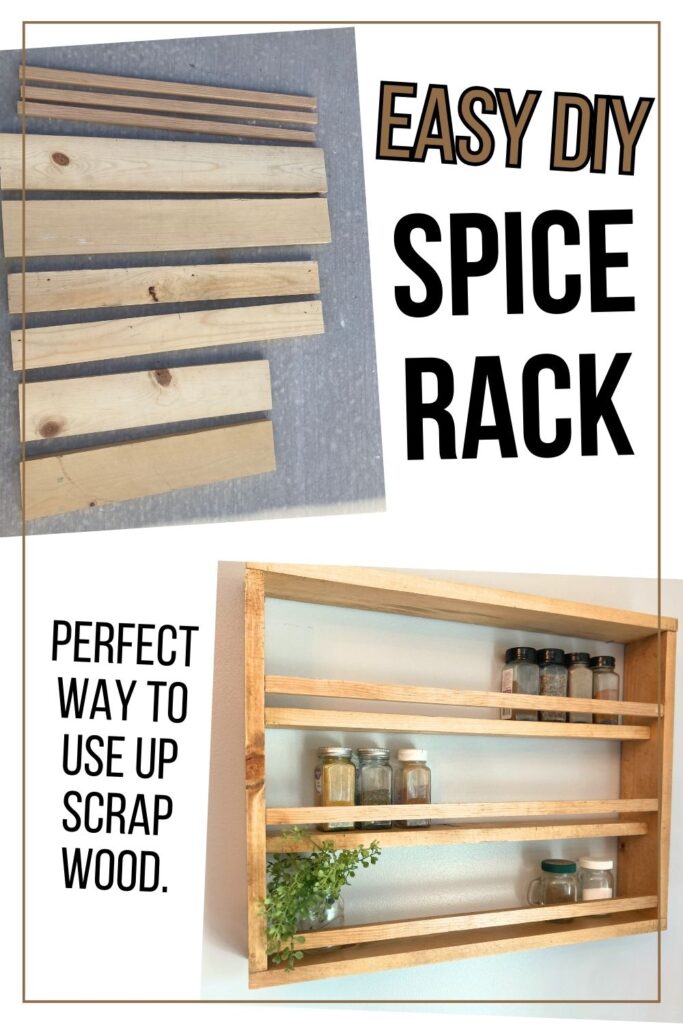
Building a spice rack is the perfect weekend project that adds functional and stylish storage to your kitchen. My mother-in-law just moved into a home with a kitchen with less storage, so this spice rack was much needed. Plus, I was able to make it all with scrap wood, which is always a win!
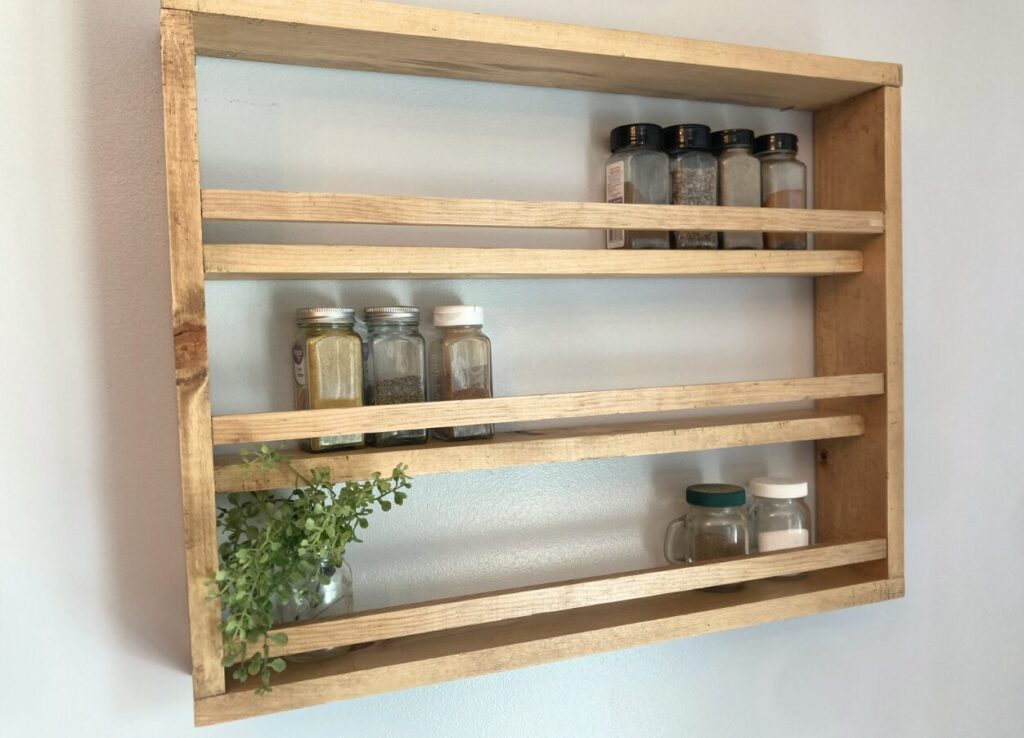
Supplies Needed to Build a DIY Spice Rack
Supplies needed:
- Lumber
- 1 x 4 (Roughly 11′)
- 3/4 x 3/4 moulding for rails (roughly 6′)
- Prestain
- Stain (I used special walnut for mine)
- Wood glue
- Brad nails
- Top coat
Tools Used While Building a DIY Wall Spice Rack
Tools used:
- Saw (I used my Ryobi Miter Saw)
- Brad Nailer
Steps to Build a DIY Wall Spice Rack
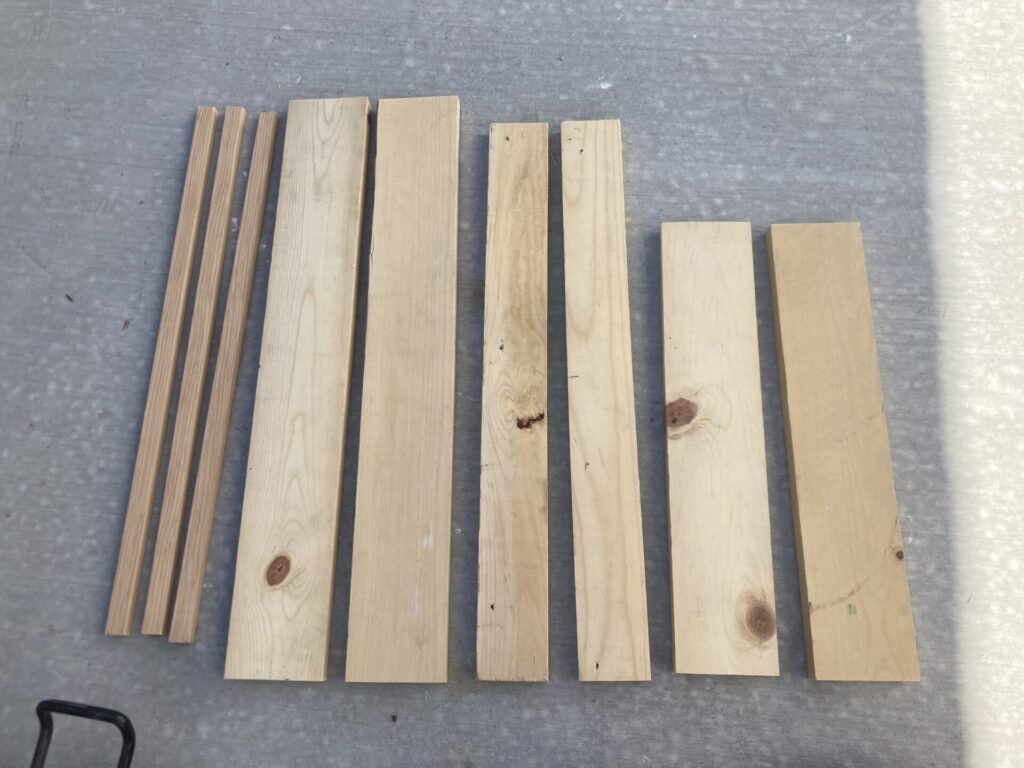
Step 1: Make Your Cuts
Using your saw, make the following cuts:
Top & Bottom (2): 23.5″
Sides (2): 17″
Shelves (2): 22″
Rails (3): 22″
I was using scraps and ran out of 1×4, so I used a 1×3 for the shelves. That is why they look a little different in the picture!
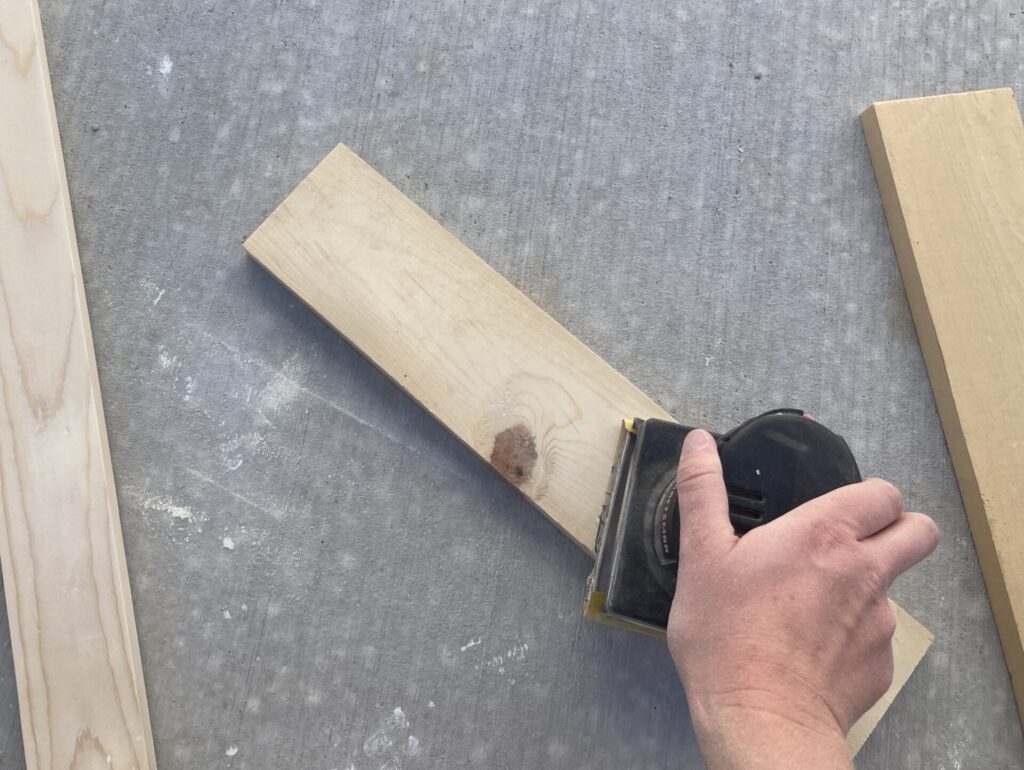
Step 2: Sand
Using 220 Grit, I sanded each piece. Sanding really makes a world of a difference and is totally worth the extra step.
Head to our sandpaper guide to learn more about sandpaper, the different grits and when to use them.
Step 3: Stain
Begin with generously applying a coat of prestain. After 5 minutes, wipe off any remaining excess.
Then apply your stain color of choice. I used special walnut because it matches other wood tones in the room.
Visit this post for some extra tips and tricks to staining wood.
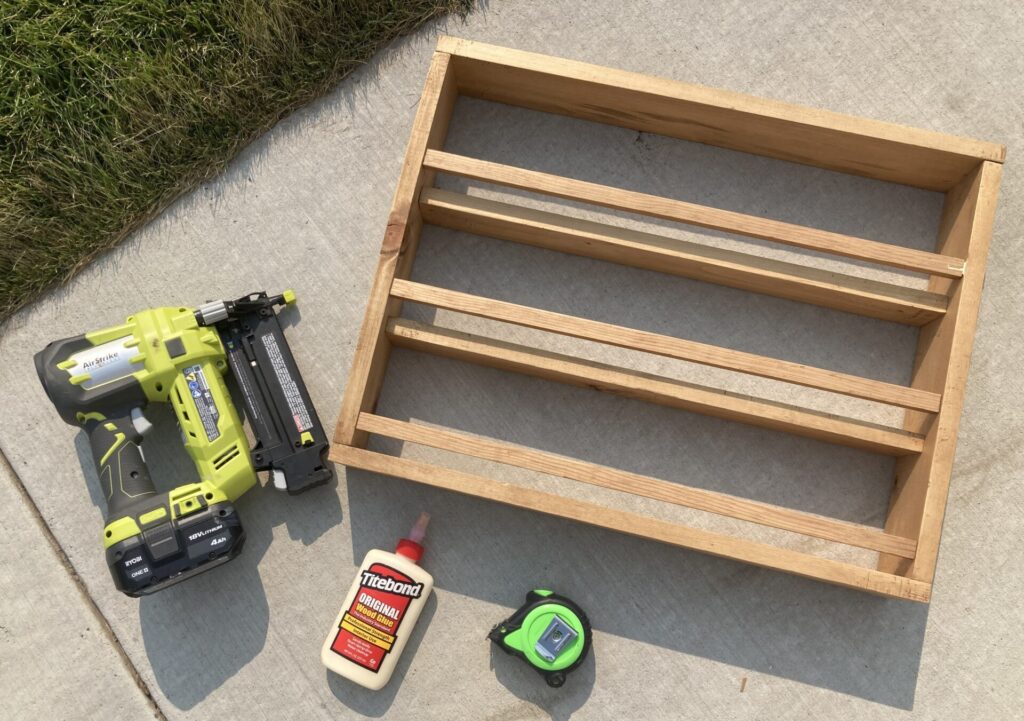
Step 4: Assemble
Using wood glue and your brad nailer, assemble your DIY spice rack.
Start with the main “box” frame, then add your shelves and railings. Keep everything equally distanced. See the graphic below for exact measurements.
Step 5: Add Top Coat
For projects like this where there are a lot of sides and angles, I like using a spray can of top coat. But regular liquid would work fantastic too! The spray can is just so convenient (no cleaning paint brushes!). I did three coats of top coat, waiting at least 1 hour in between coats.
If you need a little extra guidance on your top coat, check out our tips for using polyurethane.
Step 6: Hang Up
There are several options for hanging your DIY spice rack. I opted for a keyhole hanger, or you could just hang the top ledge on two nails. It is best to anchor into a stud or use drywall anchors.
Pin this DIY Spice Rack to Pinterest