This post may contain affiliate links. I try to make my posts as helpful as possible and have great products easy for you to access. The use of these links provides me a small commission at no cost to you. As an Amazon Associate, I earn from qualifying purchases.
DIY Barbie Doll House
My sweet neighbor was cleaning out her sister’s house and found this unfinished dollhouse kit from Michaels. She asked if we wanted it. How could I say no?? My four-year-old was thrilled!
I didn’t get very many before photos because I was too excited to start working on it and got carried away. But it was essentially just a shell of a doll house.
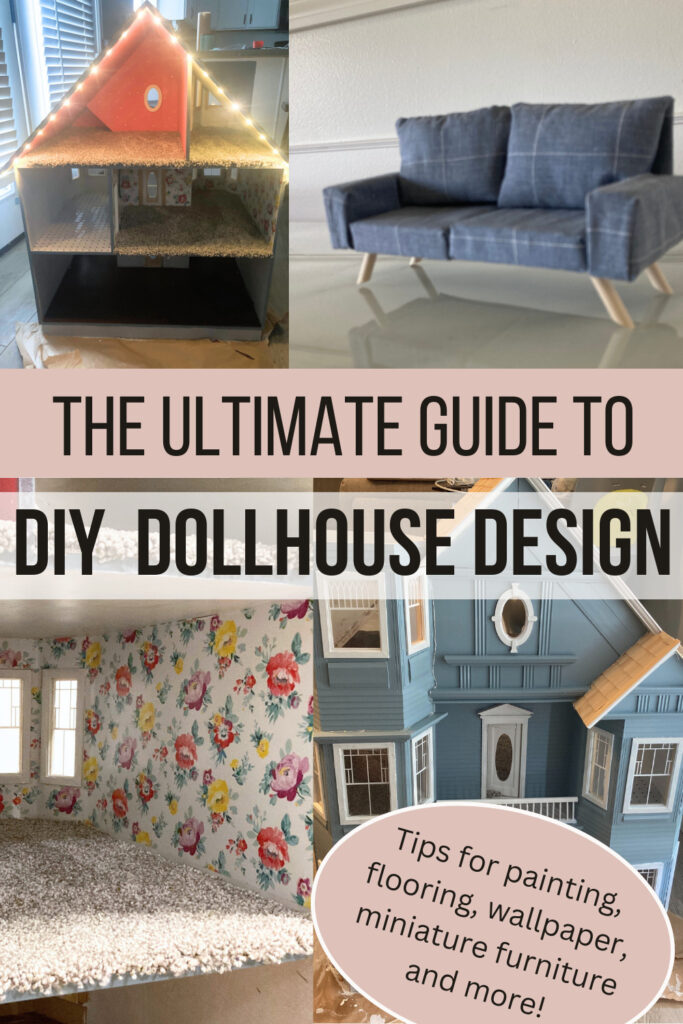
It has been so fun working with my daughter to bring this dollhouse to life. This post is full of the tips and tricks we’ve learned to decorate our DIY Barbie Doll House.
In this post you’ll find:
- DIY Dollhouse Flooring
- DIY Dollhouse Wallpaper
- DIY Dollhouse Rug
- DIY Dollhouse Bed
- DIY Mini Dollhouse Furniture: Couches
- How to Paint a Dollhouse
- Dollhouse Christmas Lights
DIY Dollhouse Flooring
I used three different types of flooring for our DIY Dollhouse: Carpet, peel-and-stick luxury vinyl planks, and dollhouse tile. See below for a breakdown of each type of flooring and how I installed it in my custom dollhouse.
DIY Dollhouse Flooring: Carpet
I was lucky enough to have some carpet scraps from the last time we recarpeted our house. I cut it to size using an exacto knife and glued it in using liquid nails. If you don’t have scraps on hand, ask around! I’m sure you wouldn’t have to look too far to find some. Or you could look in an online classified group for carpet remnants.

DIY Dollhouse Flooring: Peel-and-Stick Luxury Vinyl Planks
I had some leftover peel-and-stick LVP from another project, which was really lucky. But if you don’t have any LVP laying around, you could find a store that sells flooring by the square foot. I’m sure you could find some really affordable options!
To install my LVP in the dollhouse, I cut it to size using an exacto knife, and I added liquid nails in addition to the adhesive on the planks to increase the durability.

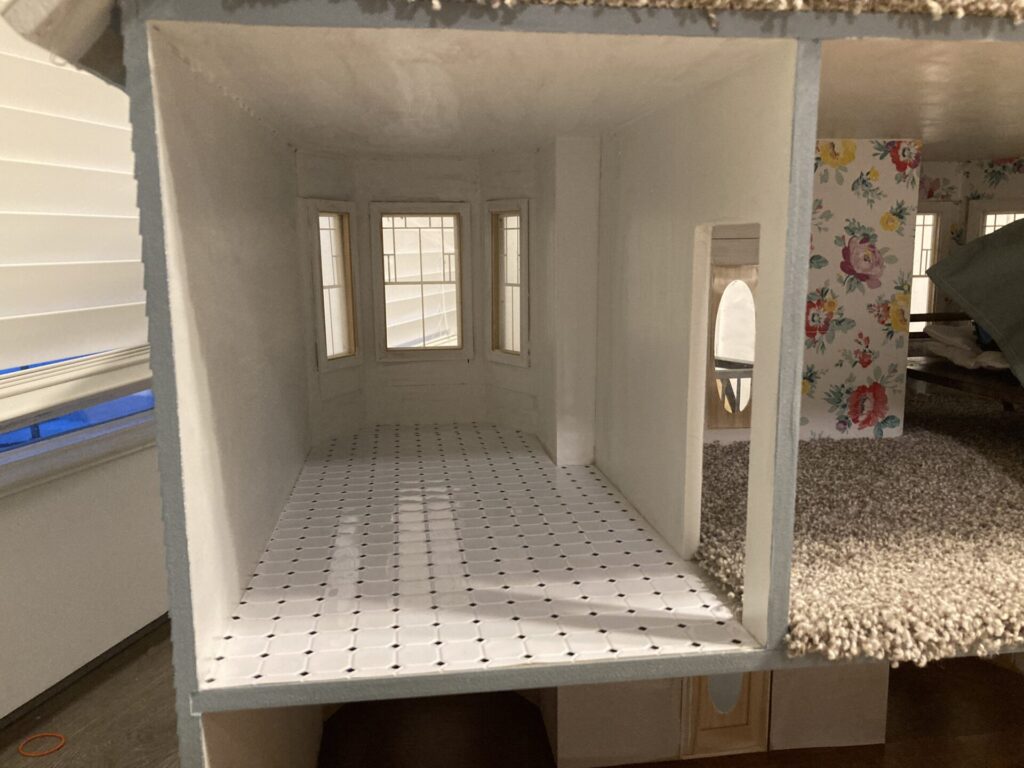
DIY Dollhouse Flooring: Tile
This sheet of dollhouse tiling was really affordable and I love the way it looks! It was perfect for the bathroom. To install it, I cut it to size and added liquid nails.
I think this could also look really cute in a kitchen too!
Other DIY Barbie Doll House Flooring Ideas:
If these flooring styles don’t fit your style, here are some other ideas you could run with!
- Contact paper: Contact paper is a self-adhesive material that comes in a variety of patterns, colors, and textures. Look for contact paper designs that resemble wood, tile, or other flooring materials. Measure and cut the contact paper to fit the floor area of each room, and carefully apply it to create a smooth and realistic look.
- Printed Paper or Cardstock: Printed paper or cardstock can be used to create a realistic flooring effect. Look for designs that resemble wood, tile, or other types of flooring. You can find printable dollhouse flooring patterns online or design your own. Glue the paper or cardstock to the dollhouse floor and seal it with a clear varnish for durability.
- Vinyl Tile or Sheet: Vinyl flooring offers a wide range of designs and patterns that can be suitable for dollhouses. Look for self-adhesive vinyl tiles or sheets that can be easily cut to size and applied to the dollhouse floor. Vinyl flooring is often water-resistant, which can be beneficial in case of any spills during play.
- Painted Floors: If you enjoy painting, you can paint the floors of your dollhouse to resemble various flooring types. Use acrylic or enamel paints to create patterns like tiles, parquet, or even decorative designs. Seal the painted floors with a clear varnish to protect the finish.
DIY Barbie Dollhouse Wallpaper
I was looking at the wallpaper selection at Walmart and I just couldn’t convince myself to spend $40+ on wallpaper that I was only going to use a very small portion of. So I headed to the contact paper section and found exactly what I wanted for my DIY Dollhouse Wallpaper!
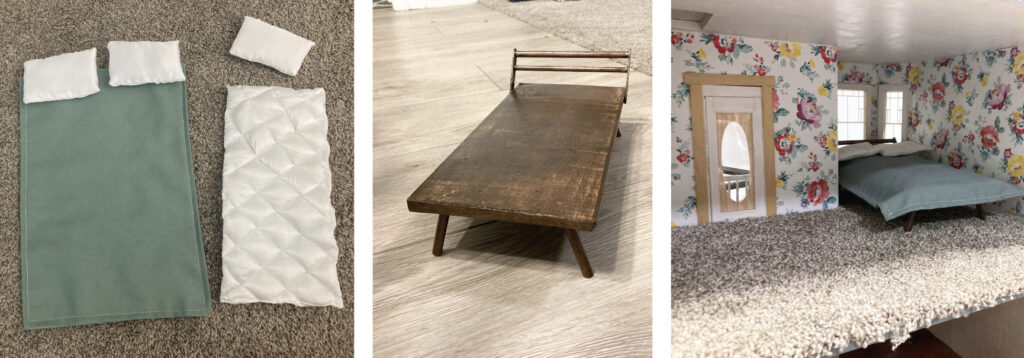
My daughter picked out this adorable Pioneer Woman floral contact paper. It was only $6, and was really easy to cut and install. We used it in the main bedroom of the dollhouse. Since the contact paper is just peel and stick, I just stuck it on. I’m not sure how durable the adhesive is, so I’ll report back! It might be good to paint a thin layer of glue under it.

Other DIY Dollhouse Wallpaper Ideas
If you aren’t a fan of using contact paper for DIY Dollhouse wallpaper, here are some other fun and affordable ideas you could try out!
- Scrapbook Paper: Scrapbook paper comes in a wide variety of patterns and designs, making it an excellent option for dollhouse wallpaper. Look for patterns that resemble real wallpaper or choose designs that match your dollhouse’s style and theme.
- Gift Wrap: Gift wrap paper can be repurposed as wallpaper for your dollhouse. Many gift wraps feature beautiful patterns and prints that can add charm and character to your miniature rooms.
- Fabric: Thin fabric, such as cotton or silk, can be used as wallpaper in your dollhouse. Simply cut the fabric to fit the walls of your rooms, apply adhesive, and carefully smooth it out. This option allows for more texture and a unique look.
- Printable Wallpaper: Search online for printable dollhouse wallpaper. Many websites offer free or affordable printable wallpaper designs that can be scaled down to fit your dollhouse. Print the designs on quality paper or cardstock and carefully apply them to the walls.
- Paint or Draw: If you’re artistically inclined, consider painting or drawing your own wallpaper designs directly onto the dollhouse walls. Use fine brushes, watercolors, or acrylic paints to create intricate patterns, motifs, or even scenes.
- Washi Tape: Washi tape is a versatile decorative tape that comes in various colors and patterns. It can be easily applied and removed without damaging the dollhouse walls. Use different washi tape designs to create a patchwork or striped wallpaper effect.
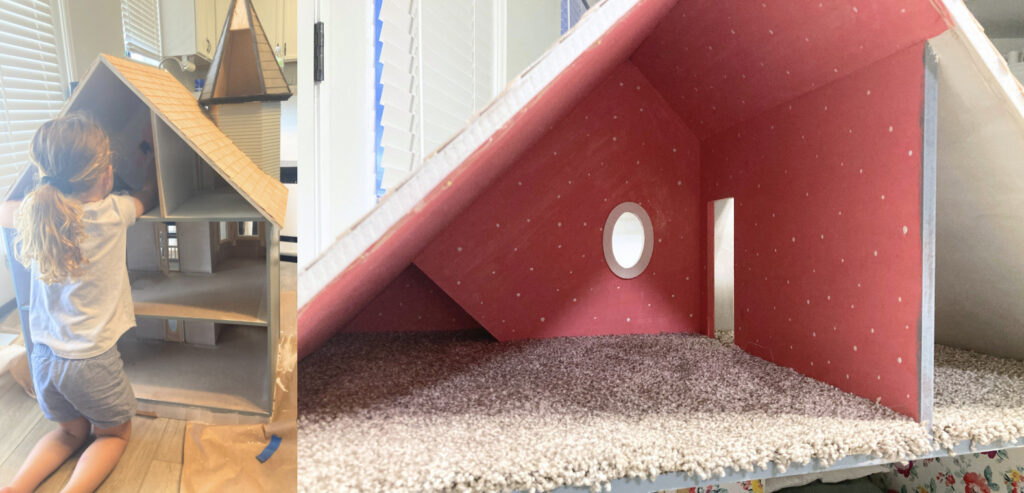
My daughter really wanted a “Pinkalicious room”. So I let her pick out some pink paint, and paint one of the rooms. I added some white dots later for a little fun touch.
DIY Dollhouse Rug
DIY Dollhouse rugs are a fun way to really warm up the space and add a little more of a design element. There are a lot of ways to go about making a DIY Dollhouse rug.
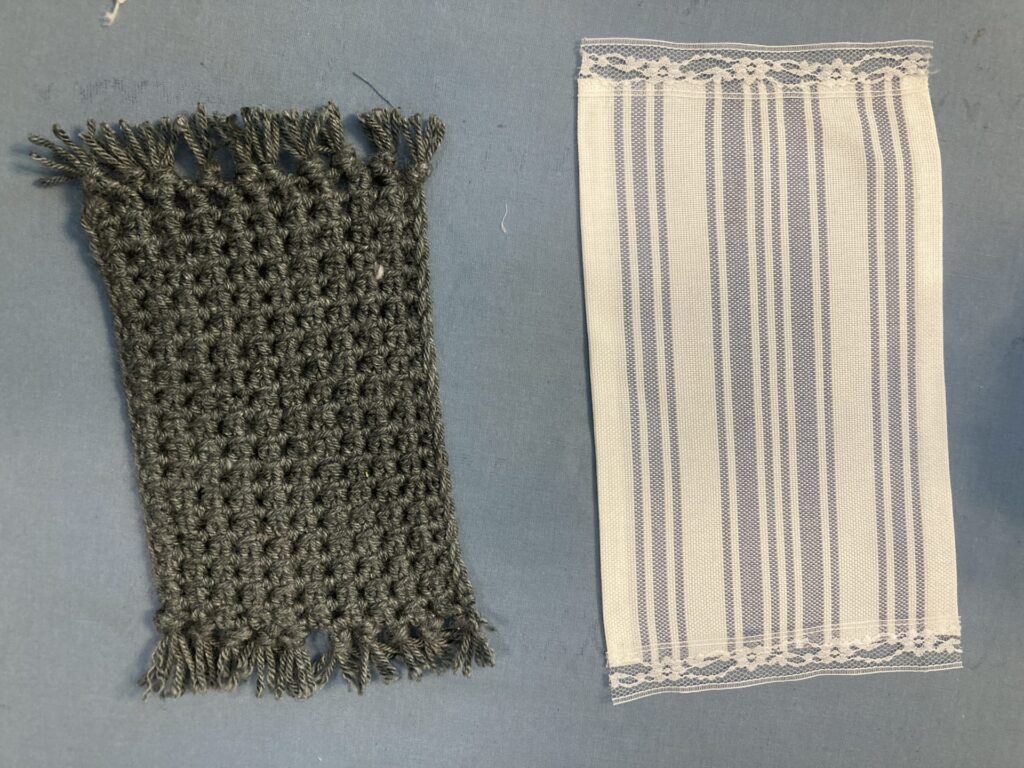
I did two different styles. One crocheted and one that is just fabric with a little trim.
I used this video to make the crocheted rug.
And for the other one, I just used bonding tape on the sides to give a clean edge. And bonding tape to adhere the trim on the ends.
Here are a few other ideas to make your own DIY Dollhouse Rug:
- Fabric Samples: Look for small fabric samples or remnants in patterns or textures that resemble rugs. Cut the fabric to the desired rug shape and size, and add a backing using adhesive or by sewing another piece of fabric to it. This will give the rug stability and prevent fraying.
- Embroidery: If you enjoy embroidery or needlework, create intricate miniature rugs using embroidery techniques. Use fine threads and small embroidery hoops to stitch detailed patterns onto fabric or felt. You can even incorporate different stitches and textures to mimic the look of a real rug.
- Yarn or Thread Crochet: Crocheting miniature rugs with thin yarn or thread can be a delightful project. Choose a crochet hook appropriate for the thickness of your yarn or thread and experiment with different stitches to create texture. You can make round, rectangular, or oval rugs, and even add decorative fringe or tassels.
- Braided or Woven Miniature Rugs: For a rustic or bohemian look, consider making braided or woven miniature rugs. Cut thin strips of fabric or yarn in complementary colors and braid them together to form a rug. Alternatively, you can weave the strips together using a small loom or a DIY cardboard loom.
- Printed Paper Rugs: Print out or design miniature rug patterns on paper or cardstock. You can find printable rug designs online or create your own using graphic design software. Cut out the patterns and adhere them to a sturdier backing, such as cardboard or foam board, for stability.
DIY Dollhouse Bed – Wooden Dollhouse Furniture
Did you know the dollar store has wood?? I didn’t until this project!
It isn’t the highest quality of wood, as you can imagine. But for a dollhouse bed, it worked perfectly and fit right into the budget!
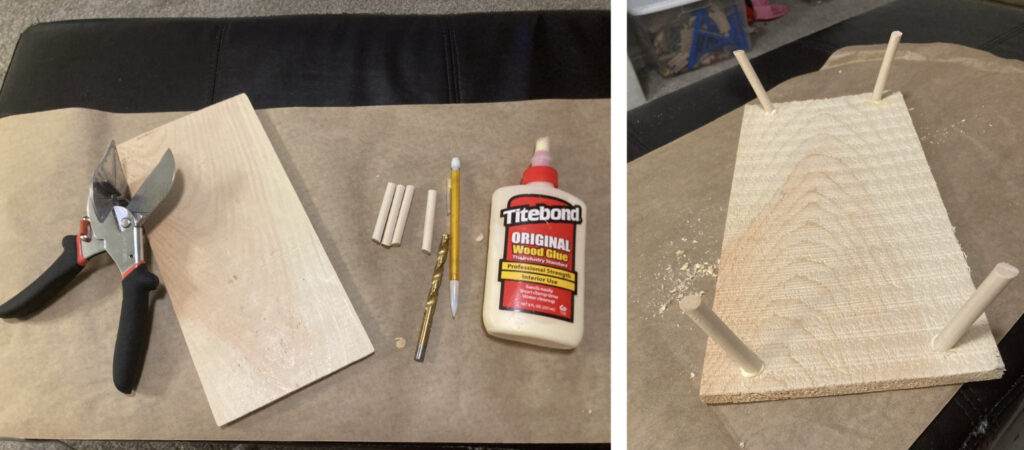
To make this bed, I just used the wood from the dollar store and a wooden dowel from Walmart.
I cut my dowels at an angel with my miter shears. drilled holes in each corner and glued them in.
For the headboard, I used a dowel and mini popsicle sticks for the sides. Then I stained and sealed it.
I used some scrap fabric I had laying around to make a little mattress, pillows, and bedspread.
I am so happy with how it turned out! I love the look of wooden dollhouse furniture.
If only my 4-year-old was as excited to make her own bed as she has been with this one…
DIY Mini Dollhouse Furniture: Couches
I knew I wanted to make DIY a Dollhouse couch. I wasn’t about to bite the bullet for a couch that will only be used by dolls… So I spent $1.50 on floral foam, 75¢ on a dowel, and some scrap fabric!
I’m so excited about how it turned out. Follow these steps (pictures below) to make your own DIY Dollhouse Couch:
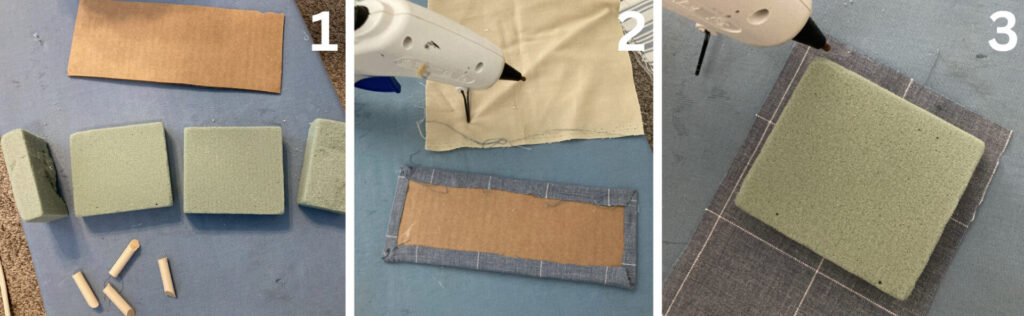
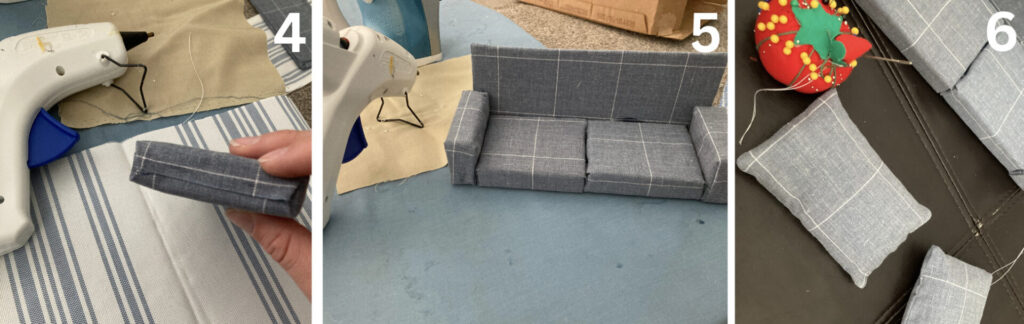
Step 1: Organize and prepare your supplies.
Used these foam floral blocks from the dollar store for my couch cushions. I cut one in half for the two main cushions. Then I cut another one in fourths for the two armrests. I used a piece of cardboard for the back and a small dowel cut with my miter shears for the legs (see this post for everything you need to know about using miter shears).
Step 2: Attach the fabric to the cardboard piece.
Use a hot glue gun to glue your fabric around your cardboard.
Step 3 & 4: Attach Fabric to Cushions
Use a hot glue gun to glue your fabric around the four cushions. This part can get a little tricky. But it’s basically like wrapping a present. Just try to keep all the seams and glued spots toward the back so you can hide it when you glue it all together.
Step 5: Glue it all together
Glue the five pieces together. Be a little liberal with the glue, you don’t want it falling apart!
Step 6: Sew pillow cushions
Sew two pillows to be the back cushions.
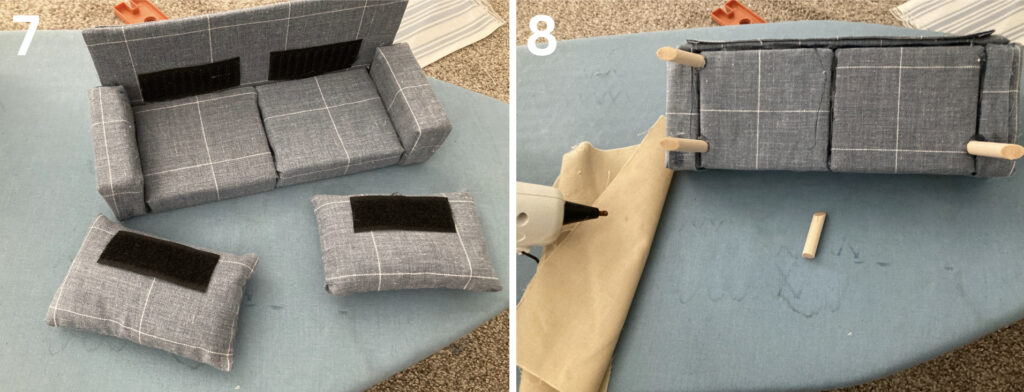
Step 7: Add Velcro
Add velcro to attach the cushions. You could always skip this step. But I didn’t want the little pillow cushions to get lost.
Step 8: Attach legs
In retrospect, I think I would have added a wood base to the couch to attach the legs to. But this method seemed to work just fine! After cutting the legs on an angle with my miter shears, I used hot glue to attach them to the bottom of the couch.
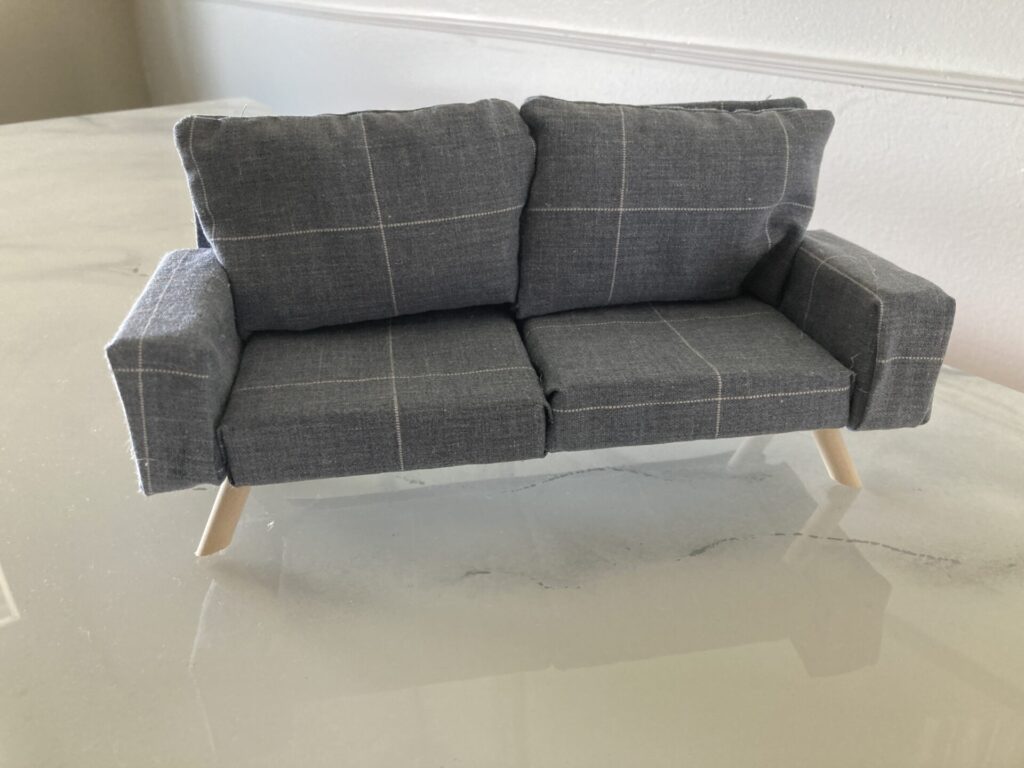
And voila! You have an adorable Midcentury Modern couch for your DIY Barbie Doll House.
Dollhouse Christmas Lights
Adding Christmas lights to this DIY Barbie Doll House was probably my favorite part. Dollhouse Christmas lights are so magical! My inner child was squealing as I installed these.
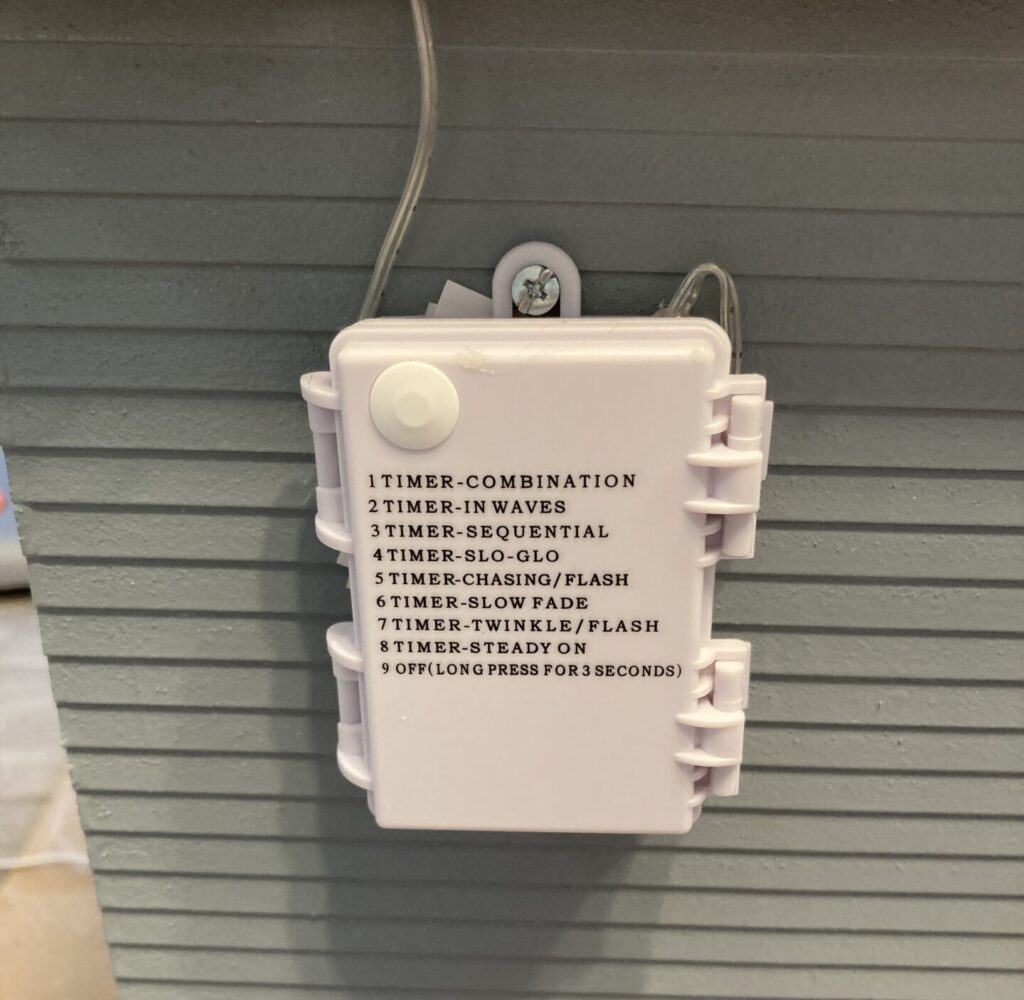
I bought these battery-powered twinkle lights. They were the perfect length to cover the front and back of my dollhouse. But depending on your dollhouse size, you may need a different length.
I attached them along the roof line using hot glue every 3-4 inches.

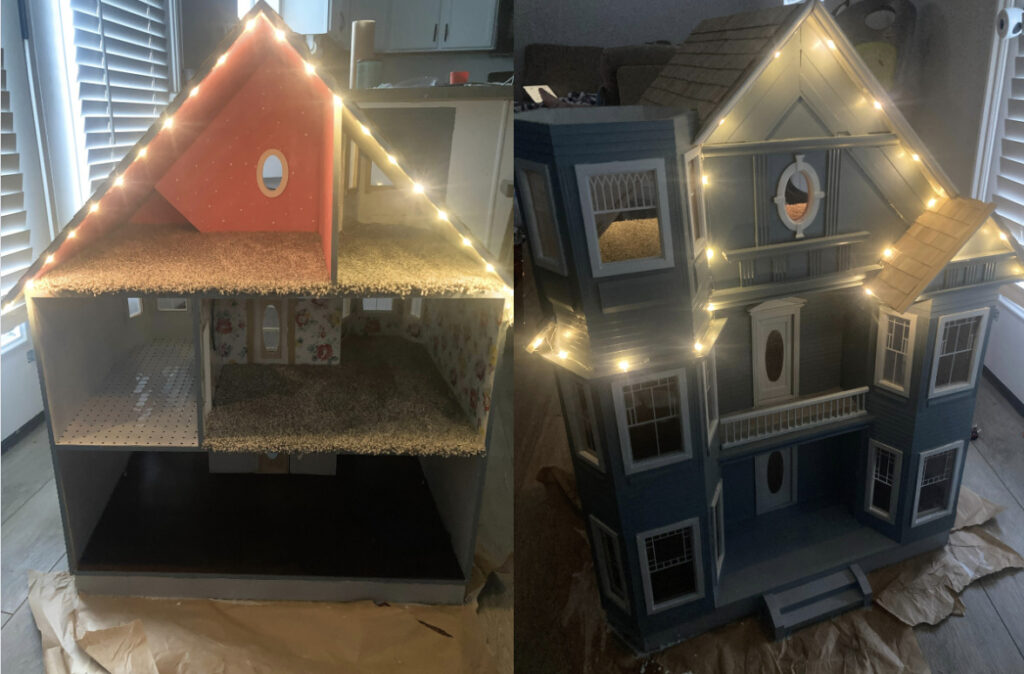
Doesn’t it just look so cozy??
The lights have this little battery pack that I just screwed to the side of the house. So it is easy for my kids to turn them on and off. They love it! And so do I!
How to Paint a Dollhouse
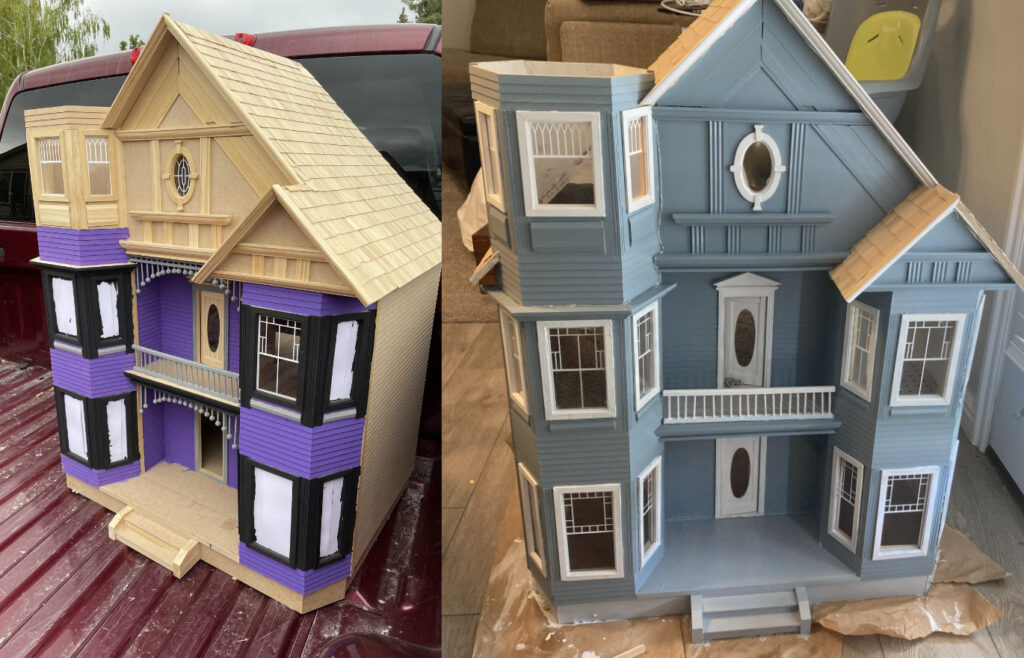
I wasn’t a fan of the paint colors the previous owner had started on the exterior. So I did a little reset with some primer. Then I used French Colony Blue from Behr Paint and used basic white on all the trim. Painting the trim was a little tedious. I just used a small paintbrush. But it was totally worth it!
Here’s a general step-by-step guide on how to paint a dollhouse:
- Prepare the Dollhouse: Remove any furniture or fixtures from the dollhouse and clean the surfaces you plan to paint. Use a mild soap and water solution to remove any dirt or dust. Allow the dollhouse to dry completely before proceeding.
- Choose Paint Colors: Decide on the colors you want to use for the exterior and interior of the dollhouse. Consider the style, theme, and overall look you want to achieve. Acrylic or latex paints are commonly used for dollhouse painting due to their fast drying time and ease of use. You can find a wide range of miniature paint colors at craft stores or mix your own using acrylic paints.
- Prime the Surfaces: If you’re painting over bare wood or unfinished surfaces, applying a primer can help create an even base and improve paint adhesion. I used Zinsser Primer for my dollhouse.
- Start with the Exterior: Begin painting the exterior of the dollhouse. Apply the paint evenly, using thin coats and allowing each coat to dry before adding another layer. Consider using different colors for different parts of the exterior, such as walls, trim, doors, and windows, to add depth and visual interest.
- Paint the Interior: Once the exterior is complete, move on to painting the interior. Determine which areas you want to paint, such as walls, ceilings, and floors. Don’t waste time painting areas you are going to cover with flooring or wallpaper. Again, use thin coats of paint, allowing each coat to dry before applying the next.
- Add Details and Accents: After the base coats have dried, you can add additional details and accents. This may include painting trim, doors, windows, or decorative elements. Use smaller brushes for precise work and take your time to achieve neat and clean lines.
- Seal the Paint (optional): If you want to protect the painted surfaces and give them a glossy finish, you can apply a clear varnish or sealer suitable for miniature projects. This step is optional but can provide added durability, which can be helpful if your kids play as rough as mine.
DIY Custom Dollhouse Decor
I hope this Ultimate Guide to a DIY Barbie Doll House has helped you in your dollhouse journey! It is so much fun to furnish and decorate a mini house.
What are you putting in your dollhouse? I’d love to hear about it in the comments below!
Pin “The Ultimate Guide to a DIY Barbie Doll House” to Pinterest