This post may contain affiliate links. I try to make my posts as helpful as possible and have great products easy for you to access. The use of these links provides me a small commission at no cost to you. As an Amazon Associate, I earn from qualifying purchases.
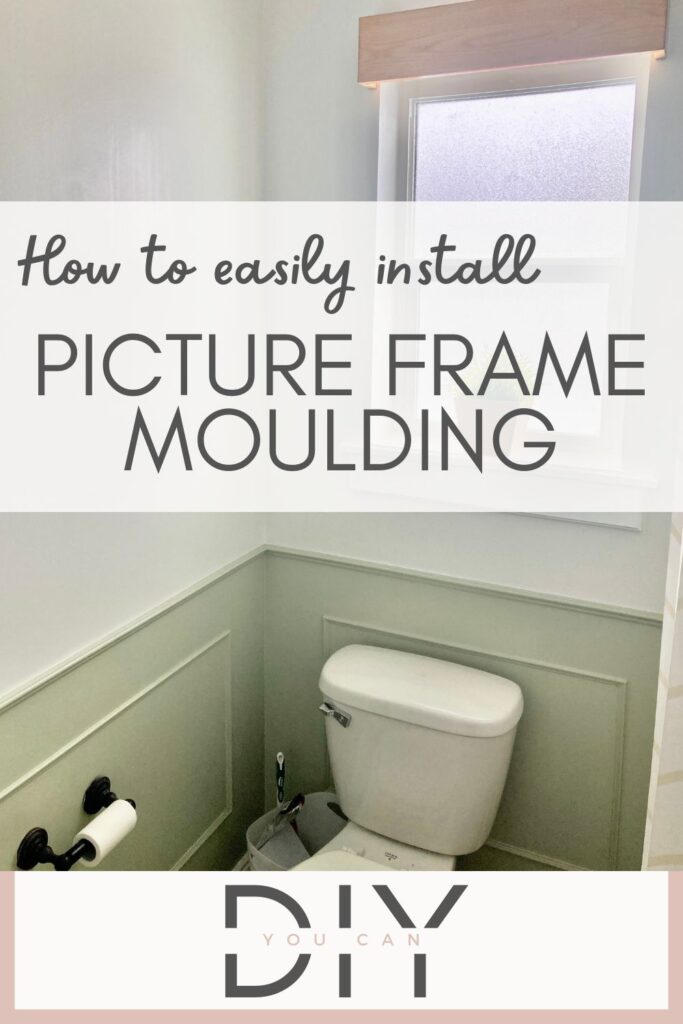
I was getting sick of my plain, yellow-tinged bathroom walls and had to do something about it. I have always loved the look of picture frame moulding (also known as box moulding), it is so classy and timeless. So I decided to give it a try, and it turns out it is quite simple to tackle!
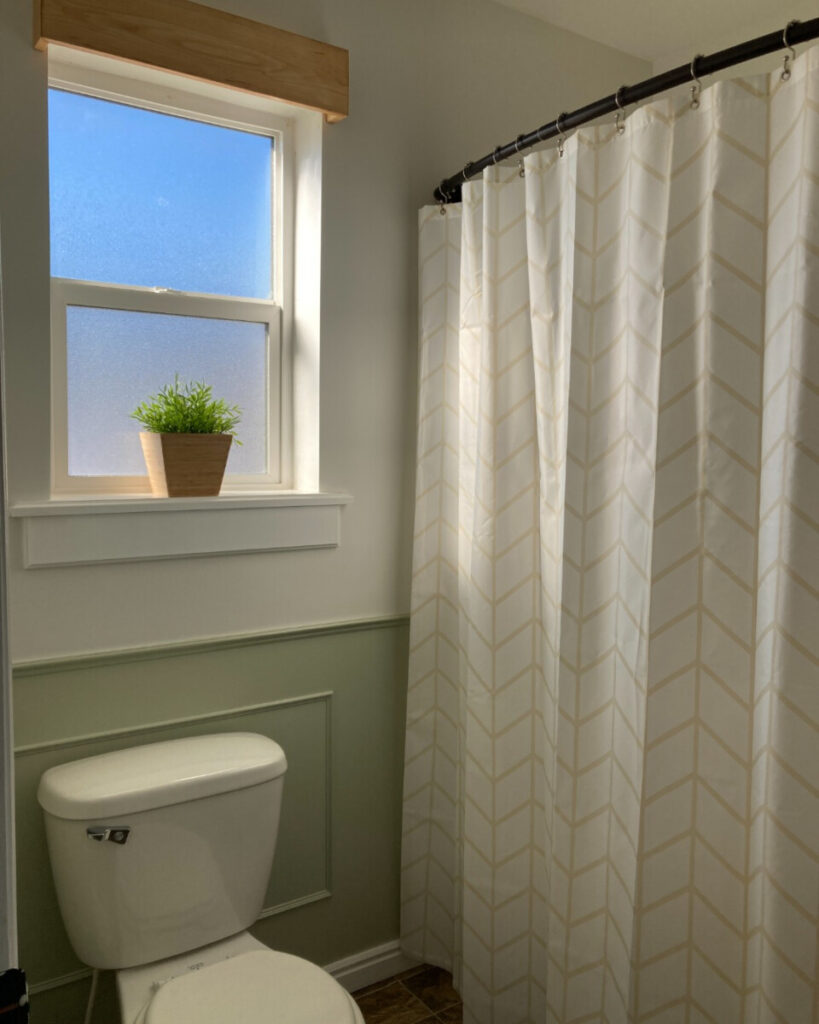
Here are some fun before and after pictures of my two bathrooms where I added diy frame moulding. It made such a difference! I also swapped out the cabinet for some DIY floating shelves. They are a quick and easy home improvement project, so make sure you check out that blog post as well!


What is Picture Frame Moulding?
Picture frame moulding is exactly what it sounds like. You use moulding/trim to create “frames” on your wall. You can cover an entire wall or a portion of your wall. In my case, I chose to do the lower third of my bathroom walls.
Tools I Used to Install my DIY Wall Moulding:
- Miter Saw (or Miter Shears more on this later!)
- Brad Nailer
- Measuring tape
- Level
- Caulk gun
Steps to Build DIY Picture Frame Moulding
Follow these simple 5 steps to make your own DIY wall moulding.
- Step 1: Buy Supplies
- Step 2: Chair Rail Moulding
- Step 3: Measure and Cut Moulding for Frames
- Step 4: Wood Fill and Caulk Picture Frame Moulding
- Step 5: Sand and Paint
Step 1: Buy Supplies
One of my biggest stressors in starting projects used to be navigating hardware stores. But don’t let this stop you. Yes, Home Depot and Lowes can be big and overwhelming, but soon you will fall in love with these places and not want to leave. Can anyone else relate? I literally ask my husband if we can go to Home Depot for date night now.
The two main sections in the store you’ll need to go for this project are the trim section (typically towards the back, near the wood) and the paint section where your caulk, wood filler, paint, and sandpaper will all be (typically towards the front).
Or another great option is to just shop online and do a curbside pick up or even delivery! But if I’m buying lumber I opt to go in myself, that way I can make sure I am getting the best quality on each piece and not warped/bowed lumber.
Here are the supplies I purchase for my DIY Wall Moulding
- Chair Rail Moulding (optional depending on your design)
- Trim/Moulding (this is the type I used, but there are a lot of options. Take some time to stroll through the Trim/moulding isle)
- 1-inch Brad Nails
- Wood Filler
- Caulk
- 220 Sanding Sponge
- Primer and Paint Color of Choice
Step 2: Chair Rail Moulding
Okay, now onto project mode – start with a quick wipe-down of your walls. Then start with chair rail moulding (if you’re doing frame moulding on the entire wall, you can skip this step depending on your design plan).
Chair rail moulding is typically set at chair height (hence the name). It is a horizontal piece of trim that is continuous throughout the room. This is totally a style preference, but I think it looks good with the picture frame moulding.
Measure from corner to corner and cut your trim 90-degree using my miter shears (see the notes below for more thoughts on miter shears) or a miter saw. I typically measure slightly long for these pieces, then adjust as I fit them. It’s easy to accidentally cut the corners too short, which isn’t a good look for this project.
Standard chair rail height is about 32–36 inches from the floor, but you can adjust based on ceiling height or furniture. Mark a level line around the room with a chalk line or laser level (this is the laser level I have, and I love it!).
Using a brad nailer, put each piece into place throughout the whole room. Alternate the direction of your brad nails to help the piece really grip to the wall.

Step 3: Measure and Cut Moulding for Frames
Once the chair rail moulding is up, it’s time to measure and cut your trim for the picture frame moulding.
If you’re not a fan of math (me raising my hand) this picture frame moulding calculator is a fantastic way to decide what size of frames you will want and how to perfectly space them out.
Using the measurements recommended by the frame moulding calculator (or your own math if you are cool like that), I cut each piece of moulding with my miter shears set to 90 degrees (again, check the side notes at the bottom of this post to learn more about miter shears).
Again, using your measurements from the frame moulding calculator, measure and add small pencil marks for each corner of each frame. But even with the pencil marks, I still used my level to insure precision when installing the frames.
I found it best to start with the top piece. Line both corners of your trim with your measurements. Use your level and add brad nails every 6 or so inches. Then add your side piece, again using a level, and if you have one a square. Brad nail it in.
When installing the third and fourth two of the four pieces I only put in one brad nail on the side next to an established trim. Once the fourth piece is up, there is a little mobility in the two pieces to get the corners to match perfectly. Then I go back and add in a few more brad nails to secure all the pieces completely.
Step 4: Wood Fill and Caulk Picture Frame Moulding
Once all the box trim is up, get your wood filler out. Rub the wood filler into each nail hole and where the corners of the trim meet. If you’re new to using wood filler, here is a great post on all the tips and tricks for using wood filler.
Next: caulk. The caulk goes along the lines between the trim and the wall, creating a seamless look. Caulk is not quite as forgiving as wood filler, it doesn’t sand down. I typically try to cut a fairly small hole in my caulk tubes to prevent using too much from coming out and making a big mess. Baby wipes are also a lifesaver to clean excess caulk as you go. And again, if you’re new to using caulk, check out this caulking 101 post.
Put a small bead in the crevasse along the seam, then gently run your finger along it, making sure the seam is sealed and especially making sure no extra caulk is chunking up anywhere.

Step 5: Sand and Paint
Give your caulk and wood filler adequate time to dry. Don’t sand the wood filler down until your caulk is dry, otherwise, you’ll end up with dust chunks forever dried in your caulk.
I like using a sanding sponge because it molds around the shape of the trim, but regular sandpaper works great too! Also, when sanding down wood filler, I make sure to do the closed-eye test. If I can feel any bumps when running my hands across with my eyes closed, I need to sand more. Make sure to check out The Ultimate Guide to Using Sandpaper for an in-depth guide on everything you need to know about using sandpaper and some great sanding hacks.
Do a quick wipe down of the dust from sanding and you’re ready to paint! I have two bathrooms in my house, in one I used a light sage green, and in the other I used a fun shade of blue. Or you can stick with a white or fun neutral! Go with what fits your style.


So there you have it! This DIY Wall Moulding is a fun weekend project that can easily be done in a weekend. And it has such an impact on the room for a pretty decent price! These are my favorite types of projects. I hope you found this post helpful.
Happy Projecting!
Free Printables to Add to Your Newly Designed Bathroom
If you’re updating your bathroom like I did, make sure you check out my post on 12 Free Bathroom Decor Printables to add a fun, stylish, but affordable touch to your newly designed bathroom.
Bonus Side Notes
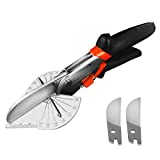
My secret weapon to this project was these miter shears, they are an extremely DIY-friendly tool (and if you have babies napping while you project, you don’t have to worry about the noise of a saw waking them up… WIN!). Check out this post on everything you need to know about using miter shears.
The thing I love the most about these miter shears is how much time I save. Rather than running back and forth between the garage/workshop and the room/project I’m working on. I just simply bring my trim in with me, measure, and cut. No dust, no running around. They are very sharp and cut through my trim like butter.
If you don’t have/want miter shears, this is the compact miter saw I love and use for almost every project. Just make sure your blade is sharp, or these little trim pieces will just get shredded. For more guidance on using a miter saw, make sure you check out the Ultimate Miter Saw Guide.
– Another side note –
You do not want to use construction adhesive when installing moulding on your walls, even if it seems unlikely, there may come a day when you or a future owner will want to remove the trim and the construction adhesive will ruin the sheetrock. So stick with just brad nails if possible.
This DIY wall moulding is a fantastic beginner project. It’s affordable and relatively simple to do! Have you added frame moulding to any rooms in your house? I’d love to hear about it! Leave any thoughts or questions in the comments!
Want to save or share this frame moulding wall treatment idea? Pin it on Pinterest!