This post may contain affiliate links. I try to make my posts as helpful as possible and have great products easy for you to access. The use of these links provides me a small commission at no cost to you. As an Amazon Associate, I earn from qualifying purchases.
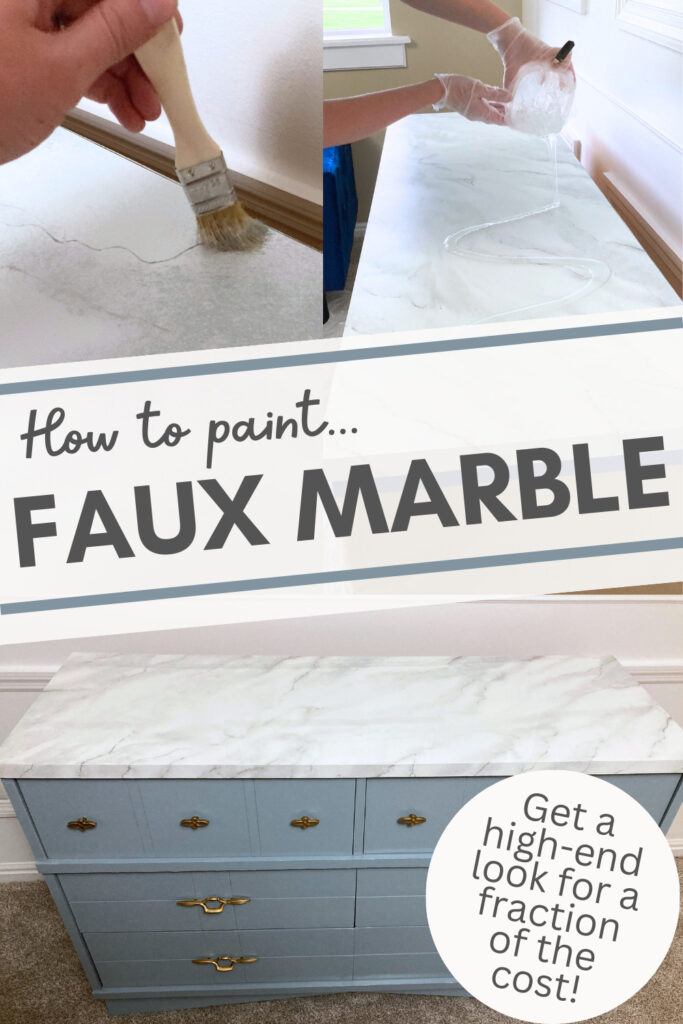
DIY Marble Counter
Are you in search of a wallet-friendly way to bring a luxurious ambiance to your living space? Enter faux marble, your new best friend in the world of DIY. In this blog post, we’ll cover what is Faux Marble, and all the tips you need to successfully paint your own faux marble epoxy counters.
In this Post You’ll Find:
What is Faux Marble?
Faux marble painting is a decorative painting technique used to imitate the appearance of real marble. It involves applying layers of paint and manipulating them to create the characteristic veining and texture found in natural marble. Faux marble can be applied to various surfaces, such as walls, furniture, and architectural elements, to achieve a luxurious and elegant look without the expense and maintenance associated with real marble.
Faux marble painting offers a versatile and cost-effective alternative to using real marble. It allows for greater control over the colors and patterns, providing the ability to match specific design schemes or replicate the appearance of specific marble varieties.
Steps to Make DIY Marble Counter
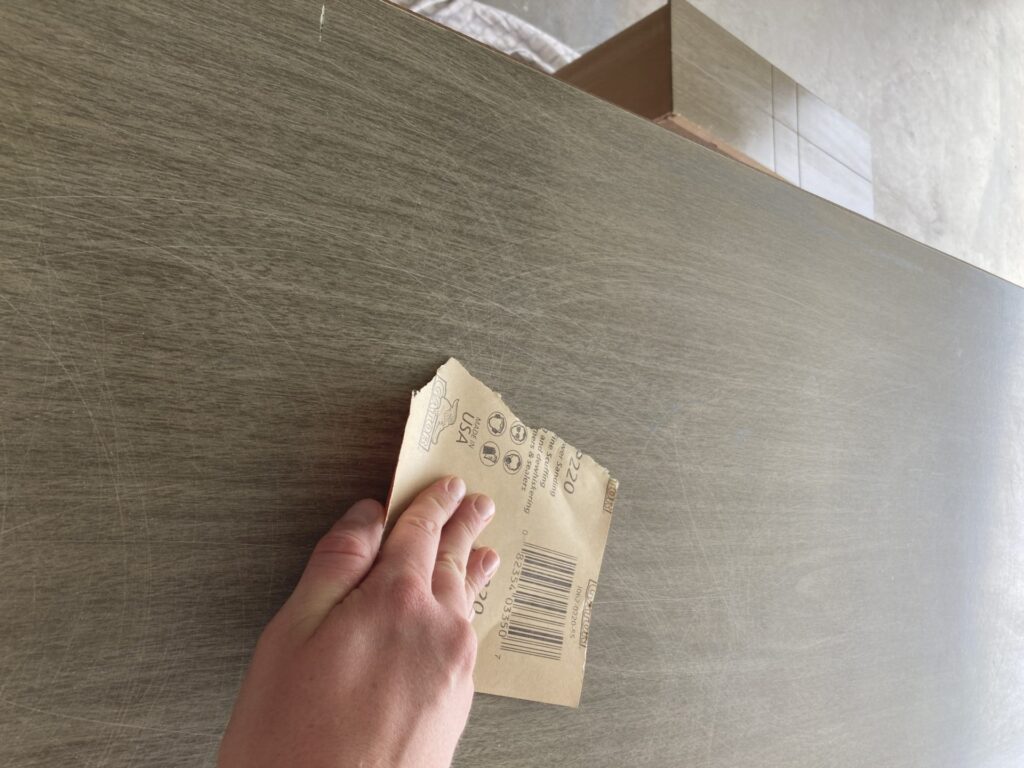
Step 1: Start with a smooth surface
- Get your surface as smooth as possible. Use wood filler or bondo to fill any dents or gaps in your surface.
- Once your filler is dry, sand and reapply filler if needed. The smoother your surface, the more realistic the faux marble will look.
- Depending on your surface, you may need to sand the entire surface to improve the adhesion of the primer.
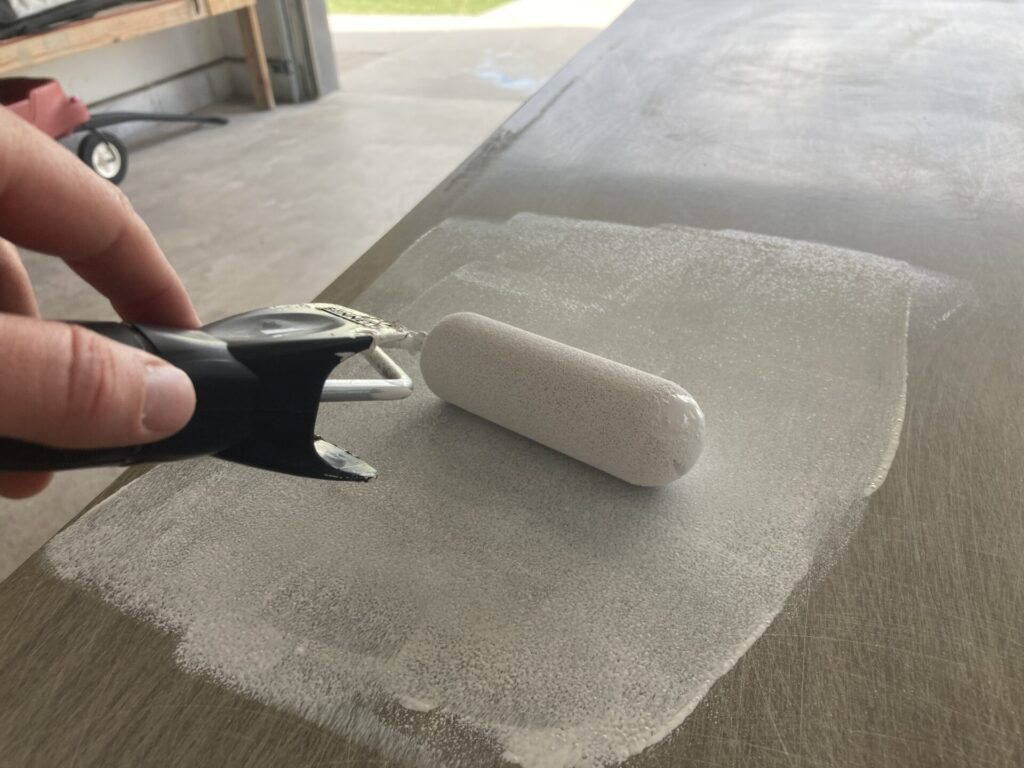
Step 2: Prime Your Surface
- Primer seals the surface and preps it for paint. I used Zinsser Primer for this project and it worked great!
- My surface was laminate, so this primer was especially helpful for getting my paint to adhere.
Step 3: Paint Your Surface
- There are a lot of different shades/colors of marble. I really like the white marble with grey veining. Depending on what look you want to go for, you can use other paint colors, but for this example, we will be using white.
- Lightly sand your primed surface and remove all the dust (I really like these tac cloths to remove dust from sanding). Then paint a coat of white paint, completely covering your surface.
- Once the first coat is dry, add a second coat if needed.

Step 4: Paint Faux Marble Veining
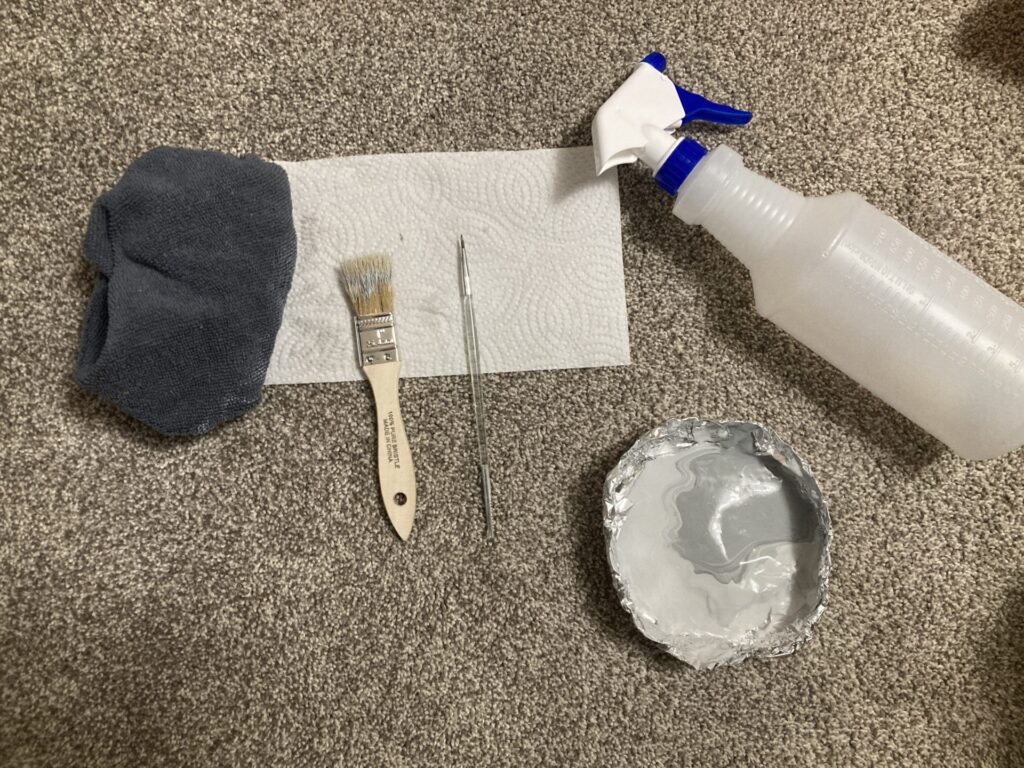
This step has 3 layers. You will need a spray bottle, a sponge and/or a bristle brush, and really light grey paint (I just added white to my grey paint to lighten it up).
Layer 1: Light Grey Cloudy Veins
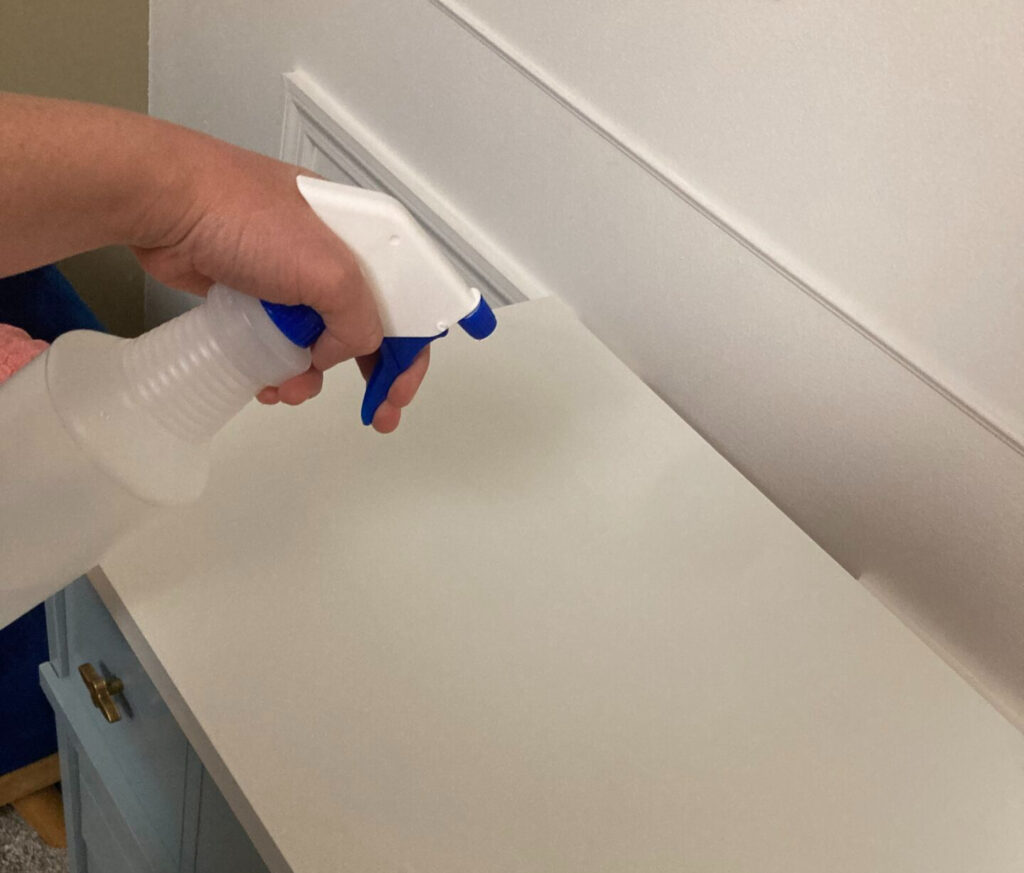
With a spray bottle, spray a light coat of water on the surface.
Take your light grey paint color and dab it on using a sponge, rag, or bristle brush.
Dab the paint in random veining patterns all over your surface. Take some time to look at real marble images to get an idea of marble veining patterns. Generally, the veins have a similar direction, so you can see in my picture the veins are random but in the same general direction.
Add more water as needed. Anytime my paint started to look unnatural, I added water and it helped a lot!
I used this bristle brush from Walmart, but I do not recommend it. The bristles kept shedding onto the surface, which was really annoying. I would get a slightly higher quality bristle brush or this sponge is a really great option too.
Layer 2: Paint Faux Marble Veins
For this layer, you will want a small paint brush, lint-free cloth, a bristle brush, a spray bottle, and slightly darker grey paint.
Lightly spray water again.
Then, somewhat following along the light great patterns you did in the last step, gently hold your paintbrush and drag and twist your paintbrush along your surface in random patterns.
After painting the initial vein, I would dab random spots with the cloth or brush. Giving Special attention to the spots that didn’t look as natural.
This step is very back and forth between all your tools. Some veins will need a lot of dabbing and water, and some will look great as it is. Just take your time, and if it looks terrible, just remember, you can always just paint over it or dab it off and redo it! Nature is imperfect and random, so make your veins imperfect and random.
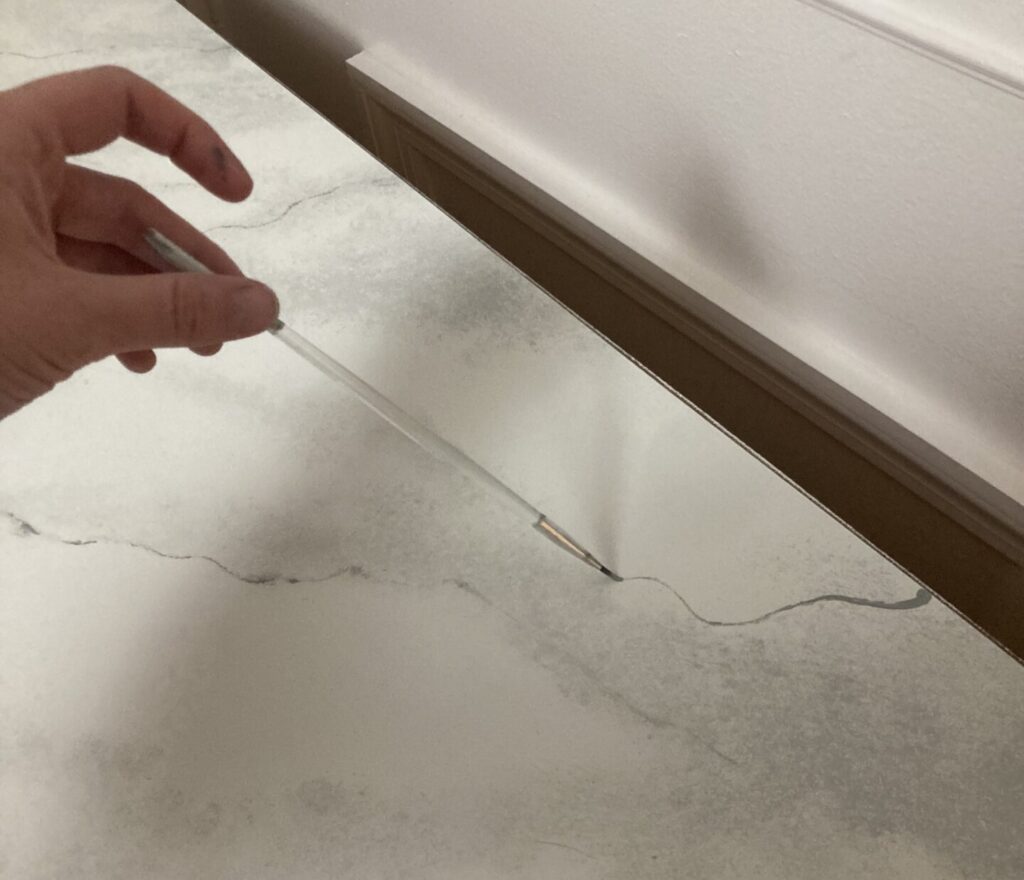
If it helps, find a picture of marble online that you like. You can use it as inspiration for the direction and amount of veins your paint.
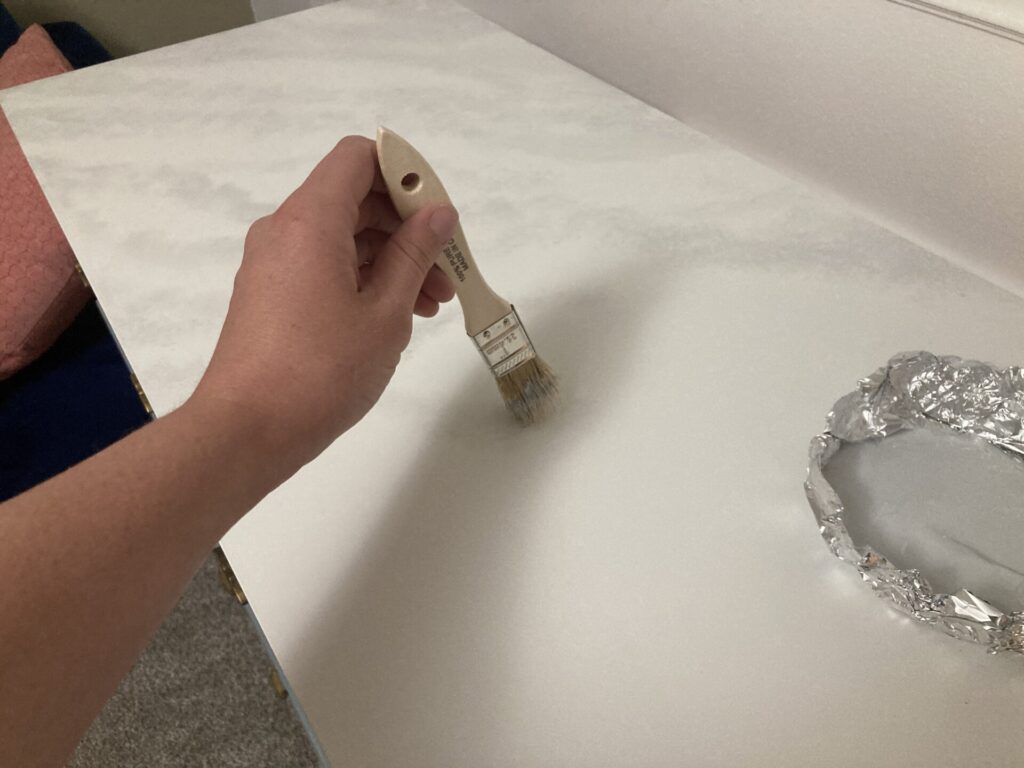
Layer 3: White Dabbing on Faux Marble
For the last step, use a sponge or brush to lightly dab white paint intermittently around your veining.
This step may be unnecessary. But it can really help to add a little depth and recover any spots that don’t look the way you want.
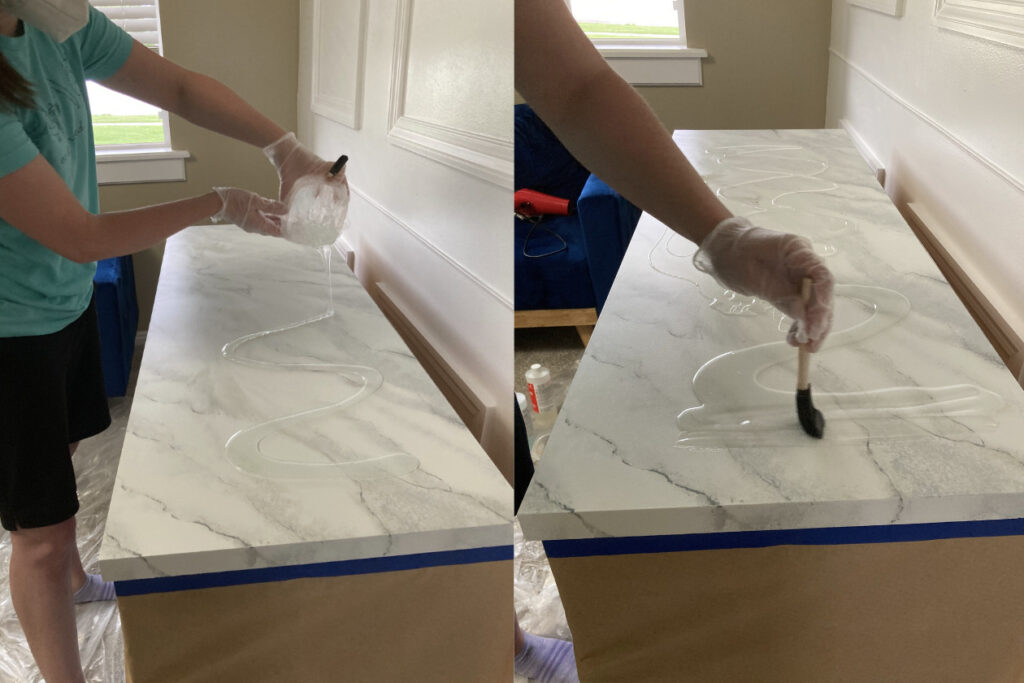
Step 5: Epoxy Pouring Countertops
For this step, you will need: Epoxy (hardener and resin), a heat gun (or blow dryer if you don’t have one), a mixing container, a stirring stick, and a brush.
I also used latex gloves to protect my hands and a face mask to protect me from the fumes.
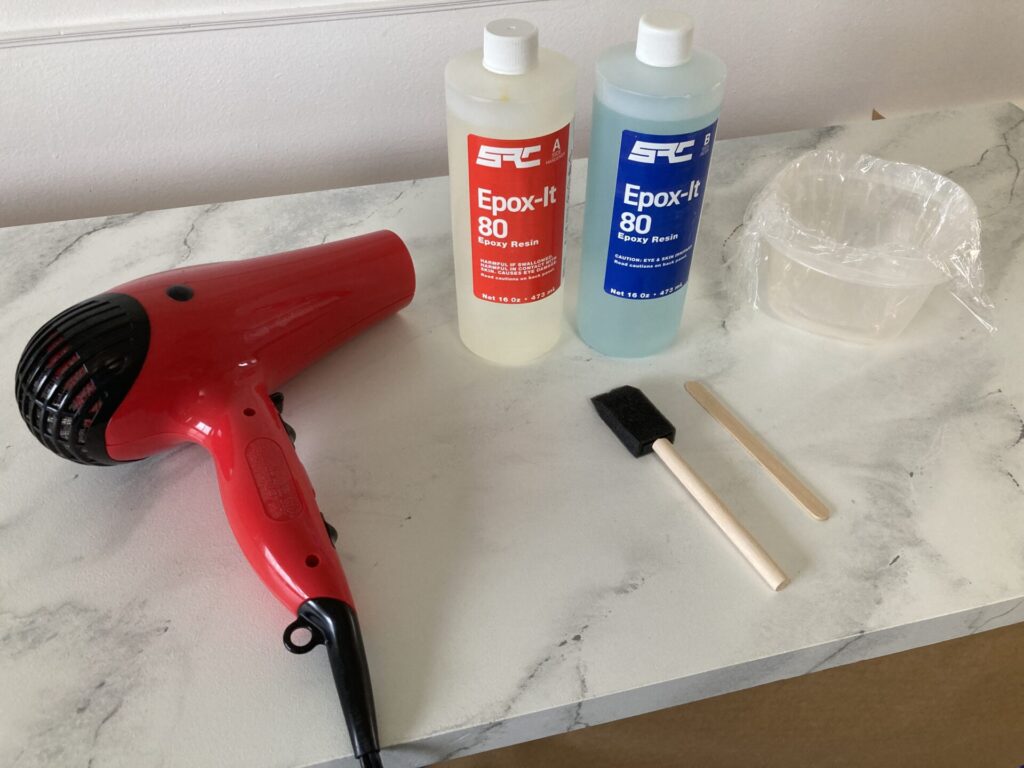
As you can see from my picture, I lined my Tupperware with plastic wrap in an attempt to make it easier to clean up. But don’t do this. It made it much harder to stir and I ended up making a mess of my Tupperware anyway!
Here are a few helpful tips to make sure your epoxy countertops are successful:
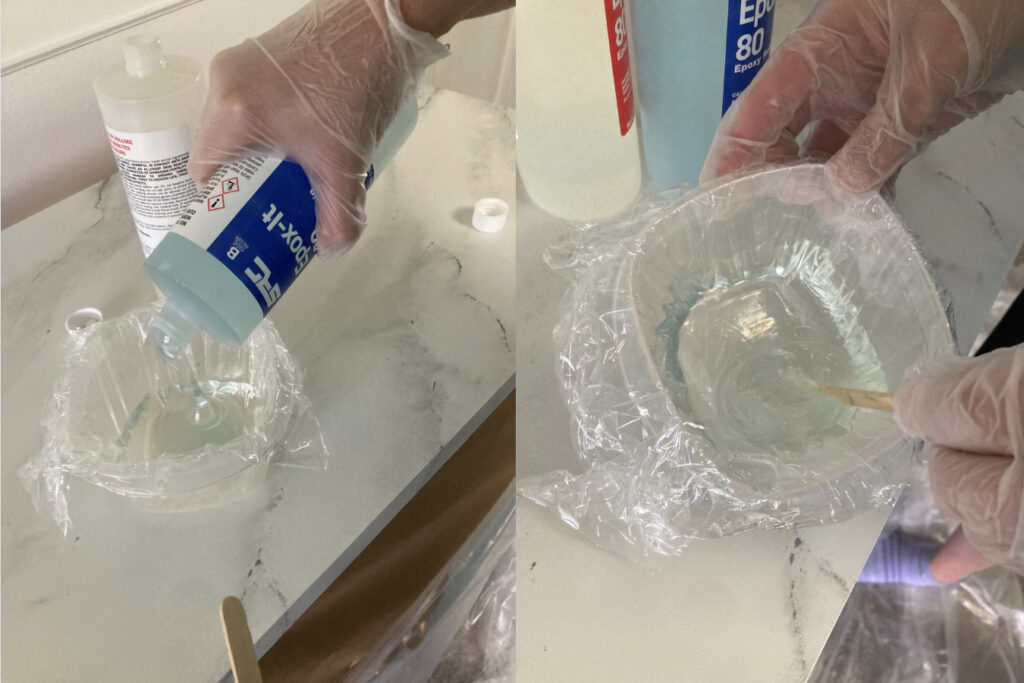
- Make sure you have exactly equal parts resin and hardener. 1:1 ratio. An epoxy mixing container will make this much easier to do.
- You need to mix the two parts together for at least 3-4 minutes. Failure to do this, or the previous tip can result in your epoxy failing to harden and you would just be left with a sticky mess.
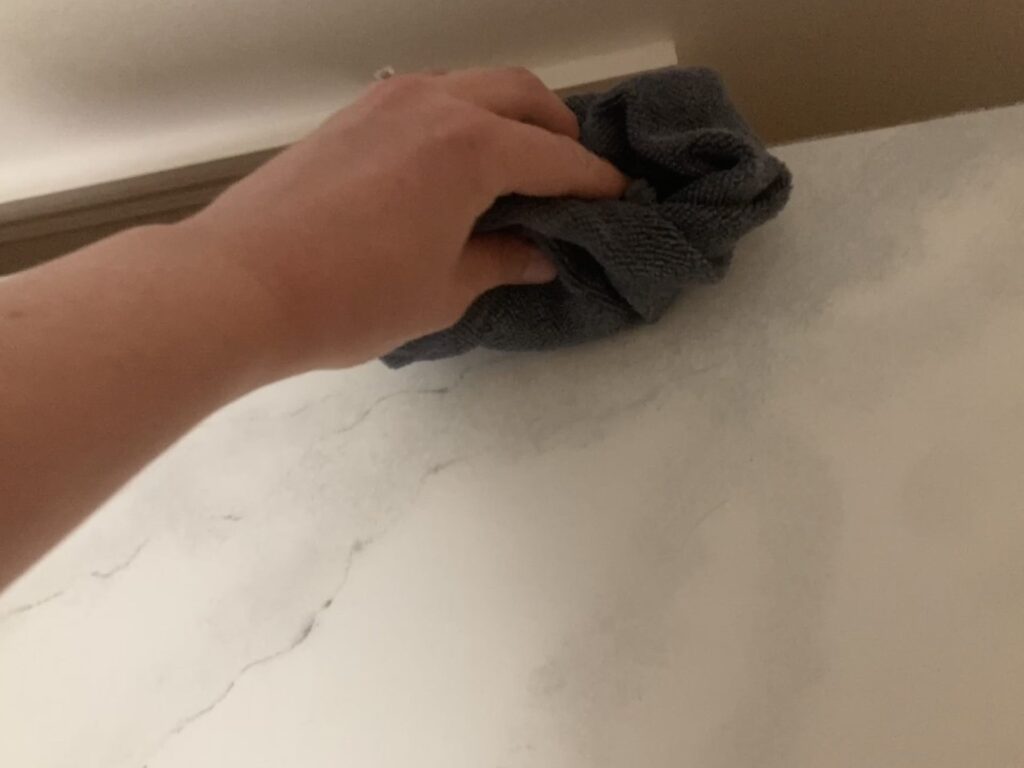
- Make sure your surface is completely clear of lint or dust. It will be stuck forever once your epoxy is poured.
- Don’t skimp on the amount of epoxy you use. You don’t want to be painting a thin layer. You want to pour and spread it thick. For the top of this dresser, I used a little more than half the bottle. There is also this helpful epoxy calculator for a little more help knowing how much epoxy you need.
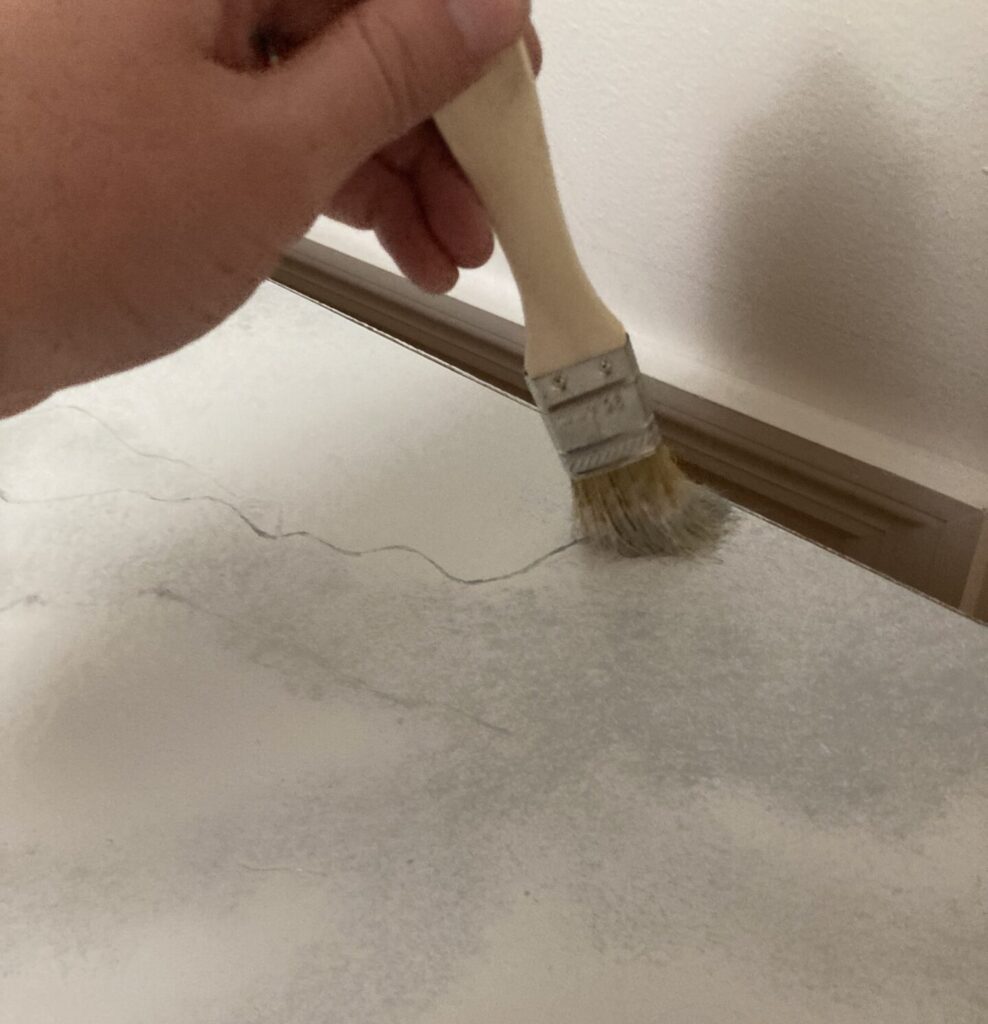
After mixing thoroughly, pour the epoxy all over the surface. Spread it out using a brush or popsicle stick. I only had this small brush on hand. And it worked fine, but I wish I would have had a wider one.
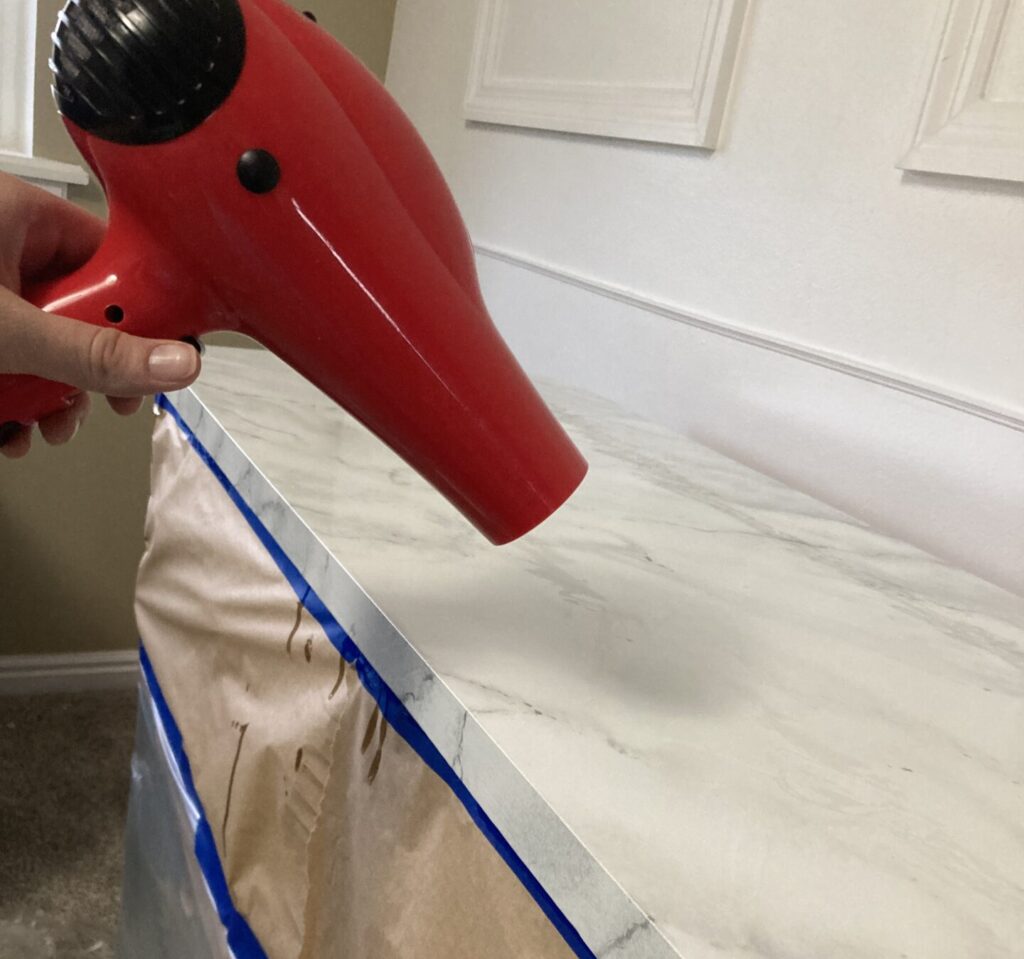
Step 6: Clean Drips and Pop Bubbles
Once I had my epoxy all spread out, I used my blow dryer (or you can use a heat gun) to pop any air bubbles coming through the surface.
I continued checking on the epoxy for about 45 minutes, popping bubbles as needed and checking for drips.
I just used a gloved finger to wipe off any drips along the edge.
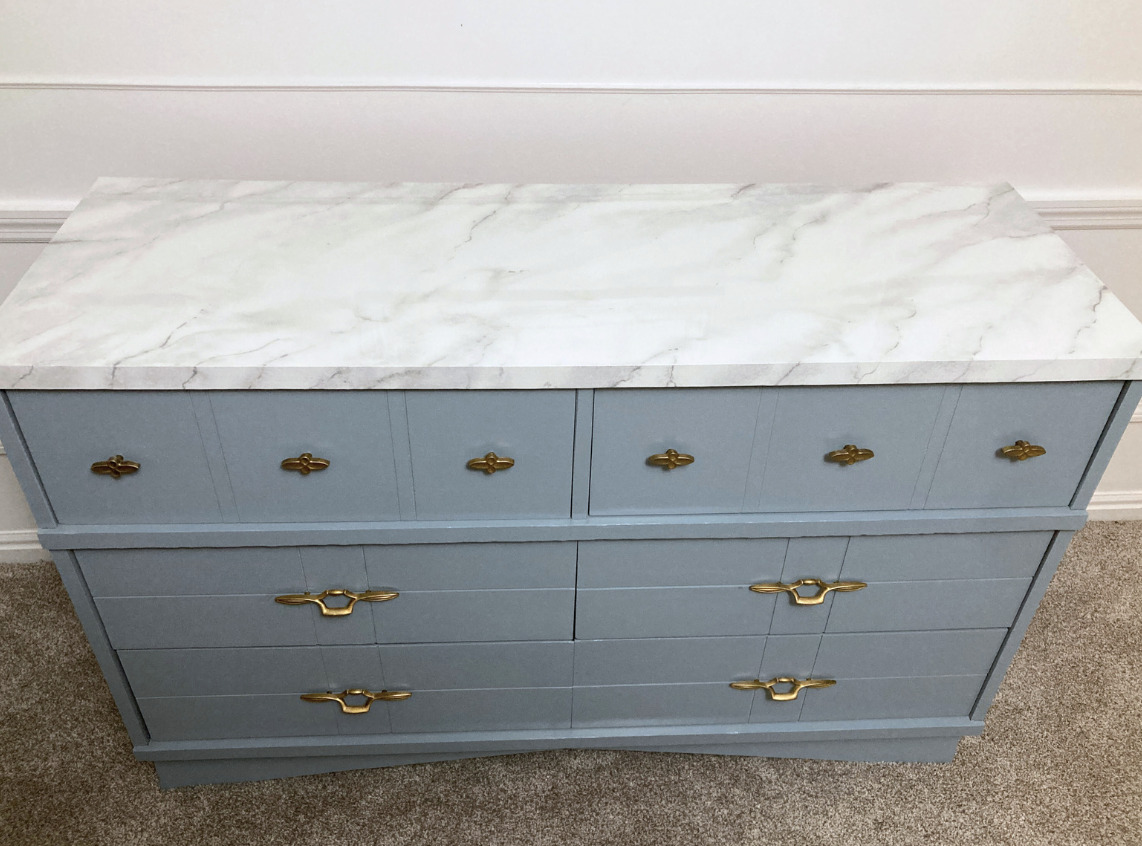
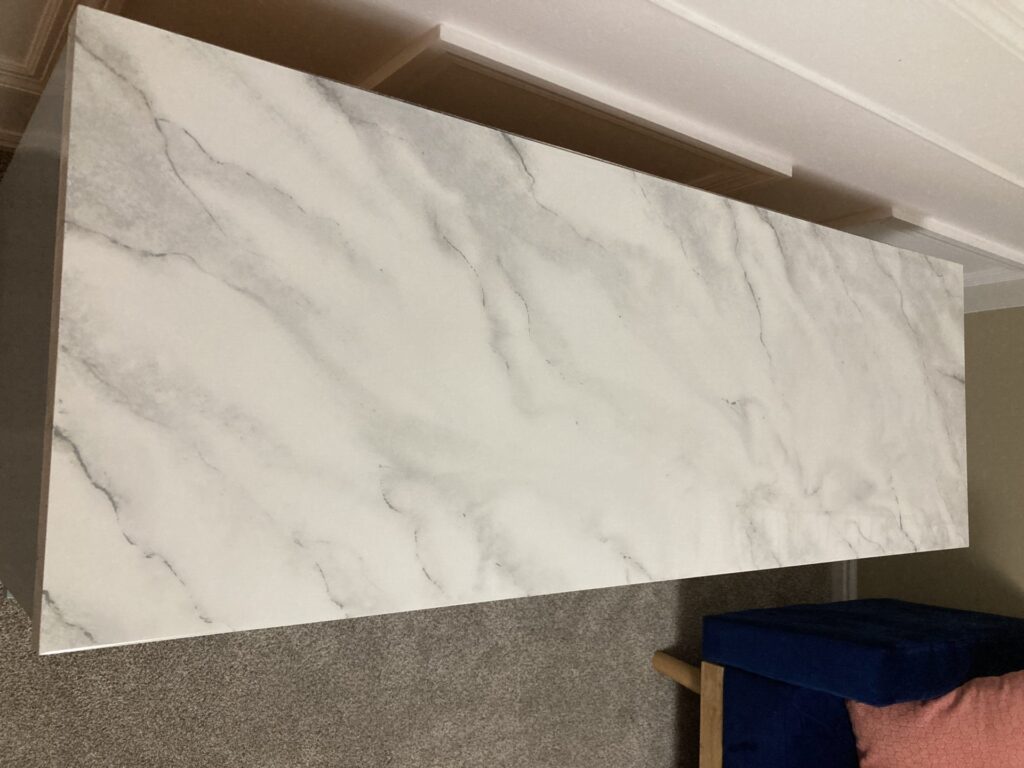
DIY Faux Marble Countertops
And there you have it! Get the high-end look of marble for a fraction of the cost!
I love the look and can’t wait to try it on other surfaces.
What Can I Put Faux Marble Countertops On?
For this specific example, I painted faux marble on the top of a laminate dresser (see my Ultimate Guide for Flipping Dressers for more). But with the same steps, you could paint faux marble on other materials such as MDF or wood. The world is your oyster when it comes to painting faux marble!
Here are some ideas for places you can do DIY Marble Painting
- Bathroom counters
- Kitchen Counters
- Backsplash
- Dressers
- Coffee Tables
- DIY Marble Counter
- Small side tables
- Coasters
- DIY Bookends
- Vases
- Picture frames
Where will you be painting your DIY Faux Marble? I would love to hear about it in the comments below!
Pin: Faux Marble Epoxy Countertops to Pinterest!