This post may contain affiliate links. I try to make my posts as helpful as possible and have great products easy for you to access. The use of these links provides me a small commission at no cost to you. As an Amazon Associate, I earn from qualifying purchases.
DIY Slumberpod Alternative
If you have ever tried to stay overnight away from home with a toddler or baby, you know the struggle of trying to get them to sleep! Especially if you are all in the same hotel room. The Slumberpod was invented to combat this issue, and it is brilliant! But, it just hasn’t been in the budget for me. So I came up with this DIY Slumberpod Alternative.
This DIY Slumberpod Dupe is an affordable way to get the perks of the Slumberpod, without taking a hit to your bank account. It just takes a little DIY and some brushing off of those Home Ec Class skills!
I hope this step-by-step guide is helpful if you have found yourself looking for toddler climbing out of crib solutions. Or if you are looking for a Slumberpod alternative!
Supplies Needed to Make Slumberpod Alternative
- 7 Yards stretchy (breathable) black fabric
- Jersey Sewing Machine Needle
- Tent poles
- Velcro
- Black sewing machine thread
- (2) 24″ Black Zippers
- Eyelets (and eyelet tool if needed)
- Black Belting Straps
- (3) 1/4″ Wooden Dowels
Make Your Own Slumberpod Dupe
Step-by-Step Guide to Make Your Own Baby Sleeping Tent
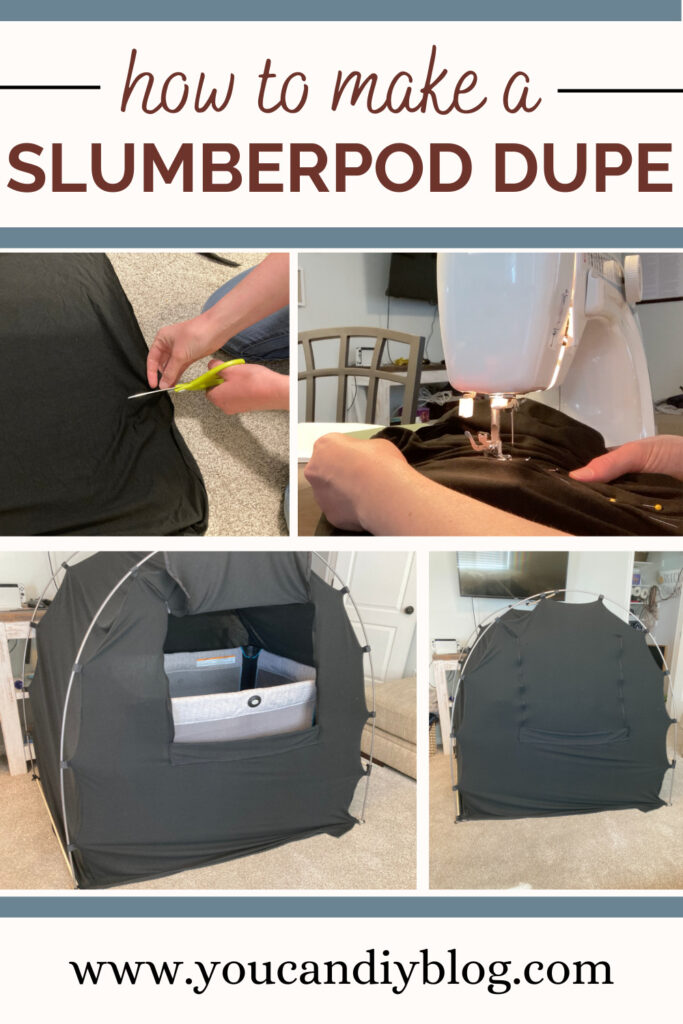
Step 1: Measure and cut your fabric
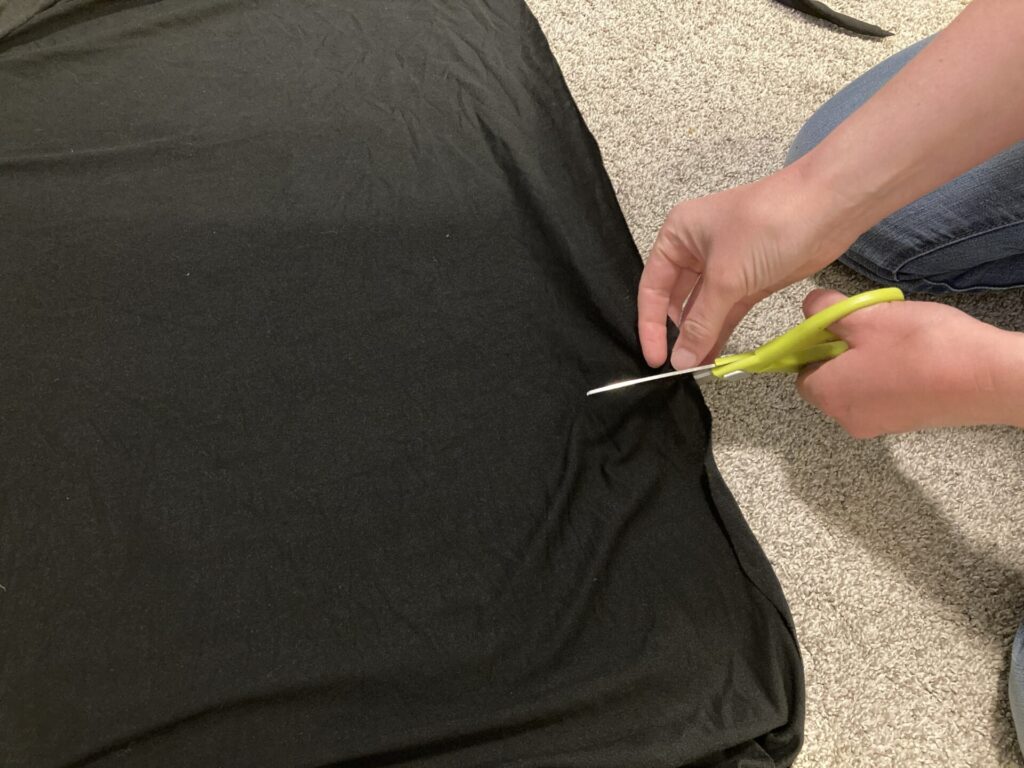
You will have three main pieces – two arched sides and one long rectangle.
For the arched sides start by measuring a 50″ x 56″ rectangle.
To create the arch, use a 25″ string. Fold your fabric in half (the string should be the width of the fabric folded in half.
Line up your string in the top folded corner. Pinch the other side of the string and rotate the string from that point. I made marks every 3-4 inches along the whole arch. Then cut along those marks. If you need more guidance on this step. Check out the youtube video above.
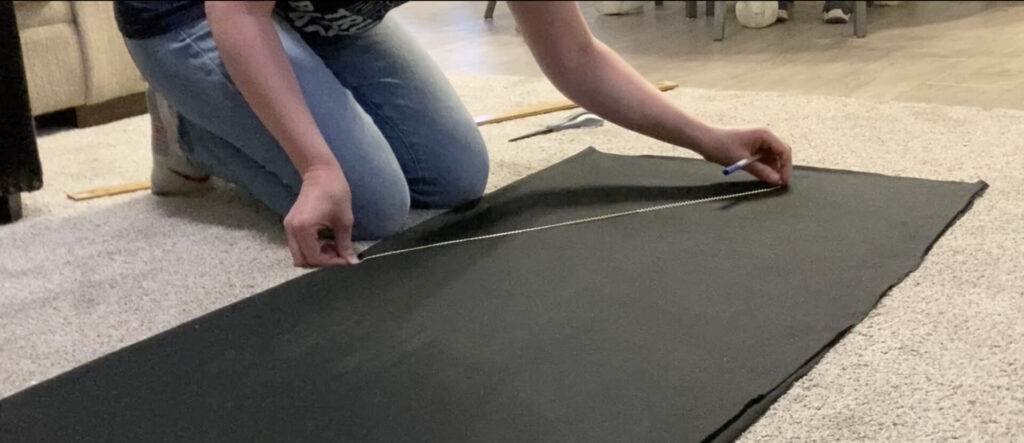
For your large rectangle piece – measure out 142″ x 36″. This is the piece that will go over the whole thing. It’s big, so make sure you’ve got space to spread out!
Step 2: Pin Three Main Pieces together – Add velcro straps
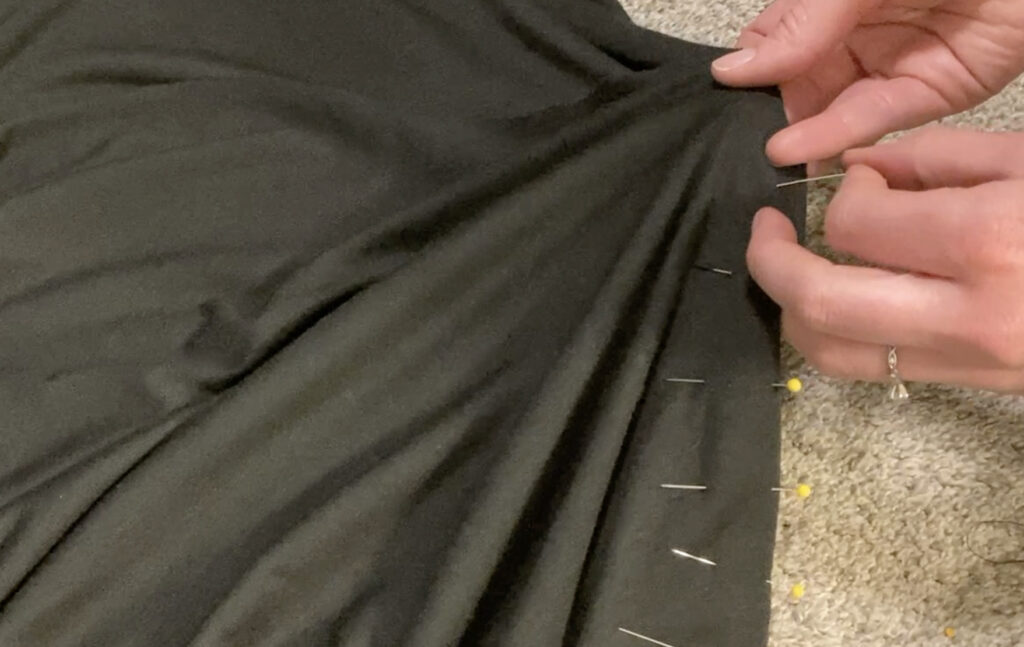
Start by pinning one of your arched pieces to the long rectangle. Don’t skimp on pins. This stretchy fabric sews much smoother when it is well pinned!
Every 12 or so inches, stick in a set of velcro. Make sure both pieces have their “sticky” sides facing the same direction. So when you go to loop them around the tent poles, they will stick together.
Also, don’t make the same mistake I made – make sure you tuck the velcro all the way in, so when you turn it right side out, they will be there (not visible when pinned). I had to do some seam ripping because I reversed it in my mind and stuck them out the wrong way… Luckily I was only three velcro straps in at that point!
I pinned about one-third of the fabric at a time. But do whatever feels best to you! 1/3 felt a little less overwhelming. And I didn’t run out of pins.
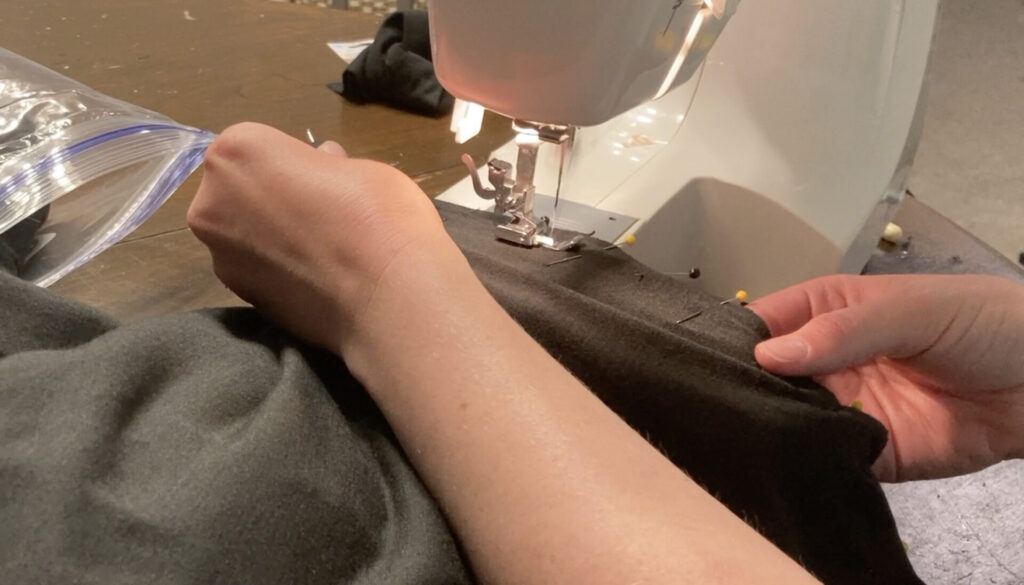
Step 3: Sew Three Main Pieces Together
To sew stretchy fabric you have to do a few things differently.
First – use a “Jersey” needle on your machine.
Second – Don’t use a straight stitch. There are a variety of stitches that are good for stretchy fabric, but I liked the triple zigzag stitch. You could use a regular zigzag stitch if your machine doesn’t have that option.
As you feed your fabric through the machine, make sure you aren’t pulling the fabric back or through. Just let it pull itself through. If you pull it, it will end up bunching because of the stretchiness of the fabric.
This project was the first time I’ve sewn with stretchy fabric. I was a little intimidated at first. But with these few tweaks, it wasn’t bad at all!
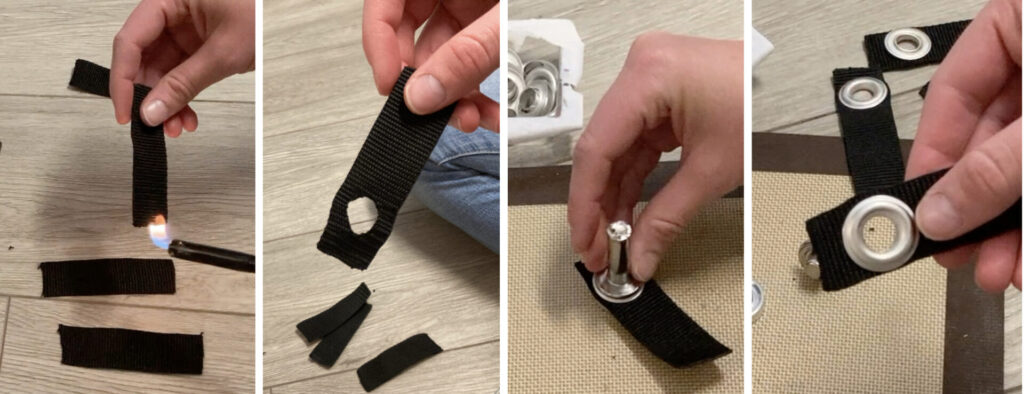
Step 4: Make and Attach Eyelet Anchors
You have the main structure of your tent done – yay! Now it’s time to add anchors/eyelets to each corner.
Cut four 2″ strips of your polypro black strap. Use a lighter to melt each side to prevent fraying.
About 1/2″ from one side, cut a small hole (about the size of your eyelets.
Using a hammer and the eyelet tool, attach an eyelet to each of the four straps.
Pin and sew a strap w/eyelet on each corner (where the seams meet) of your tent. Sew a square with an X inside of it to give extra strength to the strap.
**I had a small issue with a few of my tent poles slipping through the eyelet. If this is an issue for you, you can wrap a rubber band around the tent pole to prevent slipping or sew a little piece on the back side of the eyelet**
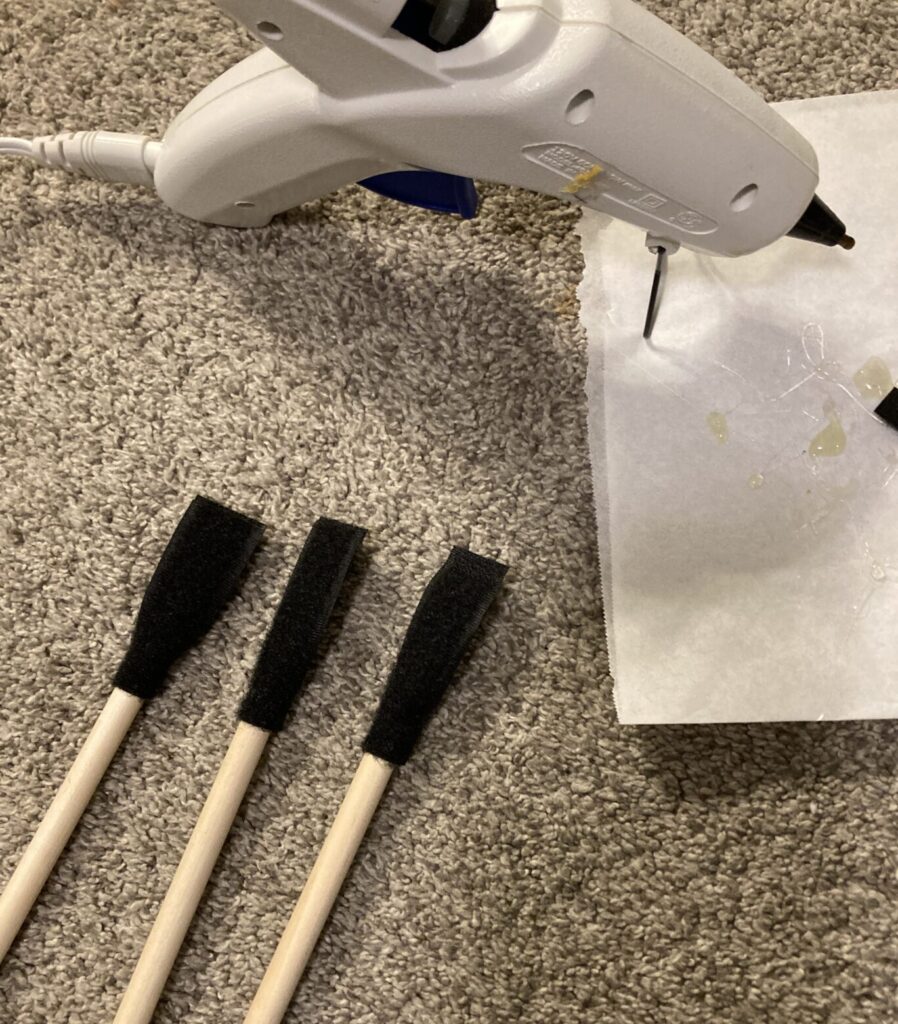
Step 5: Create Cross Bars
We have the support of the two tent poles, but we need support between them.
I used three 1/4 inch wooden dowels with vecro hot glued to the ends to do this.
Honestly, I am sure there is a better way to do this. But I was trying to make it as simple and affordable as possible and these were only .78 cents each! And the perfect length. I’m totally open to ideas and suggestions – leave them in the comments below!
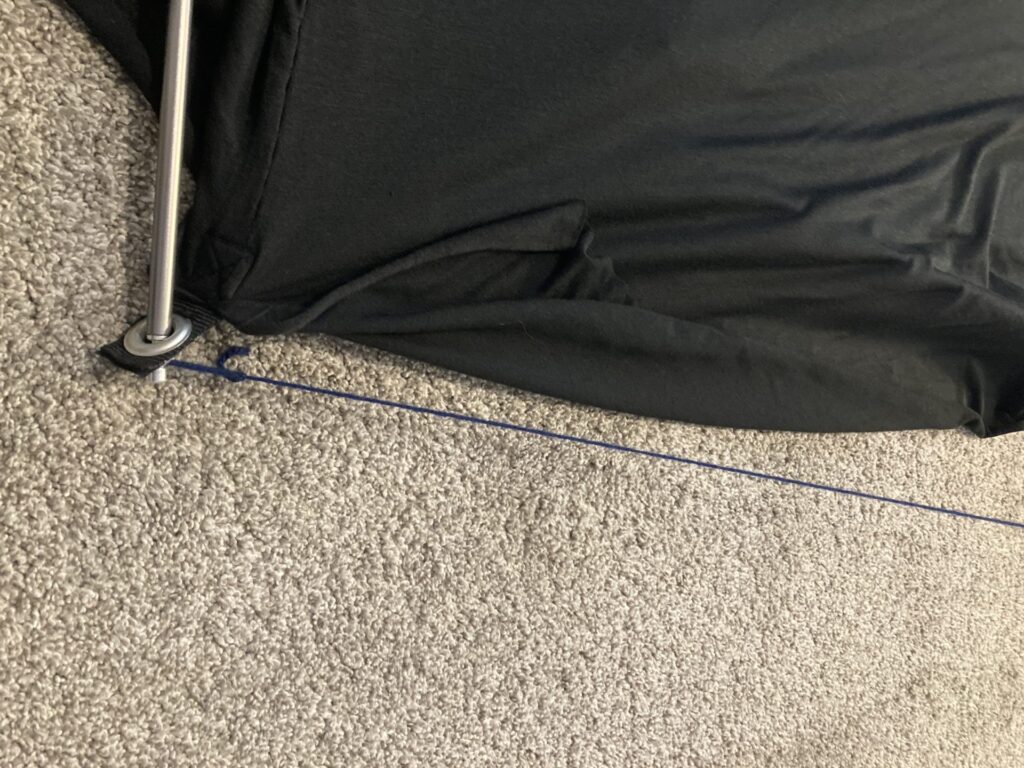
Step 6: Reinforce the Base
To keep the two sides the same length – I used a 55″ string and tied a loop on each side. Then when setting the tent up, I can loop it on each side to hold it a consistent length since the fabric is so stretchy.
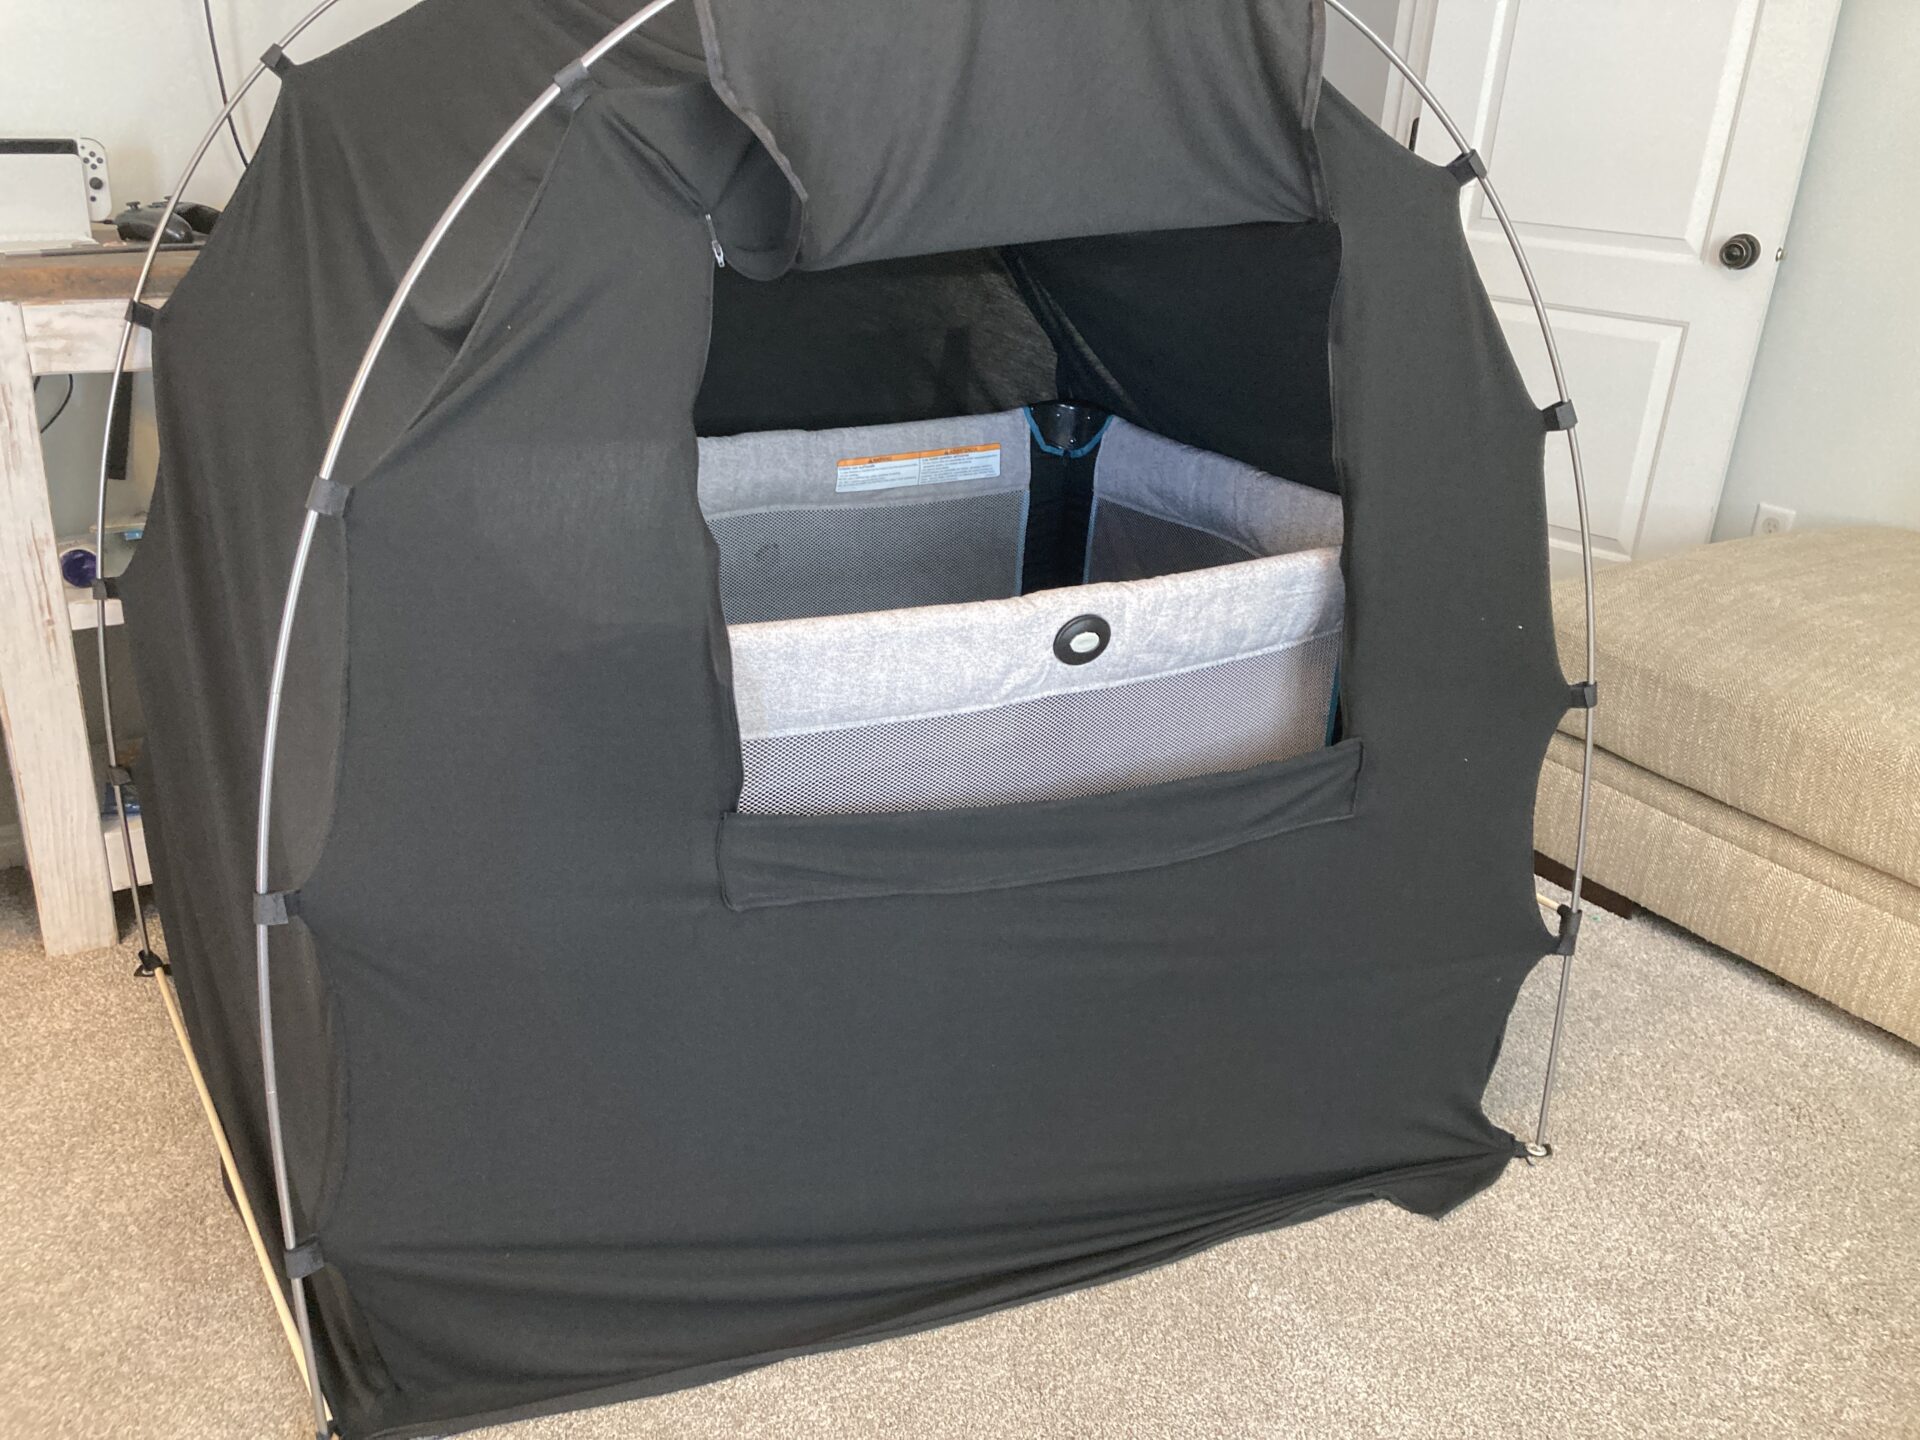
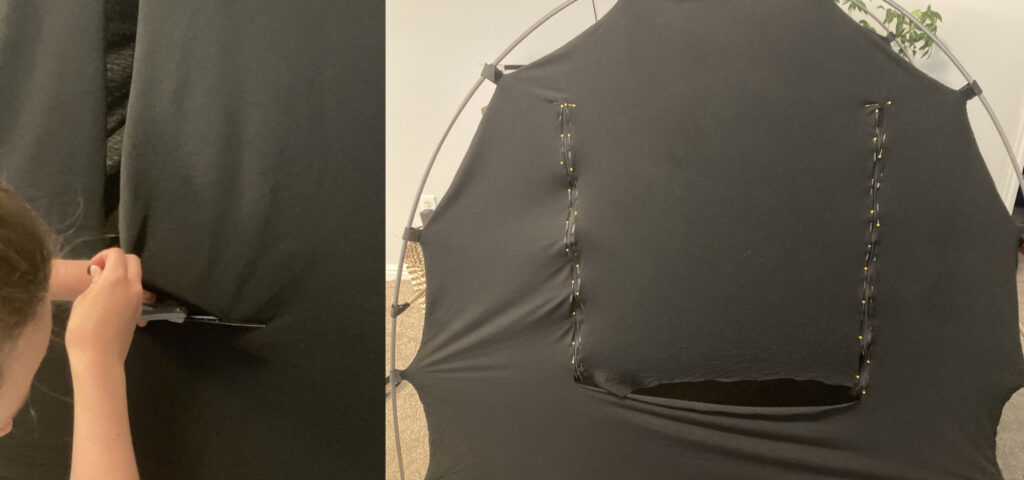
Step 7: Add a Small Door/Opening on Blackout Crib Canopy
Now all that is left is adding the door. There is probably a more technical way of doing this, but I’m not a seamstress so bear with me! If you are a seamstress, please leave any tips or advice in the comments!
Set up the tent. Lightly sketch out 3 – 24 inch lines of a square on one side of your tent. You want this door to be just big enough to open to get your child in and out of the sleep tent.
Carefully cut around the lines you drew. I was sweating a bit at this point. I had worked so hard to get it in the shape of a tent… but now we’re cutting a hole in it?! Are you feeling this way too? Don’t worry, as with almost all projects, it has to get worse before it gets better.
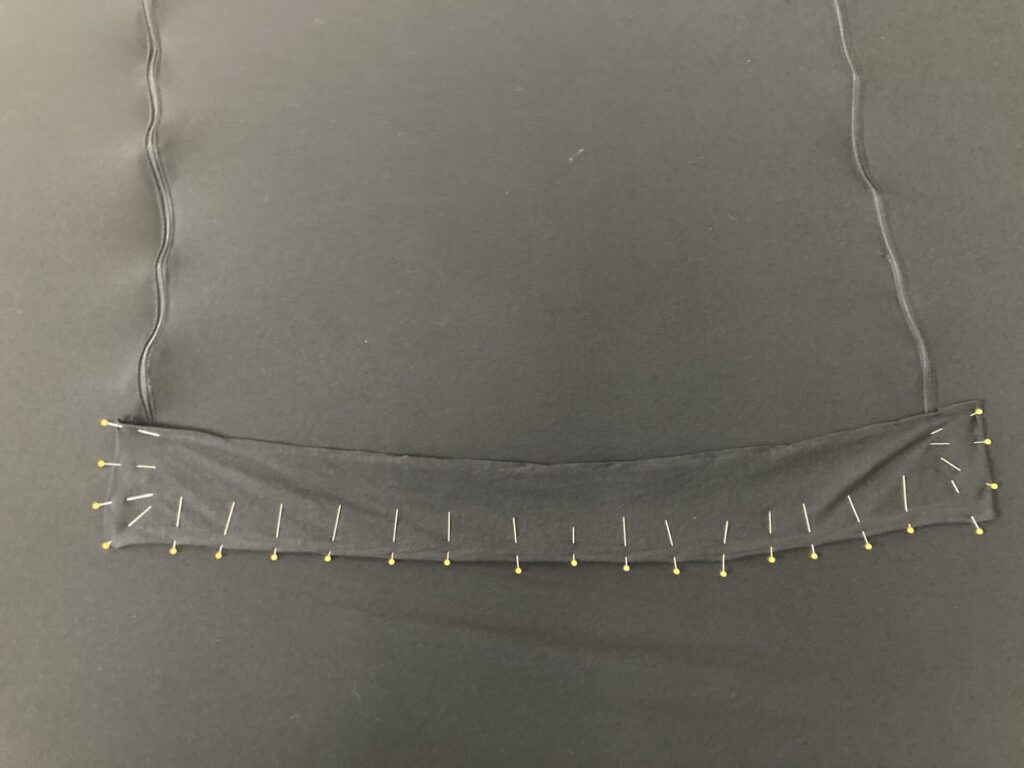
Next pin your zippers in. This fabric kind of naturally curls in. So rather than folding and ironing it over, I just let it curl in and pinned it to create a clean edge. Make sure you pin well. I found it a little tricky because the zipper isn’t stretchy but the fabric is. But extra pins will help with that!
Carefully sew the two side zippers on.
Then to close off the gap along the bottom of the door I just sewed on an extra piece I had from my scraps. It doesn’t seal it off like the zipper, but the extra fabric helps close it off from the light.
Step 8: Place the blackout canopy for crib and enjoy a good night of sleep!
Set up your Pack’n’play or crib and just set the tent over the top of it! The dark enclosed space should be ideal to help your child fall asleep and stay asleep for the night! It’s the perfect toddler climbing out of crib solution.
If you have some crafty energy left over, you can use scraps to sew together a little travel bag to store and carry your DIY Slumberpod Alternative around!
I’d love to hear in the comments if you make this Slumberpod alternative! I hope it adds some more sleep to your getaways with kids. Please leave any questions or suggestions in the comments below!
Want to save or share this DIY Slumberpod Alternative? Pin it on Pinterest!