This post may contain affiliate links. I try to make my posts as helpful as possible and have great products easy for you to access. The use of these links provides me a small commission at no cost to you. As an Amazon Associate, I earn from qualifying purchases.
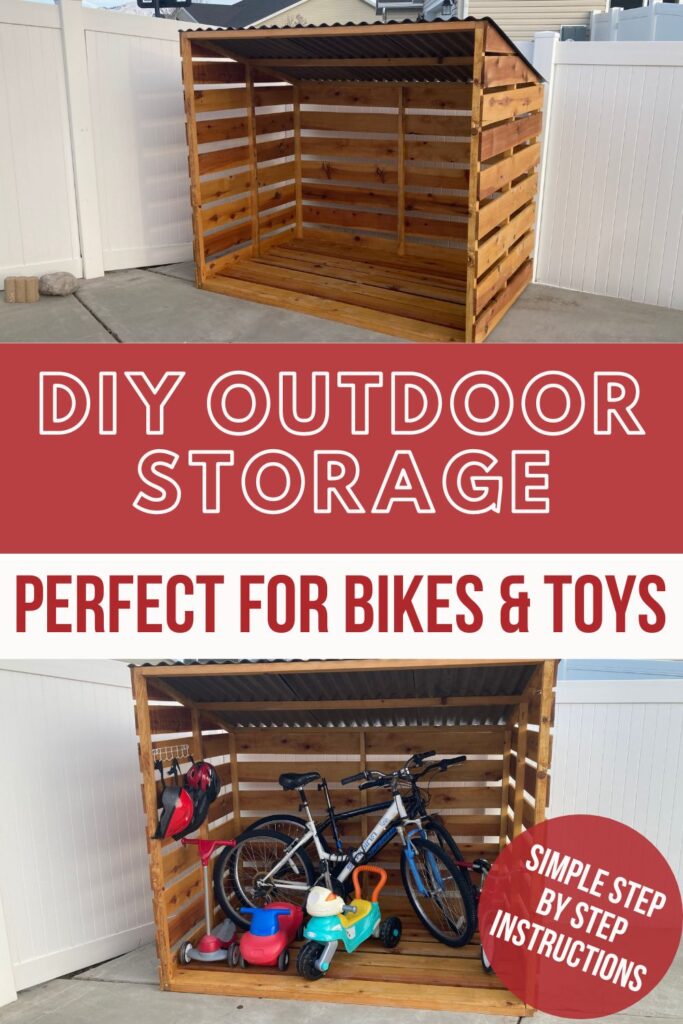
Learn How to Build a Cheap DIY Outdoor Bike Storage Shed
I have a two-car garage, but if we don’t park our cars perfectly, we can’t get out of our cars. Needless to say… It’s a bit snug in there. So storing our bikes and all of our kid’s outdoor toys has become quite the dilemma.
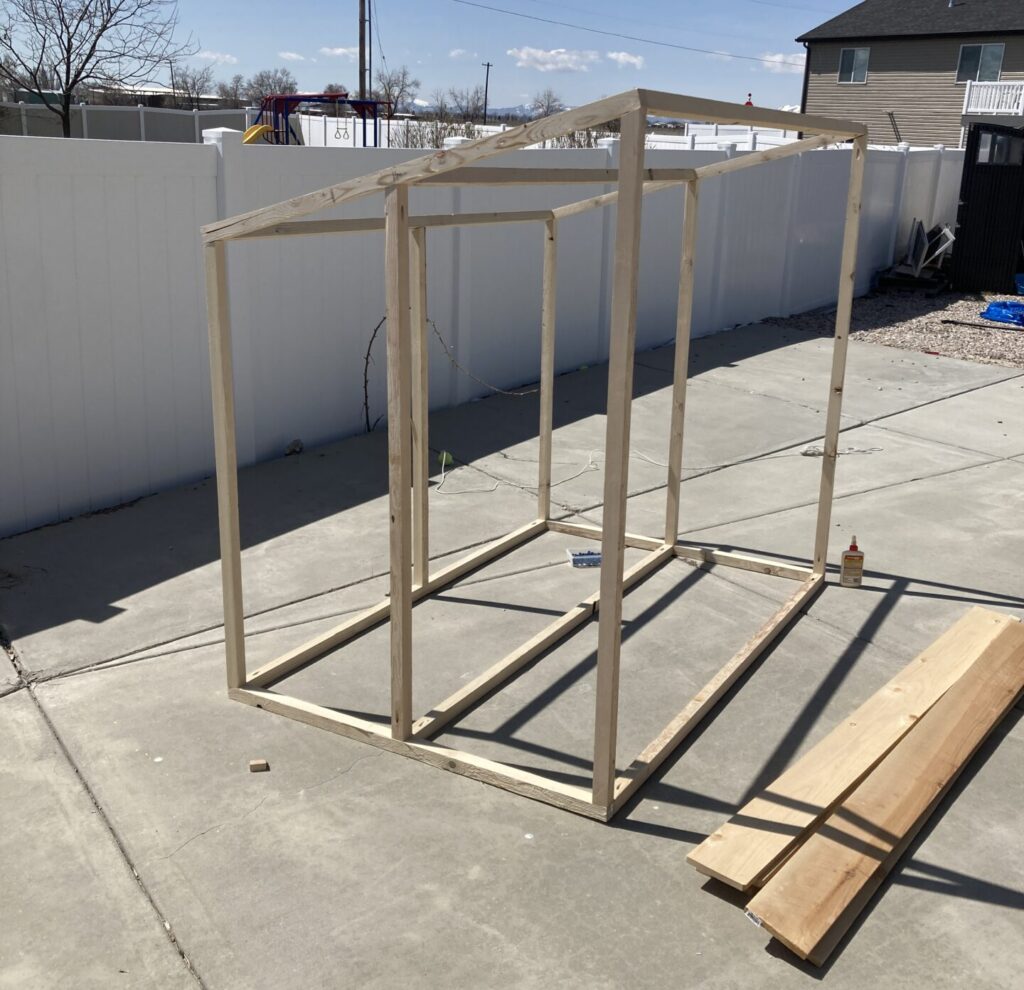
I knew I needed a cheap organization solution, so I got to work sketching out some ideas, and I came up with this 6×4 storage shed.
This cheap DIY outdoor bike storage shed has been the perfect solution to my over-packed garage.
Not only has it been great for storing our bikes, but I have been able to organize and store all of our outdoor toys. Now our bubbles, frisbees, balls, chalk, and other outdoor toys have a “home”, as our good friend Marie Condo would say.
Supplies and Tools Needed to Build Outdoor Bike Storage
At the time I wrote this blog, the cost of these supplies was roughly $250. I purchased my lumber from Home Depot.
Supplies:
- 13 – Pressure treated 2x2s
- 2 1/2 Pocket Hole Screws
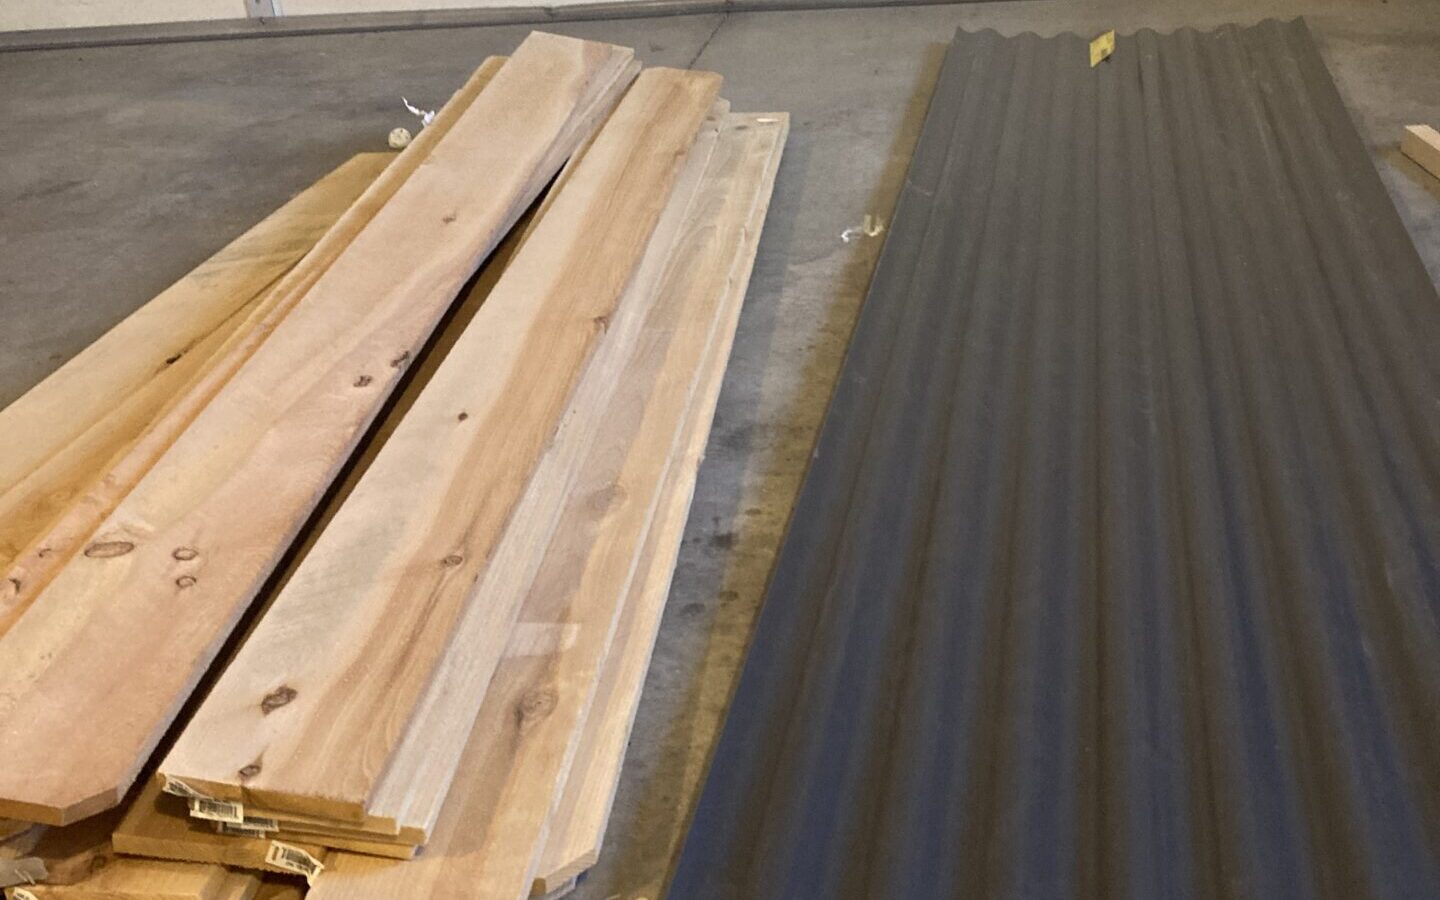
- 30 – Cedar Wood Fence Pickets
- 2 – Corrugated Roof 8 ft Panel
- 1 1/2 Exterior Wood Screws
- Sheet to Wood Fasteners
- Wood Glue
- Outdoor Wood Stain and Sealer
- Misc Baskets and Hooks for added organization
Tools I used:
- Measuring Tape
- Miter Saw
- Pocket Hole Jig
- Impact Driver
7 Simple Steps to Build DIY Outdoor Bicycle Storage
Follow these 7 simple steps to build the best outdoor storage for your bike and other outdoor toys.
Step 1: Measure and Make Cuts
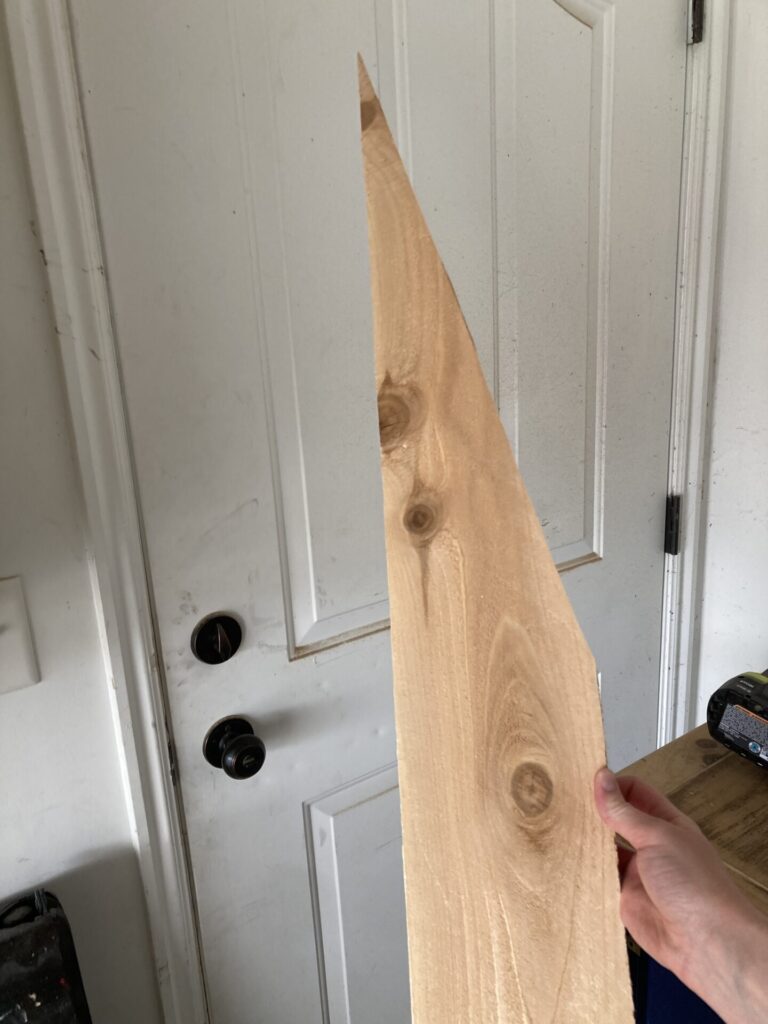
The cedar pickets I bought had “dog ears” (angled corners). You could leave it like that, but I wanted straight edges. So I first cut a clean straight edge on each picket.
As you can see in the picture below, I clamped a 1×2 to my miter saw to create a stop. This made it just a little quicker and easier to cut a consistent length off.
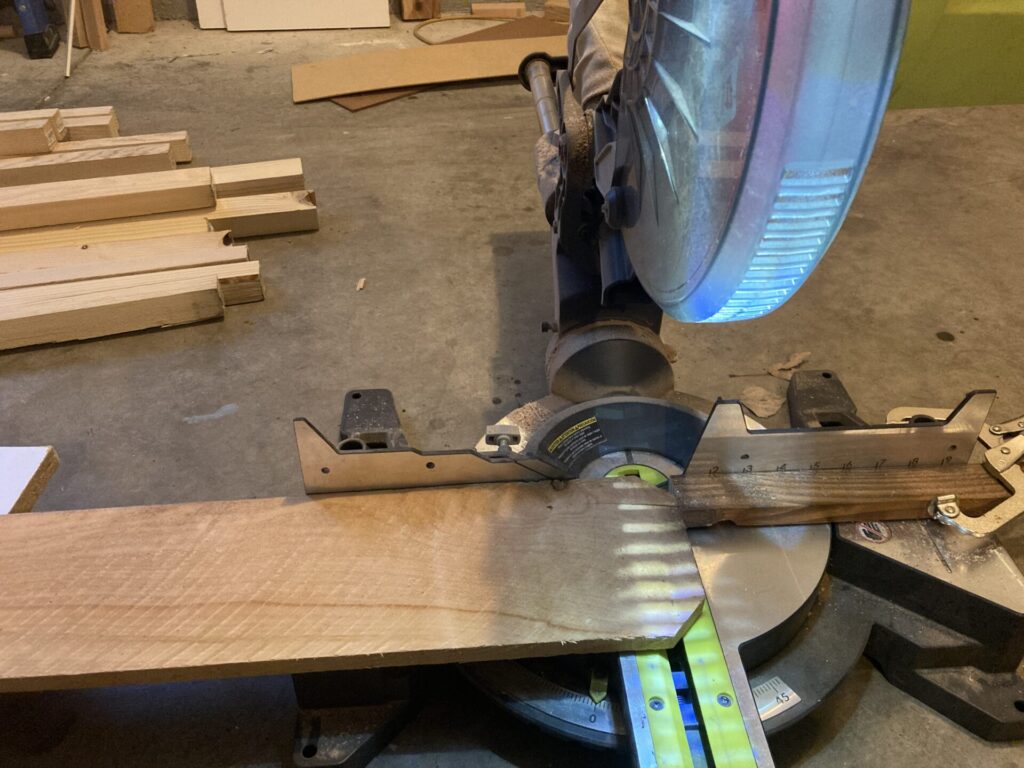
After cutting all the dog ears off, I made the rest of my cuts.
Use the list below to make your cuts. Start by making the longest cuts first.
For the upright posts, you will need to cut one end at an angle, this is for the roof to sit on. I set my miter saw to 17° to make the angles. I found it best to cut the angle first, then measure my length and make the straight cut second. You can also use a circular saw for this cut if you don’t have a miter saw.
If you’re wanting to learn more about using a miter saw, you can check out this Ultimate Miter Saw Guide.
Helpful Tip: Label each piece to make the assembly much easier!
- 2x2s:
- (6) 5’8 (three for the base and 3 for the roof)
- (2) 5′ (front posts) **Cut one end at a 17° angle
- (2) 53 7/8″ (middle side posts) **Cut one end at a 17° angle
- (5) 4′ (3 back posts and 2 roof sides) **Cut one end at a 17° angle for the 3 back posts
- (2) 3’10 (sides of the base)
- (2) 21″ (Base cross pieces)
- Fence Pickets (with dog ears off)
- (14) 5’11 (for the floor and back wall. It is 5’11 and not 6′ because I cut the dog ears off)
- (14) 46 3/4″
- (4) Custom angle cuts (see step 4 for more details)
- Corrugated Roof Panels
- (3) 4′ panels
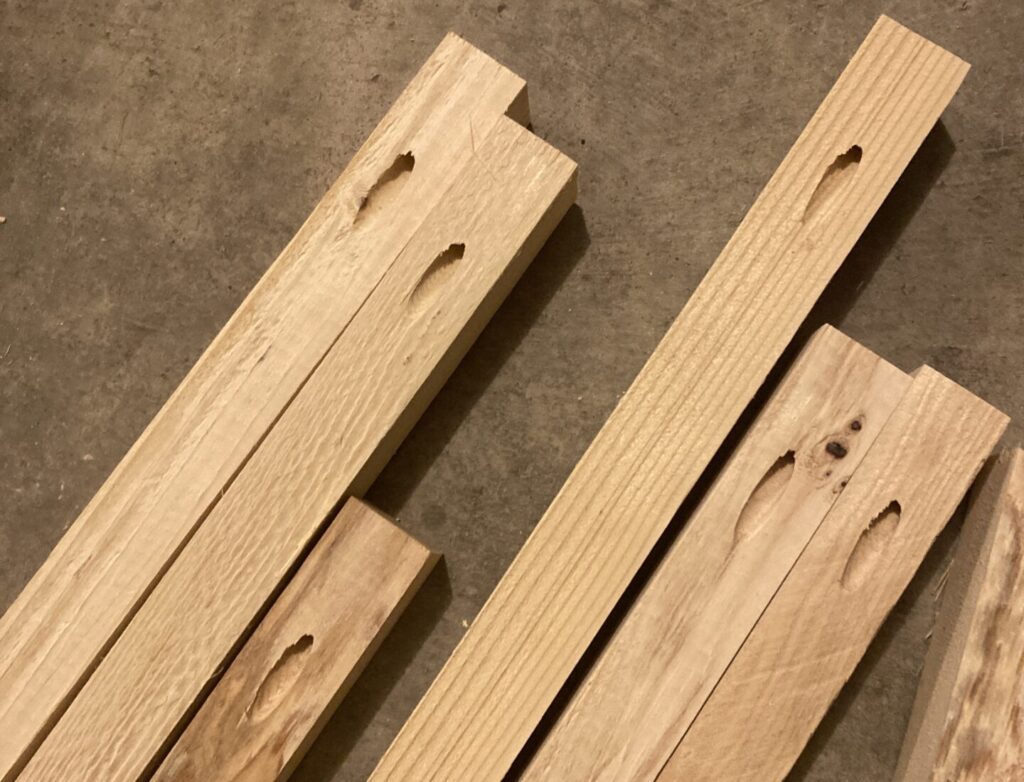
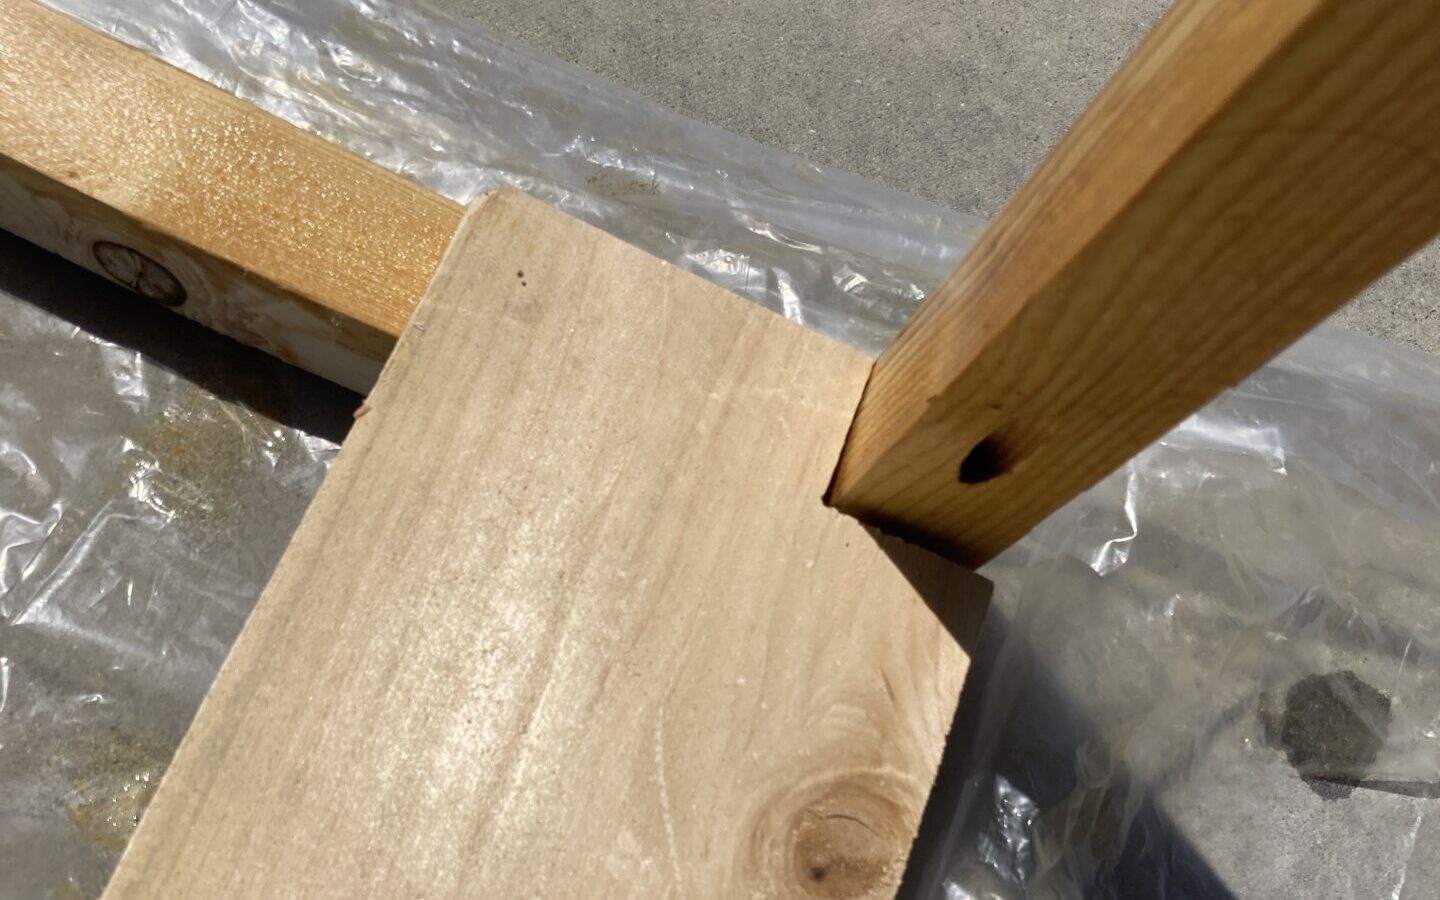
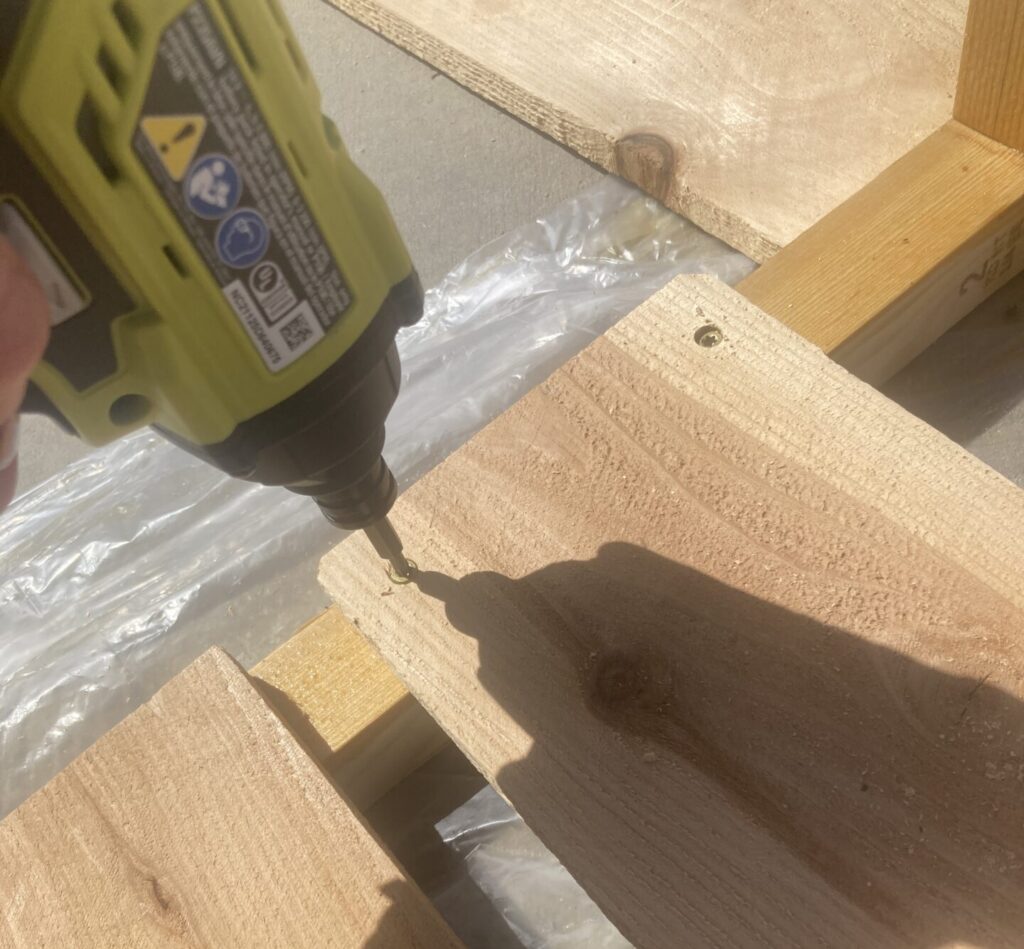
Step 2: Drill Pocket Holes
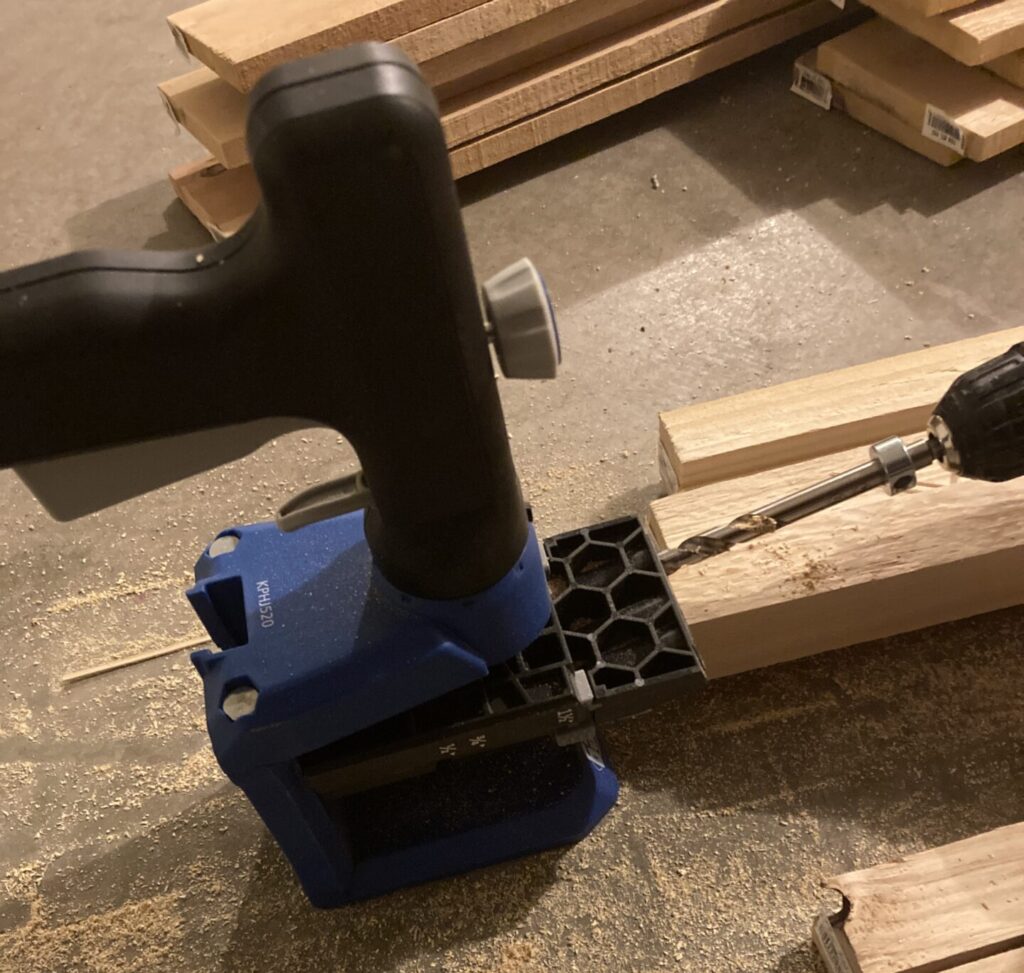
Using a pocket hole jig, drill pocket holes in both ends of your upright post pieces (6), and both ends of the (6) 5’8 roof and base pieces.
If you want more guidance on using a pocket hole jig, check out this post on How to Use a Kreg Jig to Make Perfect Pocket Holes.
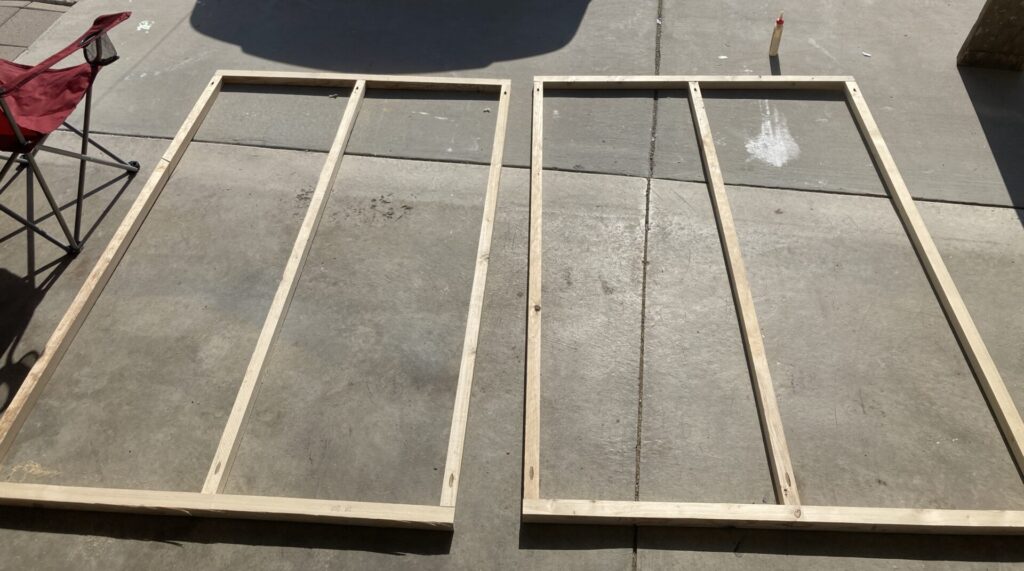
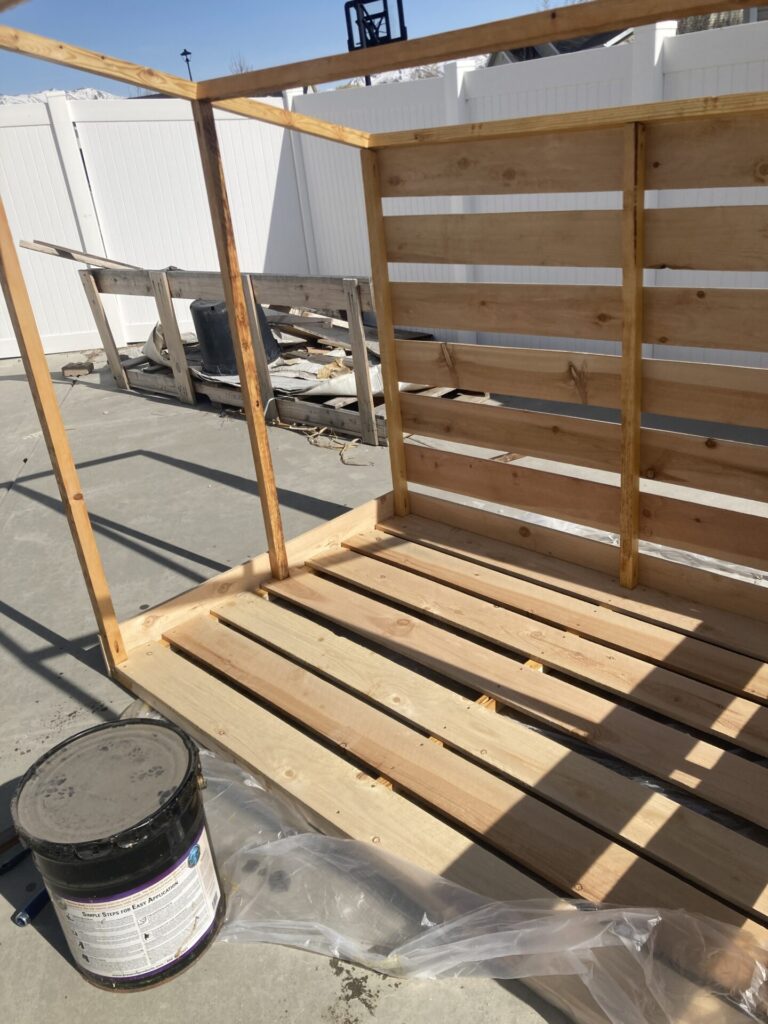
Step 3: Assemble the Frame of the Bicycle Storage Shed
Start by assembling the top and bottom frame using pocket hole screws and wood glue. The top piece (roof piece) is the slightly larger one.
Make sure your short pieces are on the outside of your long pieces (Not included in the picture are the 21″ cross pieces for the base piece. This adds much-needed support for the floor of your shed. I added them later).
Next, add the upright posts using pocket holes and wood glue. Make sure all the angles are facing the correct direction… I had to redo a couple because I got distracted and had a few facing the wrong way.
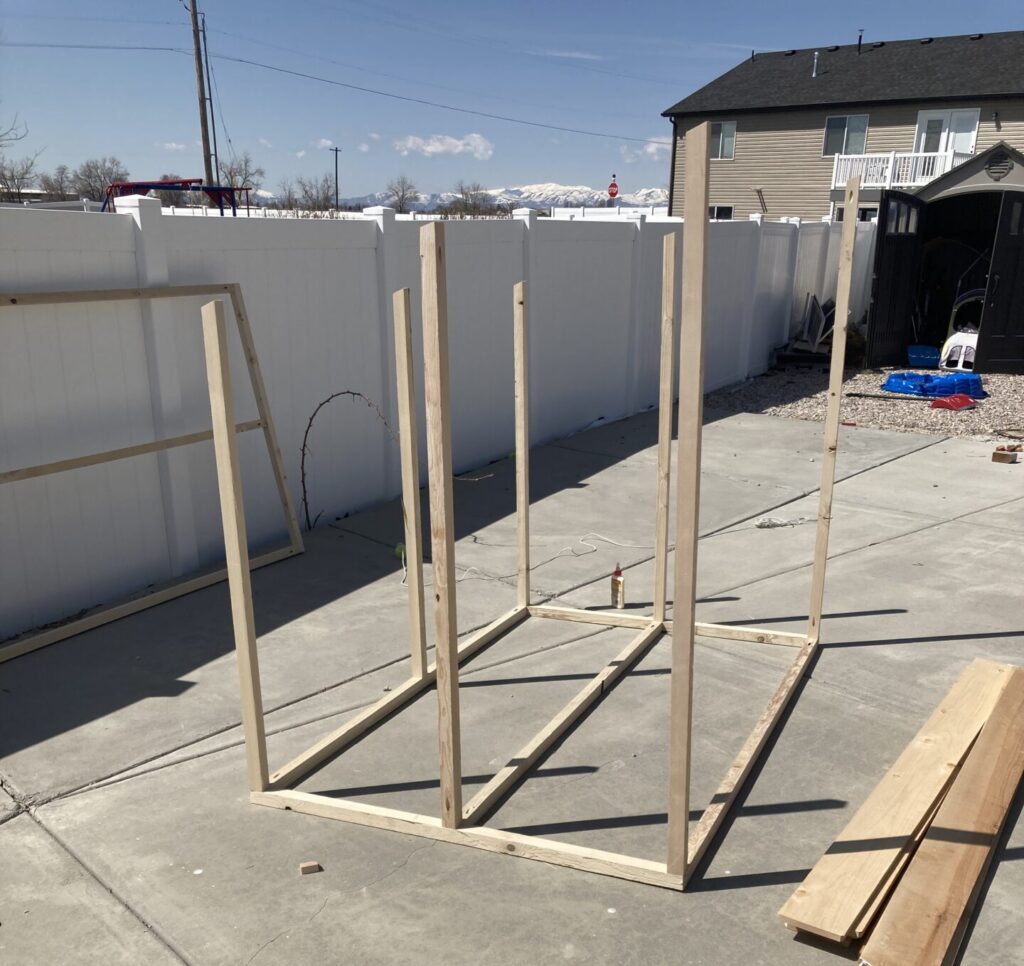
Add wood glue to the top of each upright post and carefully place the roof frame on top. Screw together using pocket hole screws.
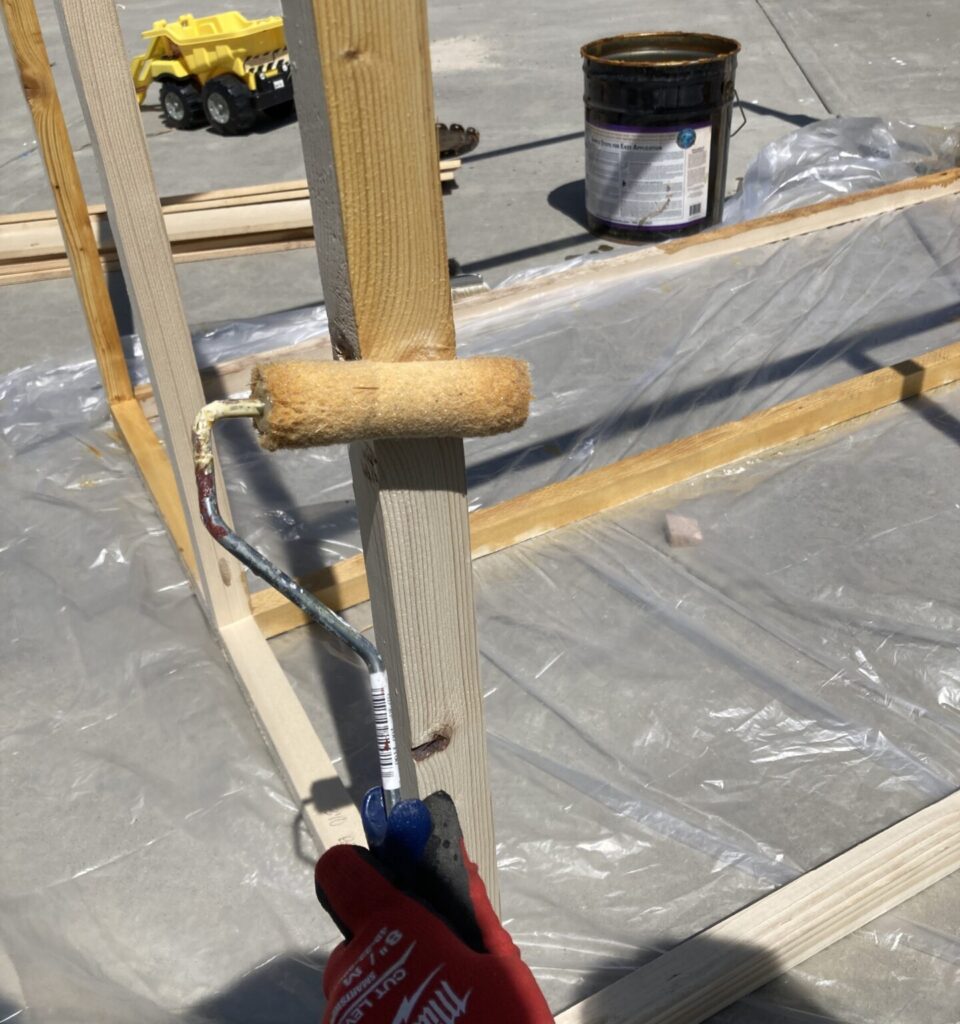
At this point, I used the stain and sealer to seal the entire frame. That way I didn’t have to try to get in between all the crevices after adding all the side planks.
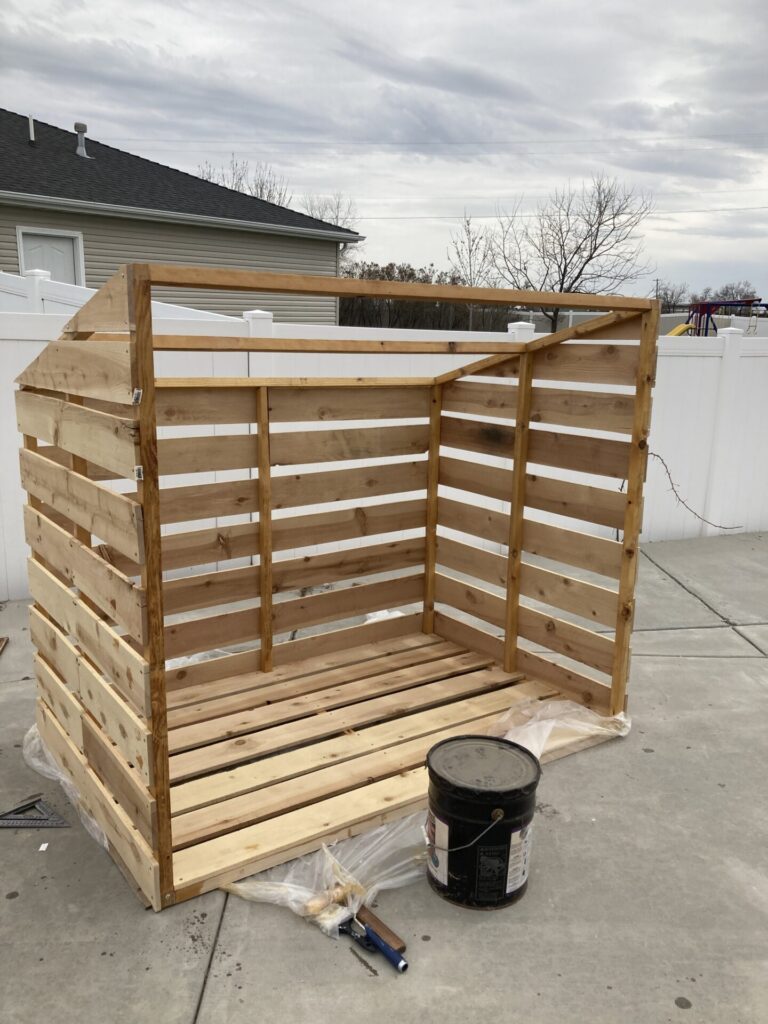
Step 4: Add Planks
Now for the fun part! (At least it is in my opinion) Adding the planks!
I did a one-inch gap for the floors and a two-inch gap for the walls. The gaps help cut costs a little bit, but if you’re looking for more protection, you could go without a gap and just buy a few more pickets.
Take your 5’8 planks and begin the “flooring”. You’ll have to notch out a few spots to fit around the framing. I did this with my jigsaw.
Using your impact driver, drill in two screws per “stud”. It will end up being 6 screws per board.
If you’re wanting to learn more about using an impact driver vs. a drill, make sure to check out this post.
Don’t forget to leave a 1-inch gap between each board.
After I finished the flooring pieces, I started up the back wall. This went a little quicker because I didn’t have to notch out anything.
Initially, I made the mistake of using my level to make sure my boards were level but… I didn’t realize it until I was a couple boards in that the ground I had the shed on wasn’t level! So I had to redo a few.
So unless your ground is really level, skip using a level and just measure your gaps!
After I finished the back, I started with the side pieces. These pieces are 46 3/4″. Leave a two-inch gap between each board. The top two pieces will be cut at an angle.
An easy way to do this angled cut is to screw your boards in place on the shed, then use a circular saw along the edge of the frame to cut it flush with the angle.
Unfortunately, my circular saw died right before this project.. may he rest in piece…
So instead I held the board in the place I wanted it. Traced a line using a pencil. Then took it down and cut it with my jigsaw. It’s not perfect, but it worked great for my purposes!
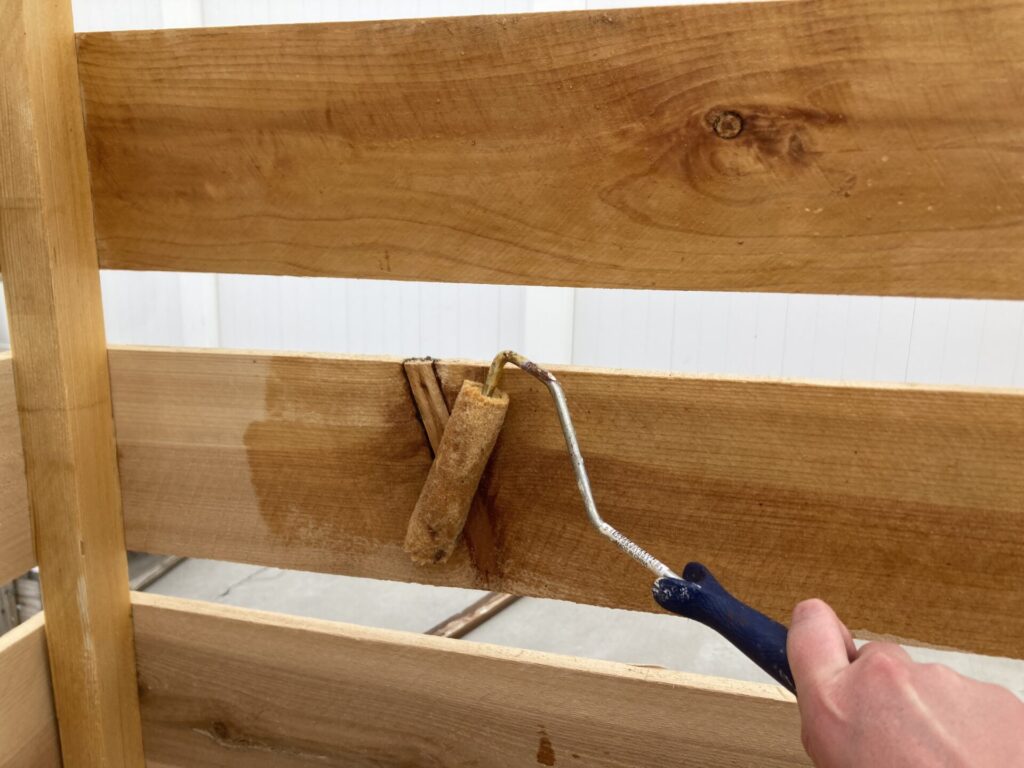
Step 5: Seal Wood
I used a small 4″ roller to apply the stain and sealer, then did some touch up with a brush.
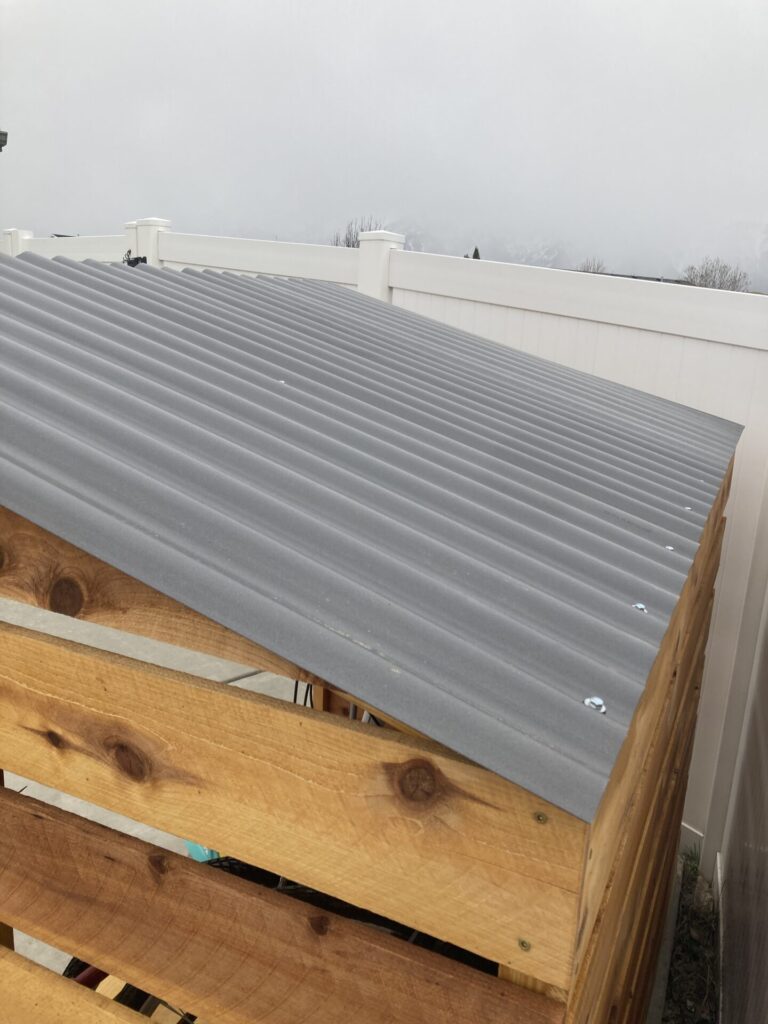
Step 6: Add Roof
The roofing material I chose was Corrugated Foamed Polycarbonate. I liked this option because it is impact resistant and lightweight. Hopefully, it should withstand the elements.
*Make sure you buy sheet-to-wood fasteners to attach the roofing material to your frame.
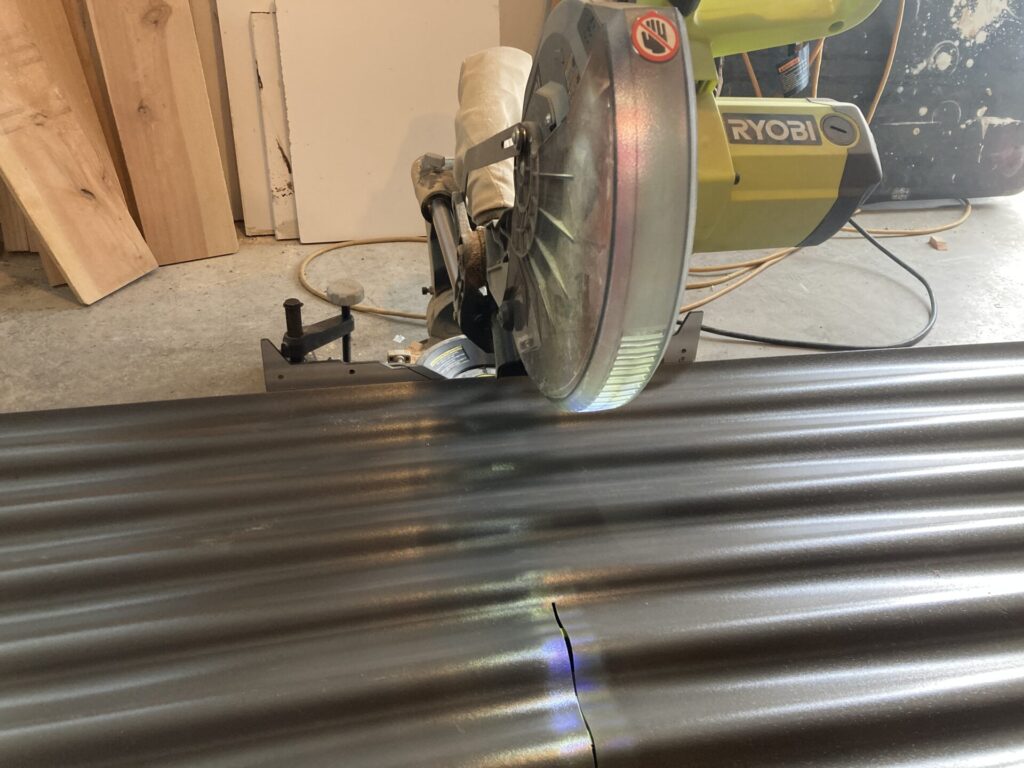
I used my miter saw to cut the roofing material. I was a little caught off guard when cutting it. Because of the shape/the ripples, it makes a kind of intense popping noise as it cuts through each ripple. It made me jump, which isn’t the best thing to do when using a power tool… so here’s your warning haha. But once I figured out the noise was just the material being cut and not my saw exploding, we were good to go!
Because of the width of the panels, I had to cut one side, then flip it over and cut the other side.
You could also use a circular saw for this cut if needed!

I sunk screws every three “ripples” along the top and the bottom. Then I added a few along the middle as well.
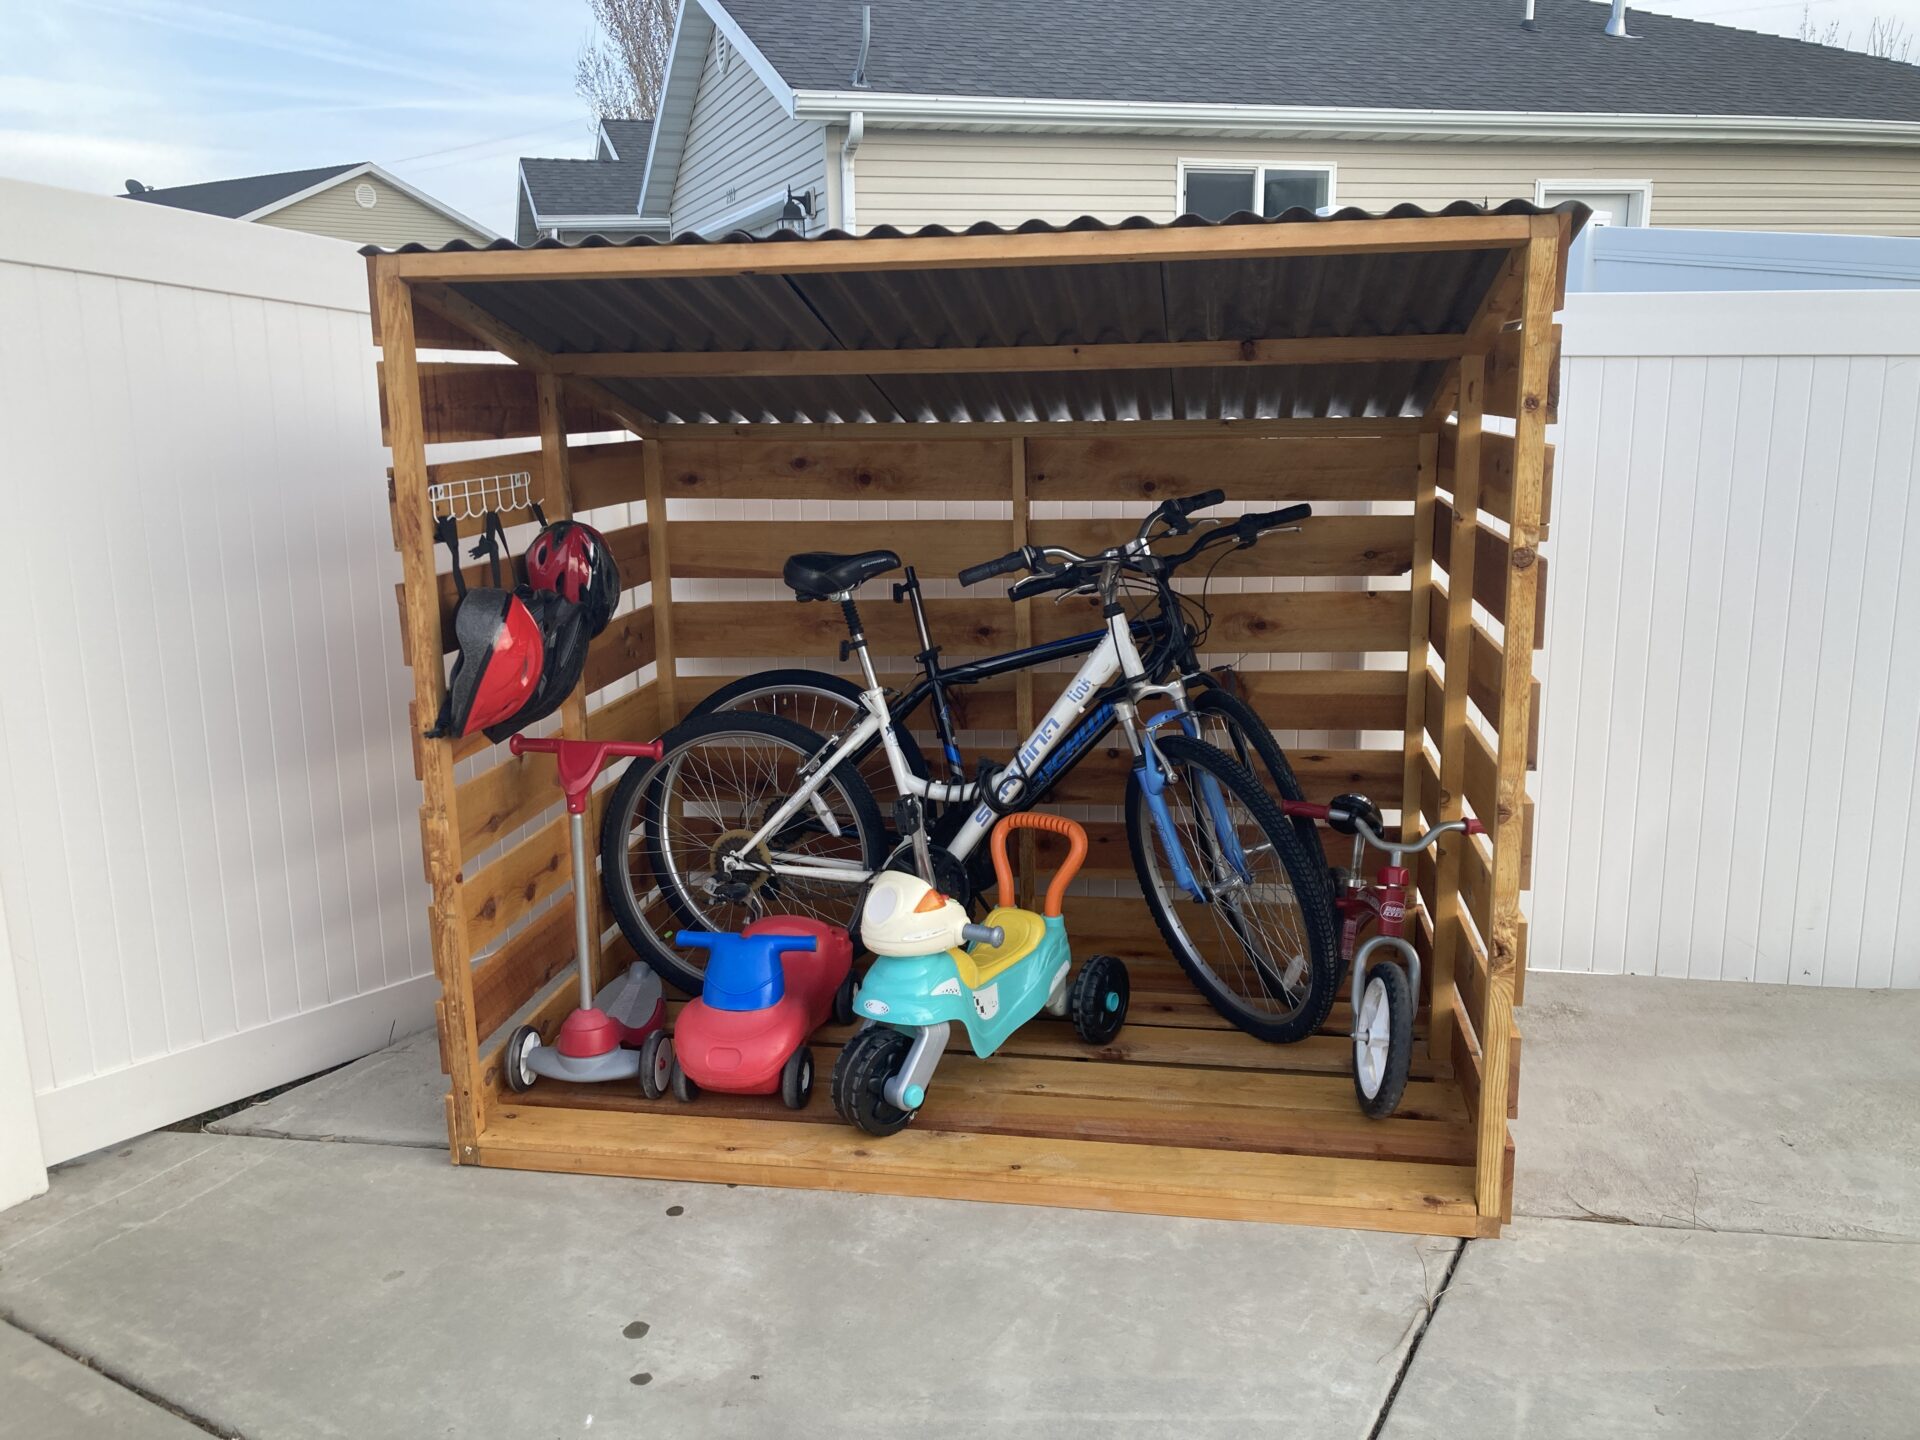
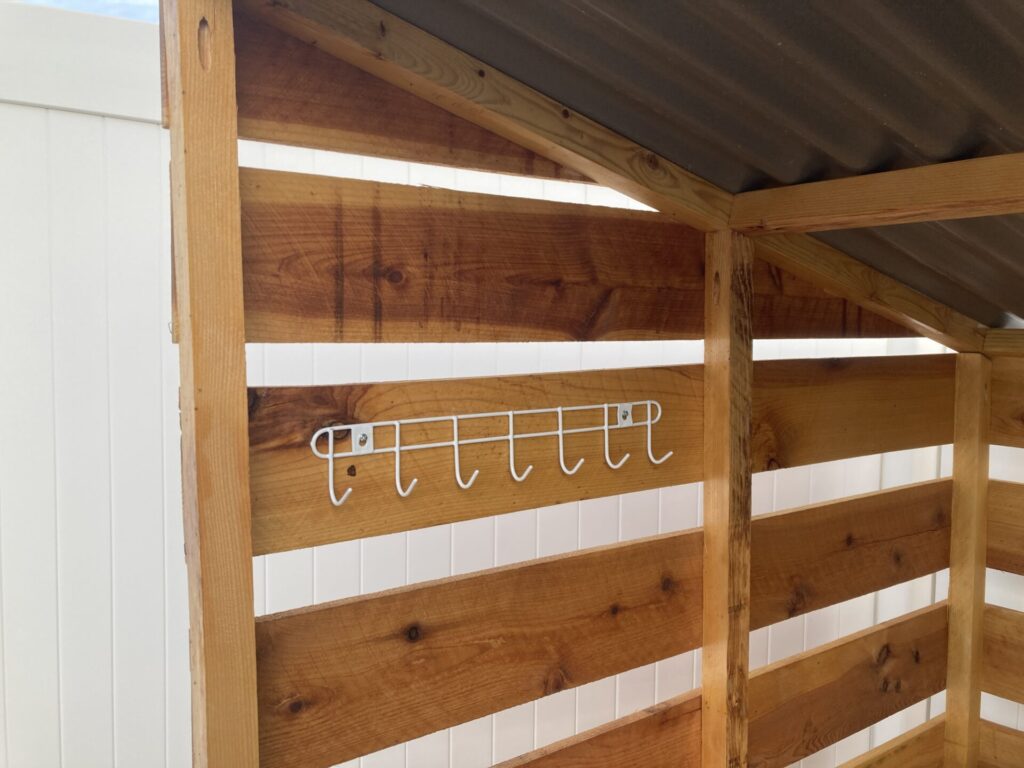
Step 7: Add Outdoor Toy Storage Organization
I said the paneling part was the fun part, but this actually really is the best part… Organization!
I search Amazon and Walmart for some good outdoor toy storage ideas, but my local dollar store was also really successful! I found a great hook set at the dollar store that I used for my bike helmets. There were also some great storage bins at the dollar store, but when I got home I realized they weren’t quite the right size. So I’m on the hunt for some good bins for our chalk, bubbles, and other little outside toys!
Cheap DIY Outdoor Bike Storage
And there you have it! A relatively cheap DIY outdoor bike storage solution. Plus, some great space for outdoor toys as well.
I have loved having this outdoor storage! Now, our cars have the space they need in the garage and our kids can easily access and put away their toys.
Did you build this storage shed? I’d love to hear about it in the comments! Give me your best outdoor toy storage/organization ideas.
Share/Save this Cheap DIY Outdoor Bike Storage on Pinterest!