This post may contain affiliate links. I try to make my posts as helpful as possible and have great products easy for you to access. The use of these links provides me a small commission at no cost to you. As an Amazon Associate, I earn from qualifying purchases.
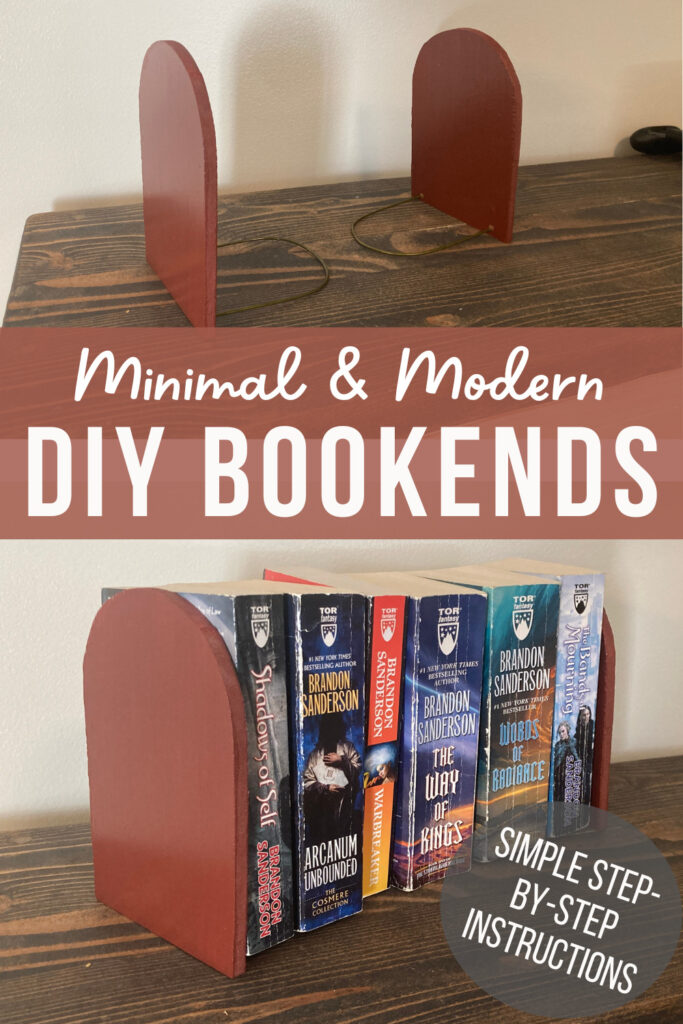
If you’re looking for a fun, quick and practical project, look no further! These DIY Bookends are all of the above.
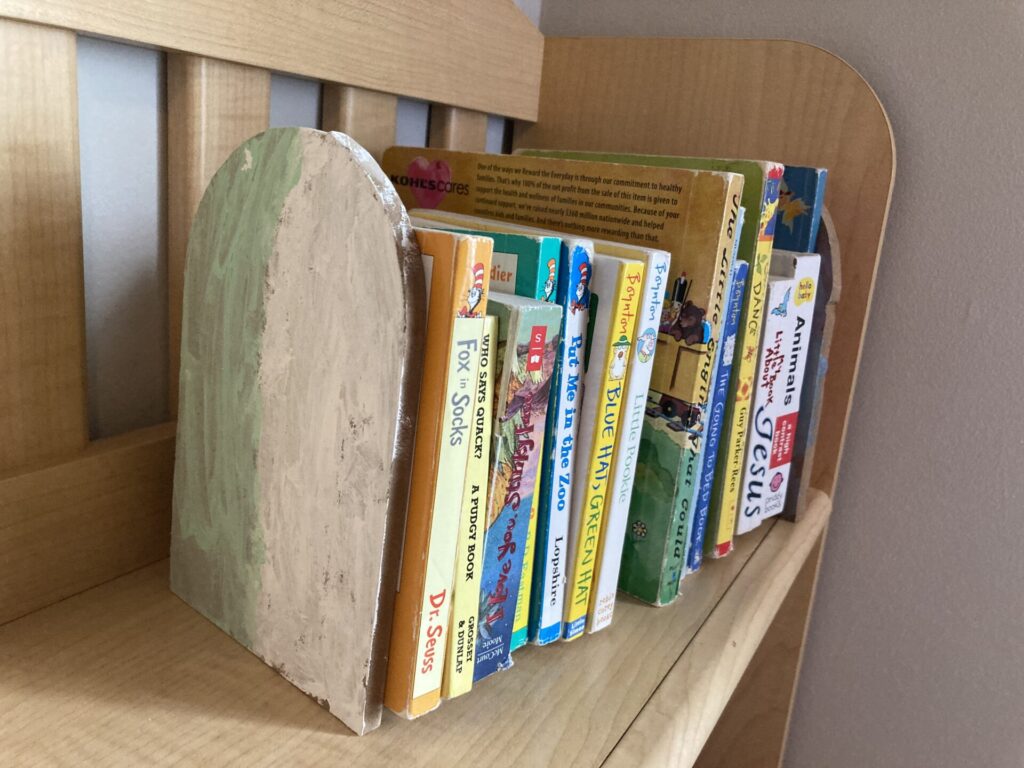
These DIY bookends are super easy to make. And like a good shirt, they are easy to dress up or dress down. You can let your kids go wild and decorate their own or you choose your favorite paint to match your decor and make your own beautiful modern set. You could even do a faux marble look with these if you’re feeling really fancy!
Follow these simple steps to make your own custom bookends.
Supplies Needed for DIY Bookends
- 1/4″ MDF
- An old metal hanger
- Paint and Primer
Tools Needed for DIY Bookends
How to Make Bookends
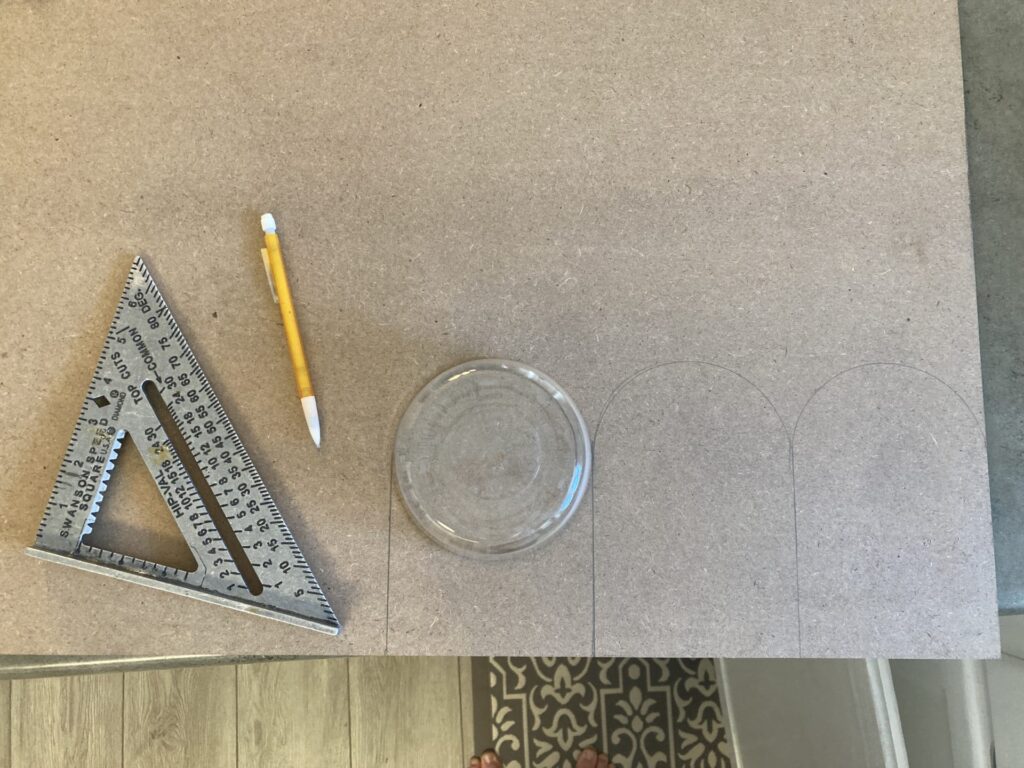
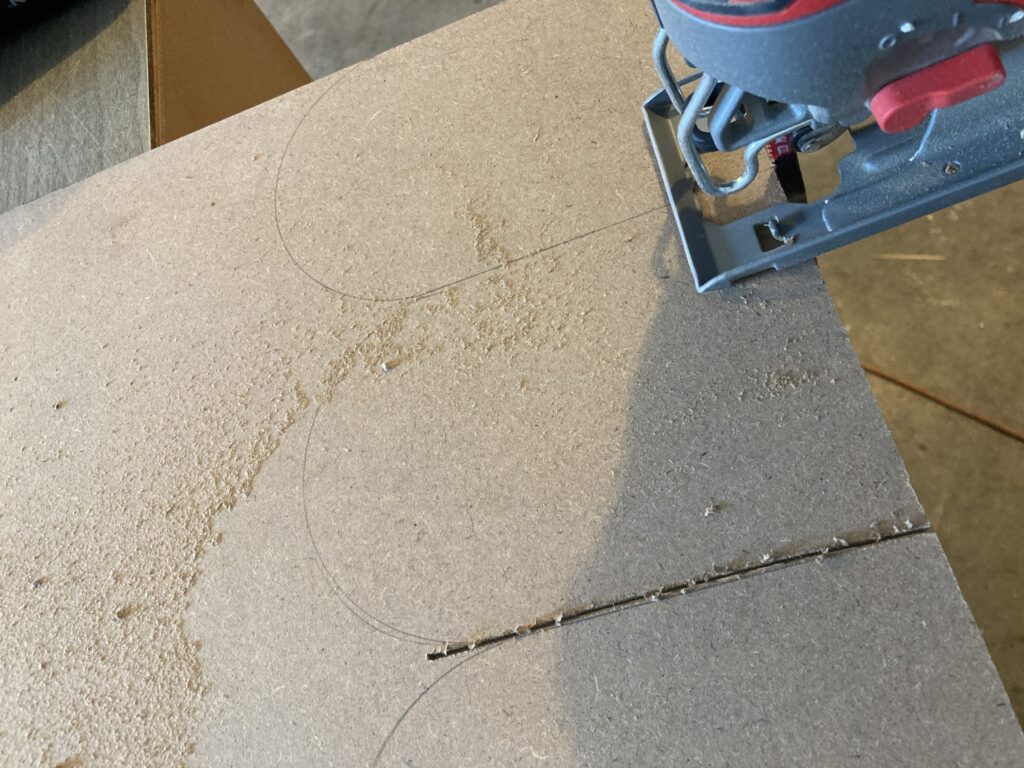
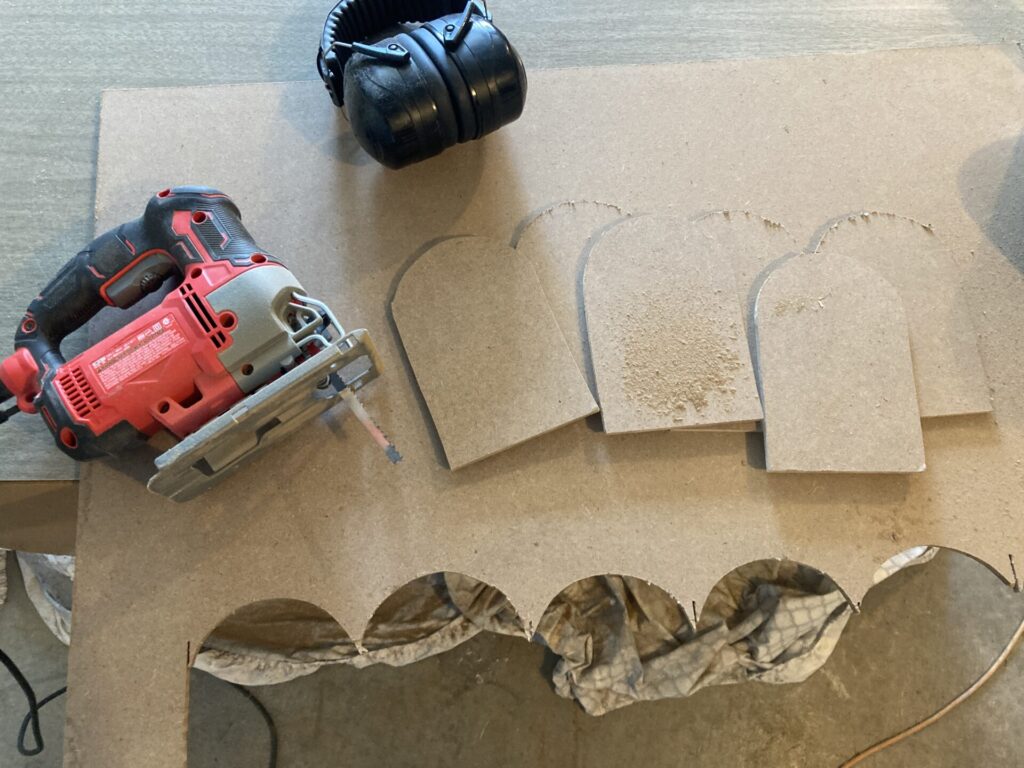
Step 1: Make your cuts
Find a bowl or something circular to make your curved shape. I used a bowl that was about 5″ wide.
Use a pencil to trace your outline. I did mine about 5″ wide and 7″ tall.
For a set of bookends, you only need two. But I did three sets so my kids could also decorate their own!
Using a jigsaw, cut along your traced lines (for more tips on how to use a jigsaw, check out this post).
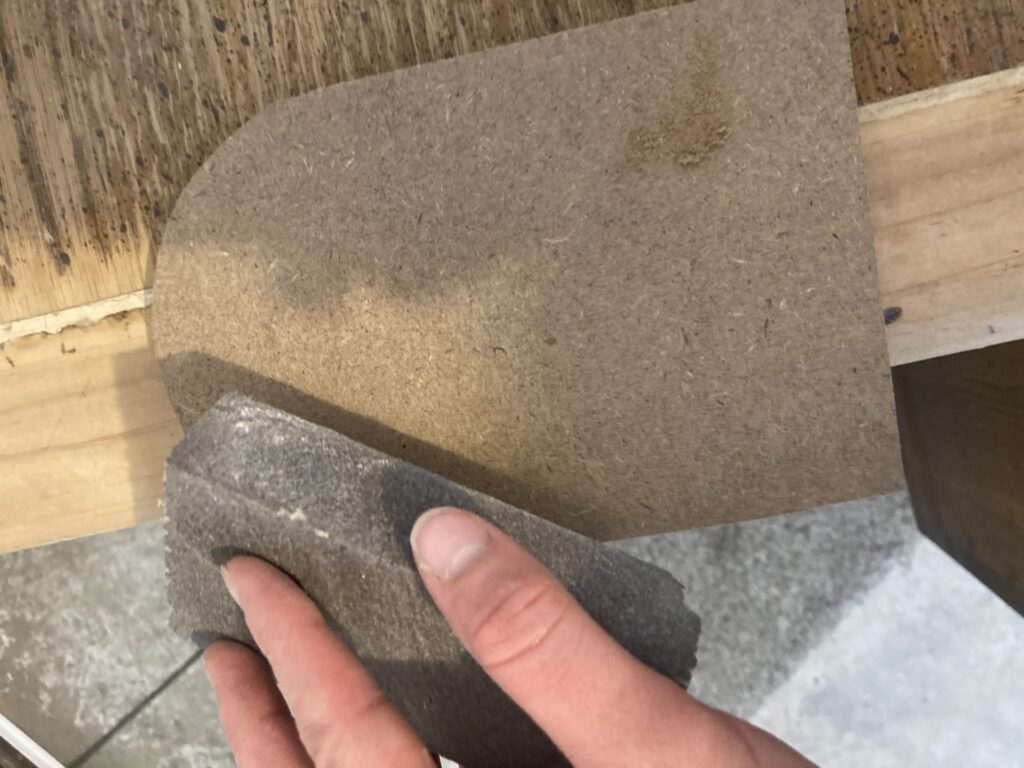
Step 2: Sand Down Your Edges
Use a sanding block or piece of sandpaper to smooth down the edges you cut (for some great tips on using sandpaper, check out this sandpaper guide).
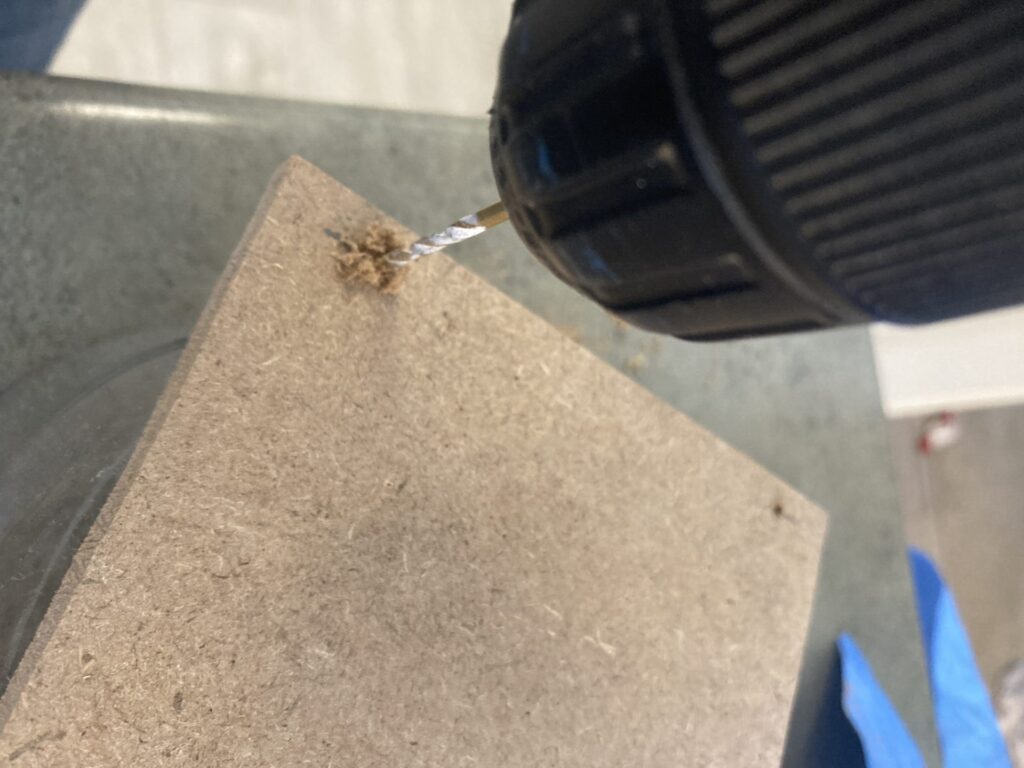
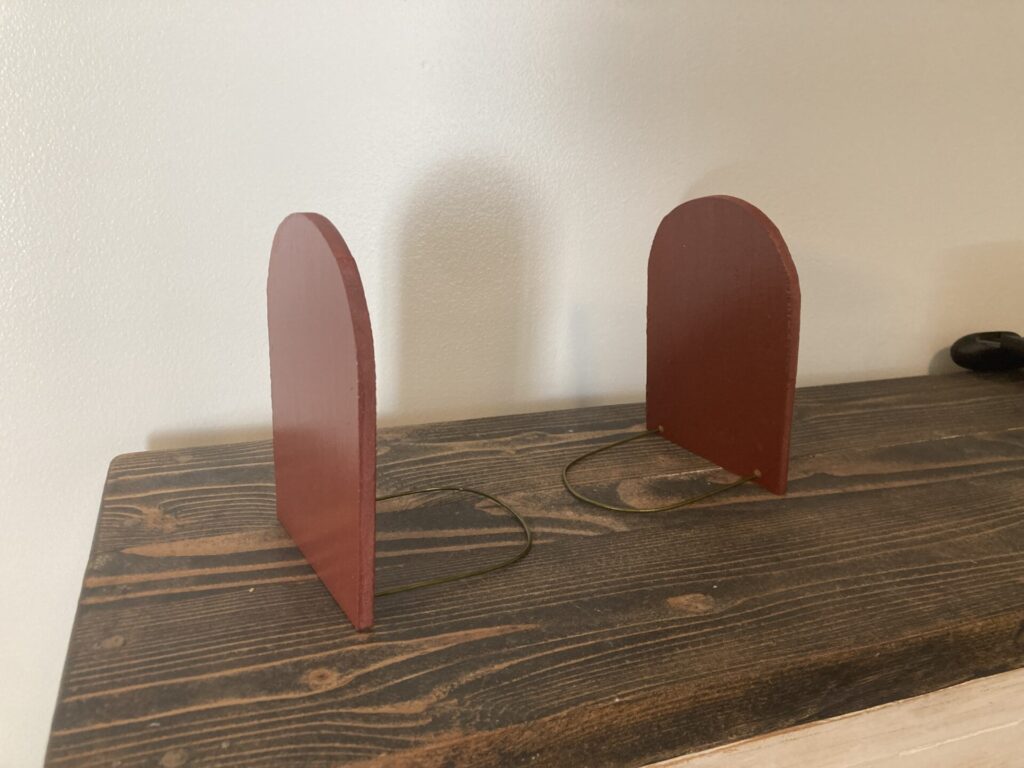
Step 3: Measure and Drill Holes for the Bookend Stand
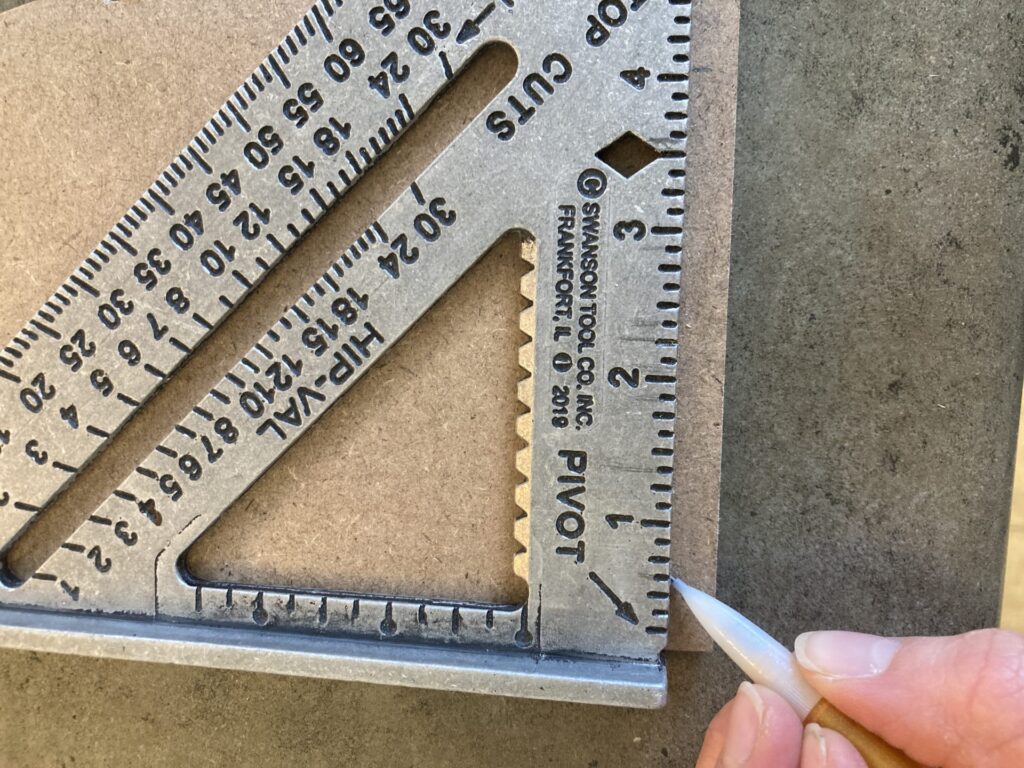
Here is a little plug-in for speed squares – they are the best. If you don’t have one, get one. You won’t regret it.
I used my speed square to measure equal distance on each corner of the bookends. It doesn’t need to be an exact measurement, just place the holes close to te bottom of the base so your books sit flat.
I found that the 3/32 drill bit was just the right size for my metal hanger stands.
Step 4: Prime and Paint
Start with a coat of primer. Then once it is dry, add your paint color of choice. I ended up doing a couple of coats.
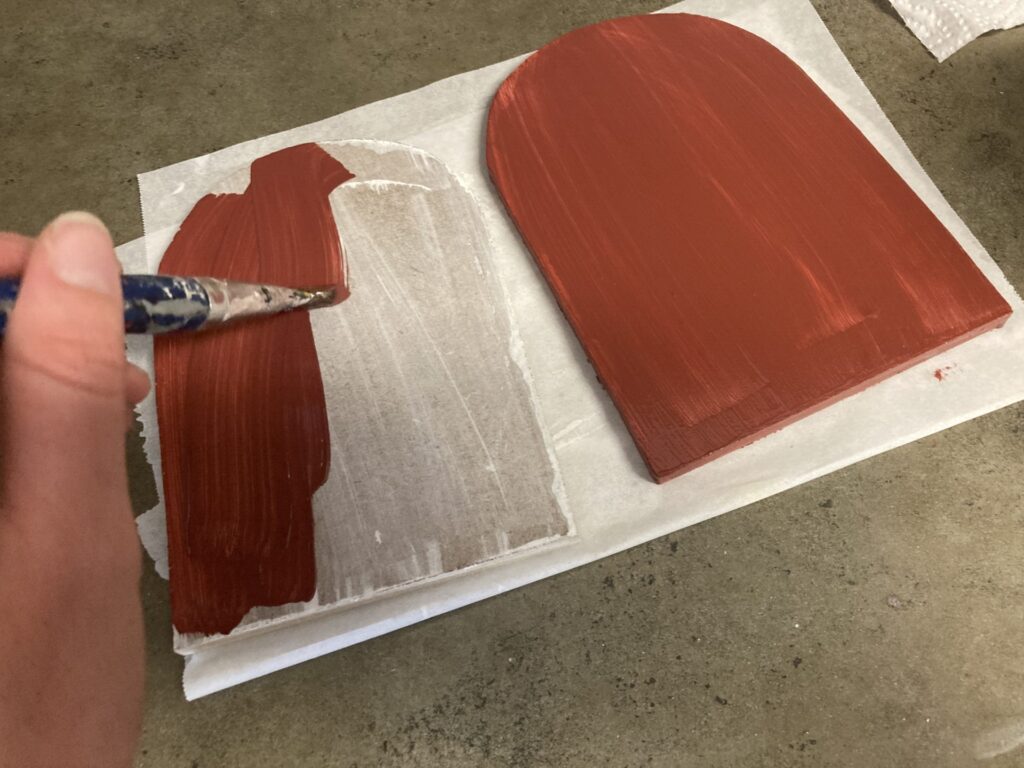
If you cut an extra set for your kids, this part is so fun! In retrospect, I wish I would have primed theirs too, but they were too excited to get painting.

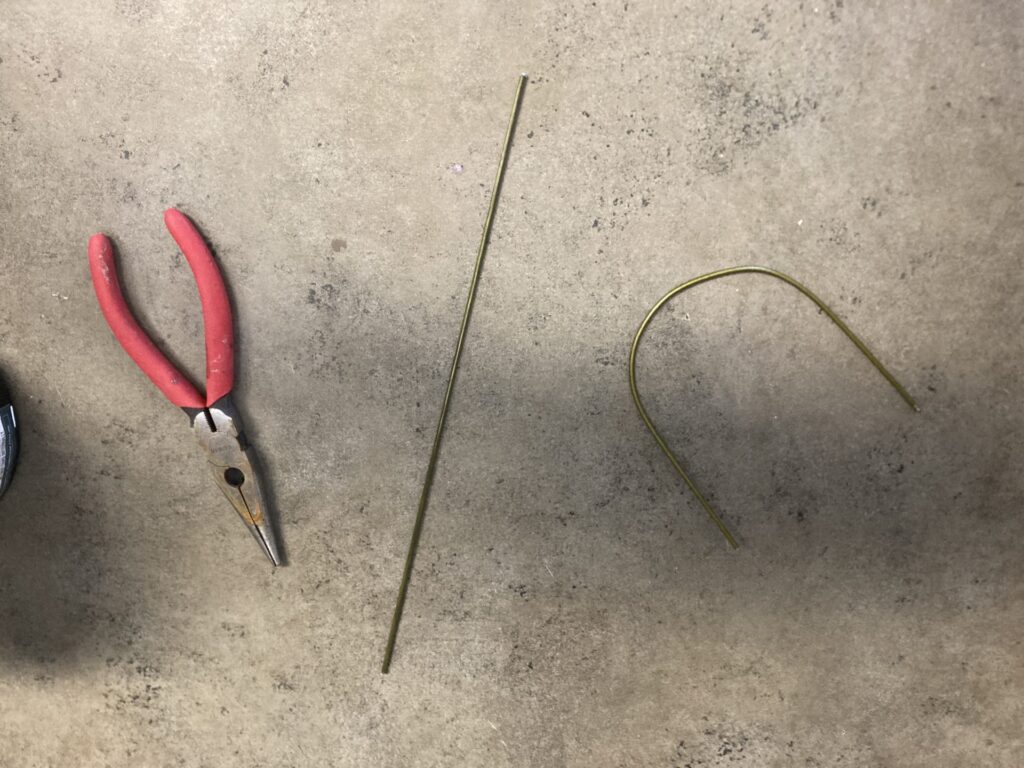
Step 5: Cut and Insert Wire for the Metal Stand
I used old metal hangers and just cut and formed the wire. I couldn’t find my wire cutters, but the sharp edge of my needle nose pliers worked just fine! I did mine about 11″ in length. But you can adjust yours depending on the size of the bookend you cut out.
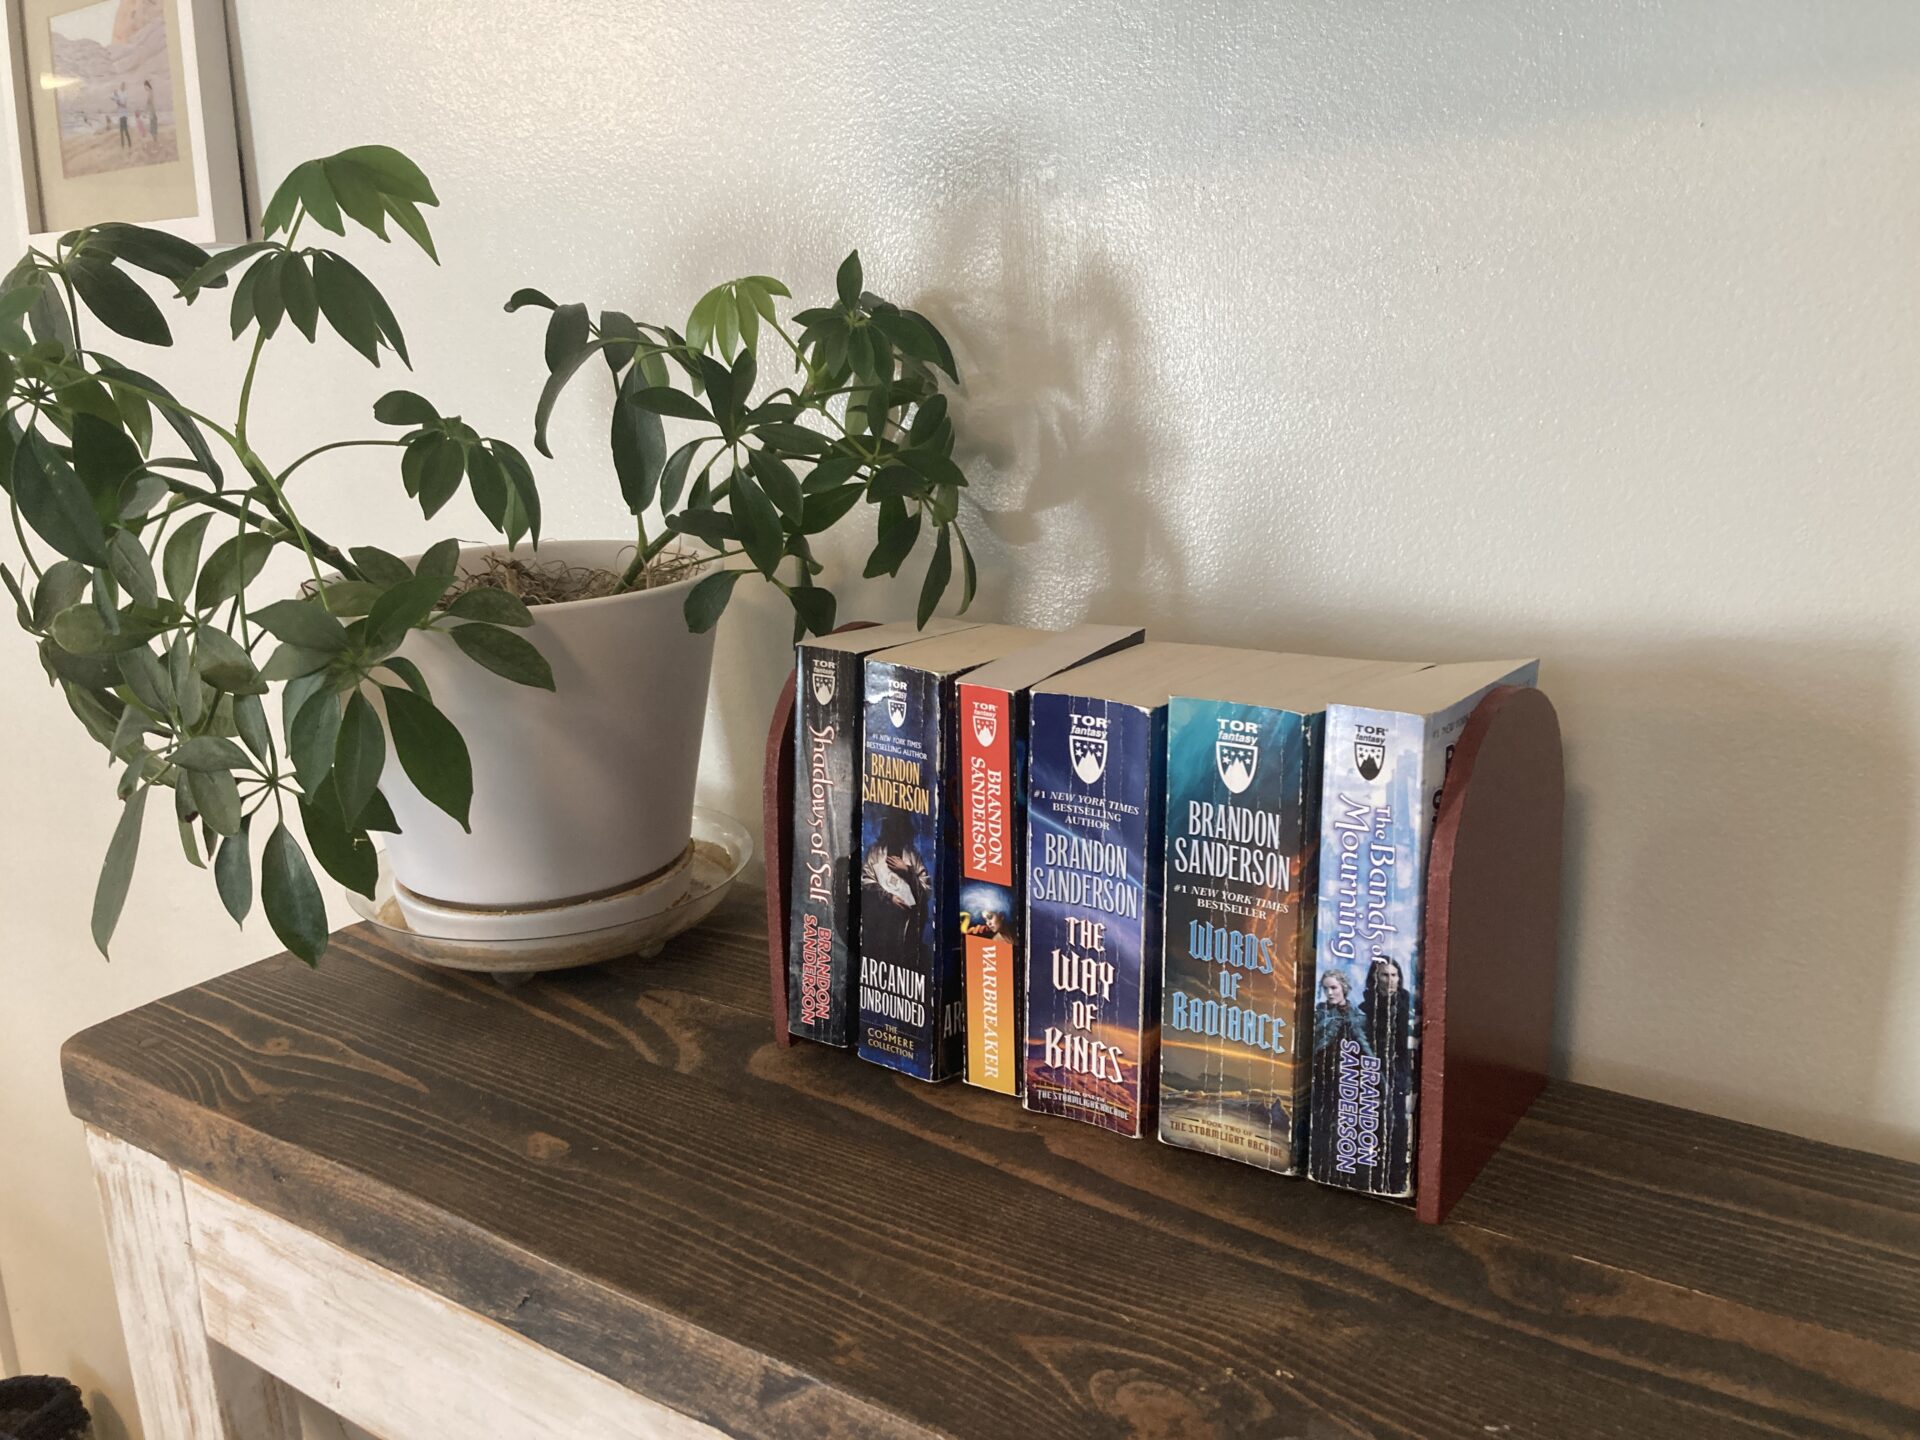
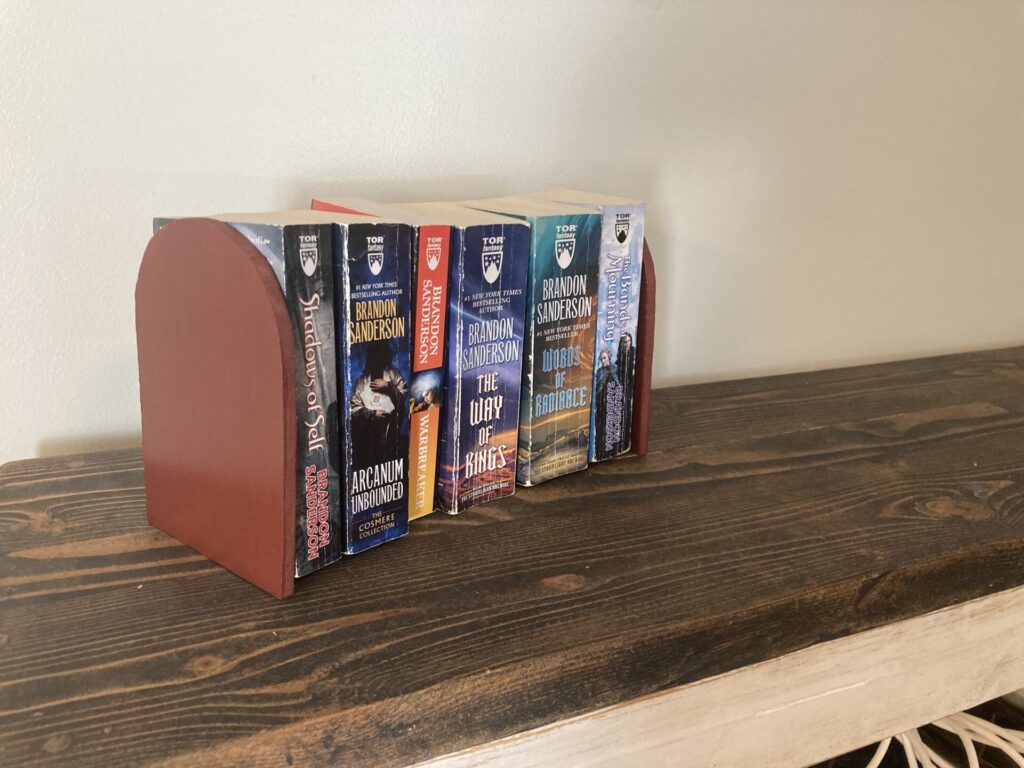
Add Your Books to Your New DIY Bookends and Enjoy!
I love the minimal, modern look of these bookends! They were so easy and totally cheap to make! Plus, doing it with my kids was an added bonus.
Any Brandon Sanderson fans out there? I’m still experimenting with how I want to decorate with these. But so far, I am loving the look!

My daughter’s bookends turned out so cute too! She loved getting to “decorate” her room with them.
These DIY Bookends are the perfect project to get your kids involved in! Let them paint and decorate their own then put their books on it.
You could also make these DIY Bookends as a gift to a friend or family member who loves books. Or you can use them in your own home to add a little style and function to your shelves.
Whatever you end up doing with these shelves, I want to hear about it! Leave it in the comments!
Want to Save or Share This Guide for DIY Bookends? Pin it on Pinterest!