This post may contain affiliate links. I try to make my posts as helpful as possible and have great products easy for you to access. The use of these links provides me a small commission at no cost to you. As an Amazon Associate, I earn from qualifying purchases.
Get the most out of your miter saw with this detailed beginner’s guide. Learn the basics and find tips for improving accuracy and precision.
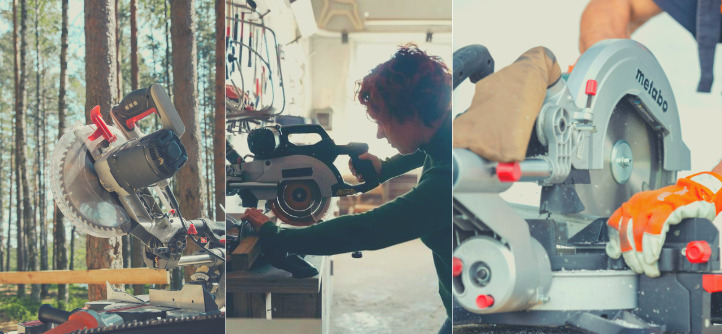
My miter saw might just be my favorite tool I own. I use it for almost all of my projects. I hope this miter saw beginner guide helps you to get the most of this amazing power tool.
Miter saws are versatile power tools that can be used to make precise cuts on a variety of materials, including wood, metal, and plastic. Whether you’re a DIY enthusiast or a professional contractor, a miter saw is an essential tool that can help you complete a wide range of projects.
This is the miter saw I have and absolutely love. But someday, I would love to own this Dewalt Miter Saw or this Bosch Miter Saw looks incredible too!
In this post, you will find:
- Types of Miter Saws
- Blade Size and Types
- Miter Saw Cutting Capacity
- 10 Inch vs 12 Inch Miter Saw
- Safety Precautions When Using a Miter Saw
- The Basics of Using a Miter Saw
- How Do I Make Precise Cuts with My Miter Saw?
- Can You Use a Miter Saw to Cut Metal?
- Can You Cut Tile With a Miter Saw?
- How Do I Change a Miter Saw Blade?
- What is the Best Blade for My Miter Saw?
- Chop Saw Vs Miter Saw
- How Do I Make Sure My Miter Saw Blade is Square?
- Miter Saw Maintenance
Types of Miter Saws
There are three main types of miter saws: standard, compound, and sliding compound.
- A standard miter saw is the simplest type and can only make straight cuts at different angles.
- A compound miter saw can make both angled cuts and bevel cuts (cuts that tilt the blade at an angle), making it more versatile than a standard miter saw.
- A sliding compound miter saw has all the features of a compound miter saw but also has a sliding mechanism that allows you to cut wider boards.
Miter Saw Blade Size and Types
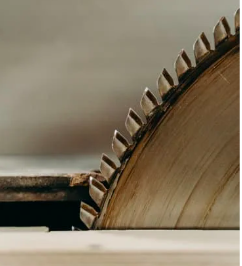
The size of a miter saw’s blade is an important consideration when choosing a saw. Most miter saws have blades ranging from 8 to 12 inches in diameter. A larger blade can make deeper cuts, but it also requires a larger motor and can be more expensive. The type of blade you choose will depend on the material you’re cutting. For example, a blade with fine teeth is best for cutting hardwood, while a blade with coarse teeth is better for cutting softwood.
Miter Saw Cutting Capacity
A miter saw’s cutting capacity refers to the size of the material it can cut. The cutting capacity of a standard miter saw is limited to the width of the blade, while a sliding compound miter saw can cut wider boards. Before buying a miter saw, consider the size of the materials you’ll be cutting and choose a saw with a cutting capacity that matches your needs.
10 Inch vs 12 Inch Miter Saw
Here’s a summary comparing 10 Inch vs 12 Inch Miter Saws:
- Blade Size:
- The primary difference between a 10-inch and 12-inch miter saw is the size of the blade. A 10-inch miter saw uses a 10-inch diameter blade, while a 12-inch miter saw uses a 12-inch diameter blade.
- The blade size directly affects the maximum cutting capacity of the saw. A larger blade allows for cutting wider and thicker materials.
- Cutting Capacity:
- Due to its larger blade, a 12-inch miter saw generally has a greater cutting capacity compared to a 10-inch miter saw. It can handle larger stock, such as wider boards or thicker timbers.
- A 10-inch miter saw typically offers a maximum crosscut capacity of around 5-6 inches, while a 12-inch miter saw can typically handle crosscuts up to 7-8 inches.
- Power and Speed:
- In general, 12-inch miter saws tend to have more powerful motors compared to 10-inch models. This increased power enables them to cut through denser or harder materials with less effort.
- The larger blade on a 12-inch miter saw also rotates at a slower speed compared to a 10-inch miter saw. This slower rotation can be advantageous when working with certain materials that require a slower cutting speed for better precision.
- Portability:
- 10-inch miter saws are generally more compact and lighter than 12-inch models, making them easier to transport and maneuver on job sites.
- The smaller size and weight of 10-inch miter saws also make them suitable for DIY enthusiasts or hobbyists who may not require the larger cutting capacity of a 12-inch saw.
- Price:
- Typically, 10-inch miter saws are more affordable compared to their 12-inch counterparts. The larger blade size and increased power of 12-inch miter saws often contribute to a higher price tag.
Choosing between a 10 Inch vs 12 Inch Miter Saw depends on your specific needs. If you primarily work with smaller materials and require portability, a 10-inch saw may be sufficient. However, if you frequently work with larger or thicker materials and need greater cutting capacity and power, a 12-inch miter saw would be a better choice, albeit at a higher cost.
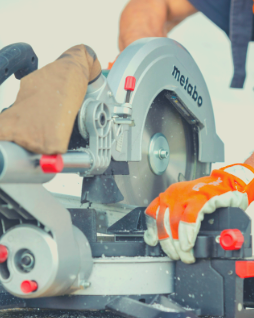
Safety Precautions
As with any power tool, safety is of utmost importance when using a miter saw. Always wear eye and ear protection, as well as gloves and a dust mask if necessary.
Keep the blade guard in place at all times and never reach around or over the blade.
Use clamps to secure the material you’re cutting and avoid cutting small pieces of material that could become projectiles. That’s one I learned the hard way… Luckily no one was hurt, but I tried to cut a small piece, and wow… those blades can really make a piece of wood fly. Not worth the risk.

The Basics of Using a Miter Saw
Before using a miter saw, make sure it’s properly set up and adjusted. Check that the blade is straight and that the angle and bevel settings are accurate.
To make a cut, place the material on the saw’s base and adjust the angle and bevel settings as needed.
Turn on the saw, let the blade come to full speed and slowly lower the blade onto the material, making sure to keep your hands clear of the blade. Once the cut is complete, release the trigger and wait for the blade to stop spinning before lifting it back up.
How Do I Make Precise Cuts With a Miter Saw?
To make precise cuts with a miter saw, here are some tips you can follow:

Choose the Right Blade: Choose a blade that is suitable for the material you are cutting. A blade with fine teeth is best for cutting hardwood, while a blade with coarse teeth is better for cutting softwood. Use a blade with the appropriate number of teeth for the thickness of the material.
Clamp the Material: Use clamps to secure the material you are cutting to the saw’s base. This will ensure that the material does not move while you are cutting. Most miter saws have some form of built-in clamps.
Keep Blade Width In Mind: the thickness of your blade is going to remove part of your wood. It doesn’t seem like much, but not accounting for blade thickness can really impact the precision of your cuts. I like to put a small “x” on the side of my mark that I am discarding. That way I know when I am lowering my blade, I want my blade edge to be on the discard side.
Use the Laser Guide: Many miter saws come with a laser guide that helps you line up the blade with the cutting line. Use the laser guide to line up the blade with the cutting line to make sure that the cut is accurate.
Wait Until Blade is at Full Speed: Turn on the saw and wait for the blade to reach full speed before starting the cut.
Make Sure Your Blade is Square: check out this portion of the post for tips on making sure your blade is square.
Can You Use a Miter Saw to Cut Metal?
Can You Use a Miter Saw to Cut Metal? Cutting metal with a miter saw can be a bit different than cutting wood or other materials. Here are the steps you can follow to cut metal with a miter saw:
- Choose the Right Blade: Select a blade that is specifically designed for cutting metal. A blade with carbide-tipped teeth is recommended for cutting metal.
- Set the Blade Angle: Adjust the blade angle to the desired angle for the cut. Make sure the blade is square to the material before starting the cut.
- Secure the Metal: Use clamps to secure the metal you are cutting to the saw’s base. This will help prevent the metal from shifting or moving during the cutting process.
4. Turn on the Saw: Turn on the miter saw and wait for the blade to reach full speed before starting the cut.
5. Make the Cut: Slowly lower the blade onto the metal and cut through the material in a smooth and steady motion, being careful not to force the blade or move the metal. Keep your hands and fingers away from the blade.
6. Let the Blade Cool: Metal can heat up quickly during cutting, so it is important to let the blade cool down between cuts. This will help prevent the blade from overheating and becoming damaged.
7. Clean Up the Metal: Once the cut is complete, use a deburring tool to smooth out any rough edges or burrs on the metal.
By following these steps, you can safely and effectively cut metal with a miter saw. However, it’s important to note that cutting metal with a miter saw can produce sparks and debris, so always wear safety gear including safety glasses, gloves, and a dust mask.
Can You Cut Tile With a Miter Saw
While technically you could use a miter saw to cut tile, it is not ideal or safe. Miter saws are not equipped with the necessary features or blade types to cut through tile effectively and safely.
The more ideal option would be to use a tile saw or a wet saw. Tile saws utilize a diamond-edged blade and a water-cooling system to prevent overheating and maintain the integrity of the tile while cutting. These saws provide the necessary precision and control needed for cutting through ceramic, porcelain, or stone tiles.
Using the right tool for the job will ensure that you achieve accurate and clean cuts while minimizing the risk of damaging the tile or compromising your safety.
How Do I Change a Miter Saw Blade?
Follow these beginner-friendly steps to change your miter saw blade.
- Unplug the Miter Saw: Before changing the blade, make sure the miter saw is unplugged from the power source to prevent any accidental start-ups.
- Raise the Blade Guard: Lift up the blade guard and secure it in the up position. This will provide you with access to the blade.
- Loosen the Blade Bolt: Use a wrench to loosen the bolt that secures the blade to the saw’s arbor. This bolt is usually located in the center of the blade.
- Remove the Blade: Carefully remove the old blade from the saw by pulling it off the arbor.
- Install the New Blade: Place the new blade onto the arbor and make sure the blade teeth are facing in the right direction. The blade teeth should point downward on a miter saw. Tighten the blade bolt with a wrench.
- Lower the Blade Guard: Release the blade guard and lower it back down into its original position.
- Test the Saw: After changing the blade, plug in the miter saw and test it by making a few test cuts on a scrap piece of material. Make sure the blade is aligned properly and that it is cutting smoothly.
This youtube video is a great visual of how to change out your saw blade.
What is the Best Blade for My Miter Saw?
What is the Best Blade for My Miter Saw? When looking for miter saw blades, consider popular and reputable brands such as Freud, Diablo, Forrest, Irwin, or DeWalt. These brands are known for producing high-quality blades suitable for miter saws.
I personally use Diablo blades and have loved them! I love that I can have a high-quality blade on my middle-of-the-road tools (Ryobi).
Chop Saw Vs Miter Saw
There are a few small differences when it comes to Chop Saws Vs Miter Saws. Since we have already covered the basics of a miter saw, here is a summary of the primary uses of a Chop Saw Vs Miter Saw:
Chop Saw:
- Designed for straight cuts in hard materials like metal.
- Uses abrasive discs or carbide-tipped blades.
- Primarily used for 90-degree cuts, not suitable for angled cuts.
- Less versatile than miter saws, commonly used in construction and metalworking.
- Larger and heavier, typically stationary tools.
Miter Saw:
- Designed for precise crosscuts, miter cuts, and bevel cuts in wood and some other materials.
- Uses circular saw blades with carbide teeth.
- Capable of making angled cuts and compound cuts.
- Comes in various sizes, including portable options for job sites.
How Do I Make Sure My Blade is Square?
Ensuring that your miter saw blade is square is essential for making accurate and precise cuts. Here are the steps to follow to make sure your miter saw blade is square:
- Check the Blade for Damage: First, check the blade for any damage or warping that may affect its squareness. If the blade is damaged or warped, it should be replaced before making any cuts.
- Adjust the Miter Angle: Set the miter angle to 0 degrees, which is the default setting for a square cut. This will help ensure that the blade is square to the material.
- Use a Square: Place a square against the fence of the miter saw and the blade. Make sure the square is flush against both the fence and the blade, and that the blade is perfectly perpendicular to the fence. If it’s not, you will need to adjust the saw to make it square.
- Adjust the Saw: If the blade is not square to the fence, adjust the saw until it is. Many miter saws have an adjustment knob or screw that can be used to fine-tune the angle of the blade. Refer to the saw’s instruction manual for specific instructions on how to adjust the saw.
- Recheck: After making any adjustments, recheck the blade’s squareness with the square to ensure it’s perfectly perpendicular to the fence.
By following these steps, you can ensure that your miter saw blade is square and ready for making accurate and precise cuts. It’s important to note that you should check the blade’s squareness before every use to ensure that it’s properly aligned and to avoid making inaccurate cuts.
Miter Saw Maintenance
Proper maintenance of your miter saw is essential to ensure that it performs at its best and remains in good working condition. Here are some basic maintenance tasks you should perform on your miter saw:
- Clean the Saw: Regularly clean your miter saw to remove any sawdust, debris, or other materials that may have accumulated on it. Use a clean cloth to wipe down the saw and a brush to remove any debris from hard-to-reach areas.
- Lubricate the Saw: Your miter saw may have moving parts that need to be lubricated regularly to keep them operating smoothly. Refer to the saw’s instruction manual for specific lubrication requirements.
- Check the Blade: Inspect the saw blade regularly for any damage or wear. Replace the blade if it’s dull or damaged.
- Check the Electrical Connections: Check the electrical connections on your miter saw to make sure they’re tight and secure. Loose connections can cause the saw to malfunction.
- Check the Fence: Make sure the fence on your miter saw is square and properly aligned. If it’s not, adjust it according to the manufacturer’s instructions.
- Check the Dust Collection System: If your miter saw has a dust collection system, make sure it’s working properly. Clean out the dust collection bag or canister as needed.
- Store the Saw Properly: When not in use, store your miter saw in a dry, protected area to prevent rust and damage.
Performing these maintenance tasks regularly can help prolong the life of your miter saw and ensure that it operates safely and effectively.
This is a great video showing how to clean your miter saw.
As you can see, a miter saw is a versatile tool that can help you complete a wide range of projects. A miter saw is a perfect tool for any DIY beginner. It opens the doors to a lot of fun project potential.
Do you have a miter saw? Any questions that I missed? Leave any miter saw beginner tips in the comments below!
Here are some of my favorite projects I’ve done with my miter saw.
Pin This Miter Saw Beginner Guide to Pinterest!