This post may contain affiliate links. I try to make my posts as helpful as possible and have great products easy for you to access. The use of these links provides me a small commission at no cost to you. As an Amazon Associate, I earn from qualifying purchases.
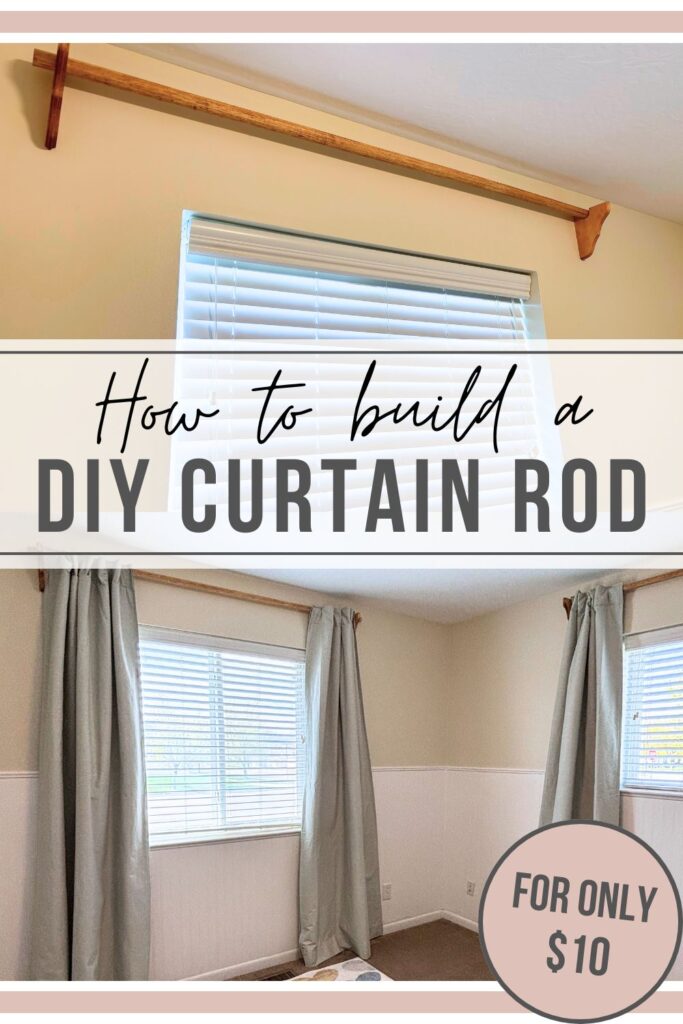
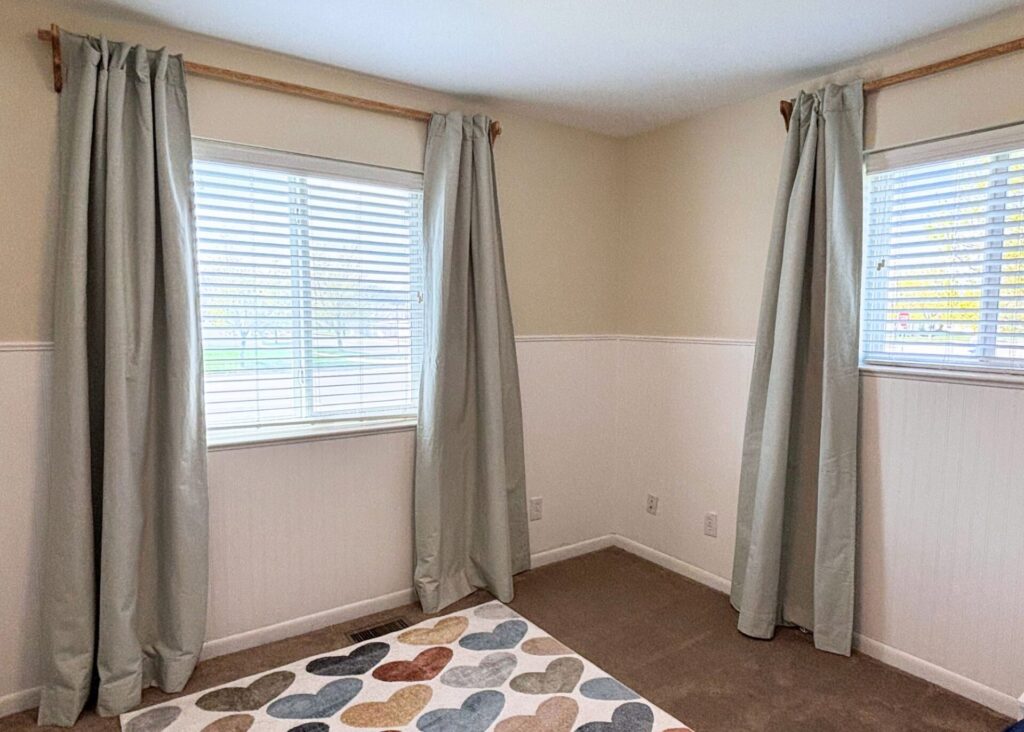
With a baby on the way, I knew I needed good black out curtains installed in the nursery. So for a quick weekend project I pulled together this DIY Curtain Rod for only $10! Plus I was able to perfectly customize it to fit my windows.
Learn how to make these DIY curtain rods, plus learn about my very favorite blackout curtains that ACTUALLY work. Plus get tips for how to hang blackout curtains.
In this Post You’ll Find:
- Supplies I Used
- Tools I Used
- Steps to Make a DIY Curtain Rod
- My Favorite Blackout Curtains
- How to Hang Blackout Curtains
Supplies I Used
Supplies I used but had on hand: sand paper, stain, screws, and drywall anchors
Tools I Used
- Jig Saw
- Miter Saw
- Impact driver (or drill) for installation
Steps to Make a DIY Curtain Rod
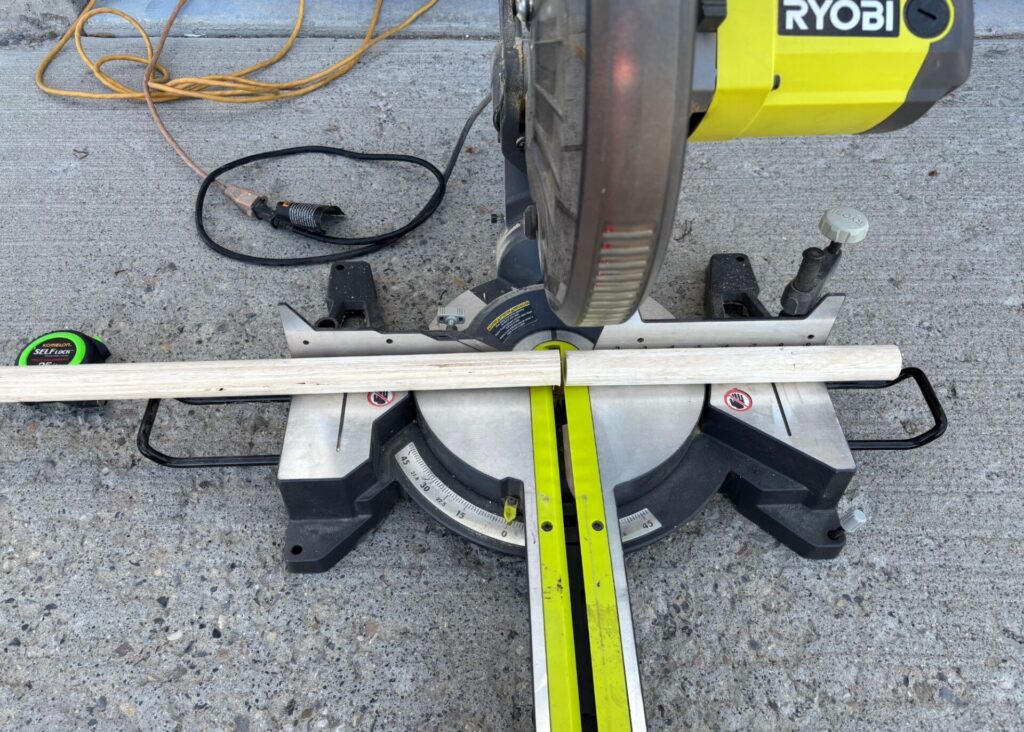
Step 1: Make Your Cuts
Using my Ryobi Miter Saw, I cut my rod to size. This cut could be made with a simple circular saw or jig saw if needed. But I LOVE my miter saw and highly recommend it to anyone wanting to get into DIY projects. Head here for tips on how to use a miter saw.
How do you know how long your curtain rod should be? Add roughly 12″ on each side of your window. So window width plus 24″.
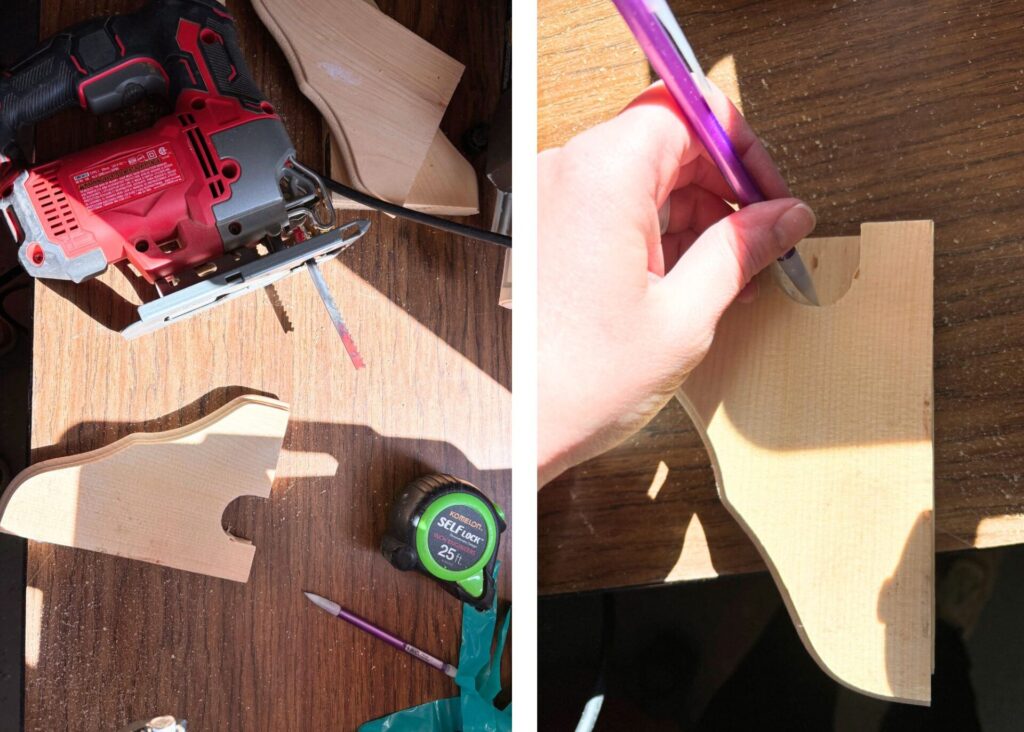
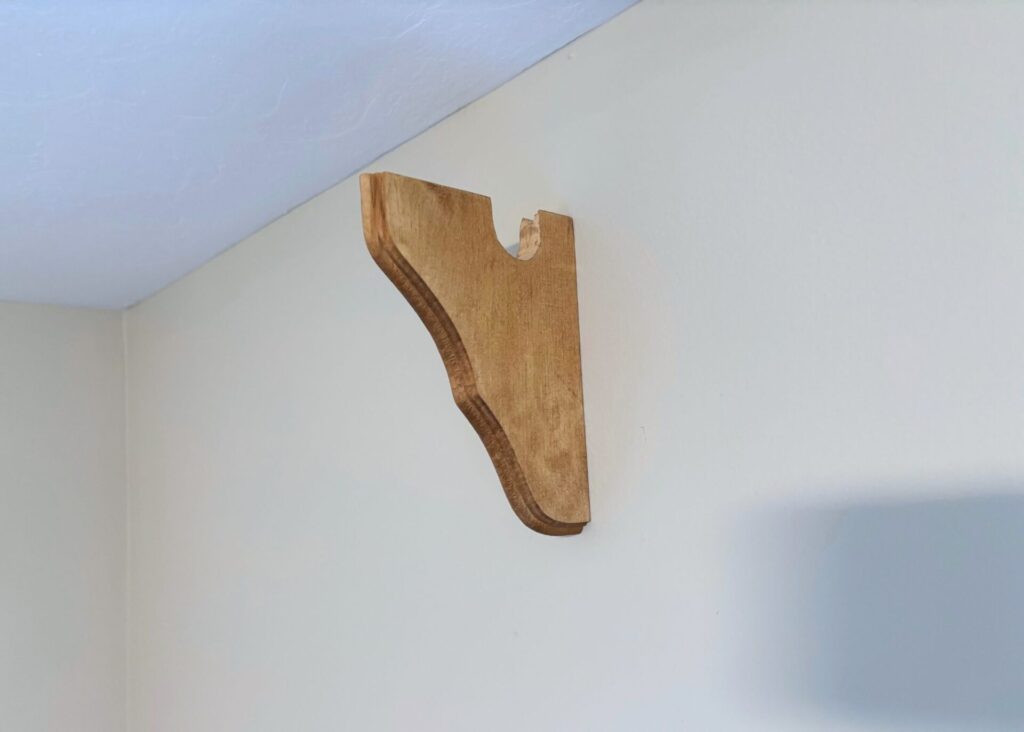
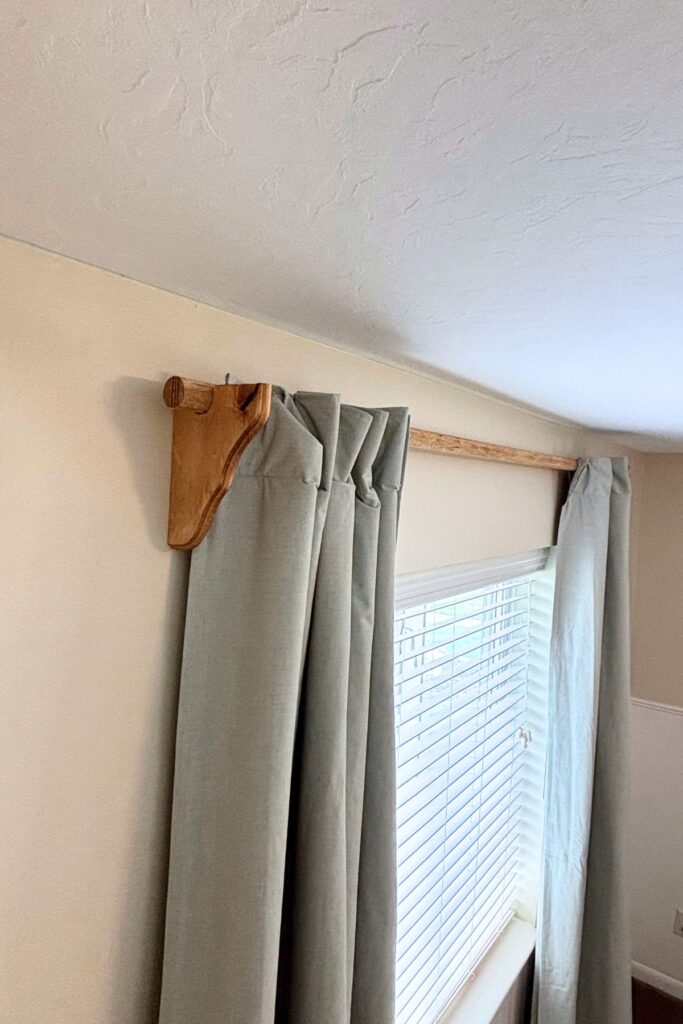
Using your rod, trace a line to cut a slot into your corbels. Since I’ll be using these as blackout curtains, I wanted the rod relatively close to the wall, so I set it back. If I wasn’t using these for black out curtains, I would have centered it on the corbel a little more.
I made this cut using my jig saw. A spade bit could also be useful here if you have the right size (mine were too small unfortunately). Once I cut one corbel, I used it to trace a line on the other corbel so they would be identical.
Here are some helpful tips on how to use a jig saw.
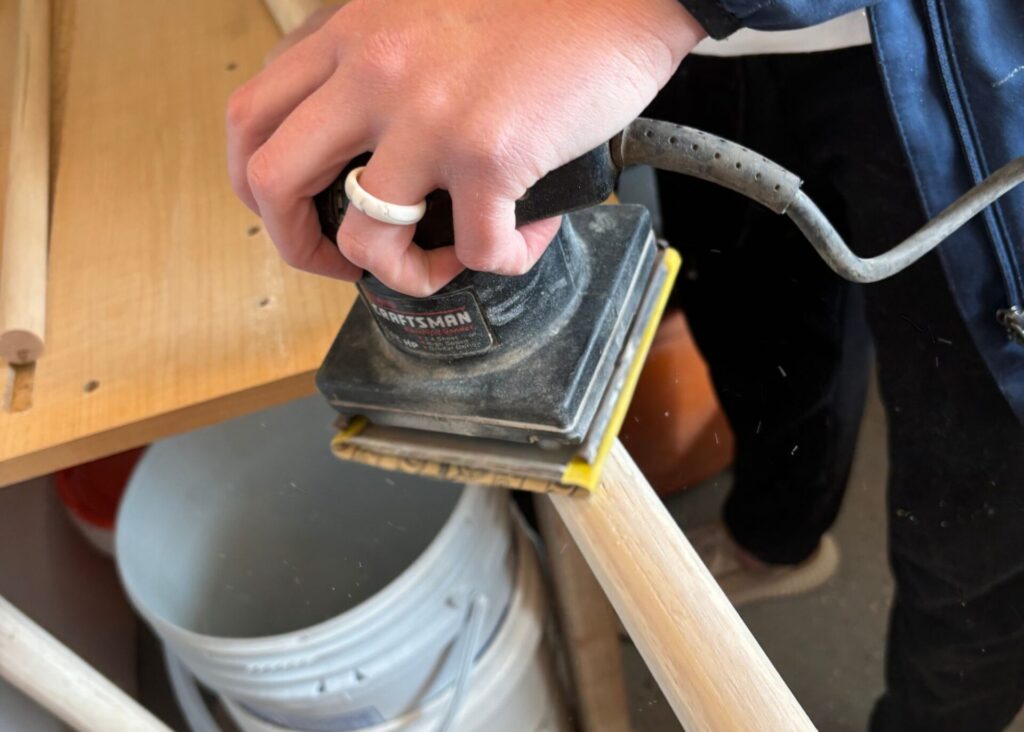
Step 2: Sand
Sanding is always a tempting one to skip, but don’t! It’s always worth it. I just went over my corbels and rod quickly with 220 grit sandpaper. There is a lot to know and learn about using sandpaper, if you’re a nerd like me and want to learn more, head to this guide on sand paper.
Step 3: Paint or Stain
I have been really loving wood look lately, so I decided to stain curtain rod and corbels. I feel like it adds a nice cozy warmth to a room to have some wood tone/texture. But painting is always a great option too!
I started by applying pre-stain, then followed up with Special Walnut wood stain.
Using pre-stain makes all the difference. Learn more about wood staining here.

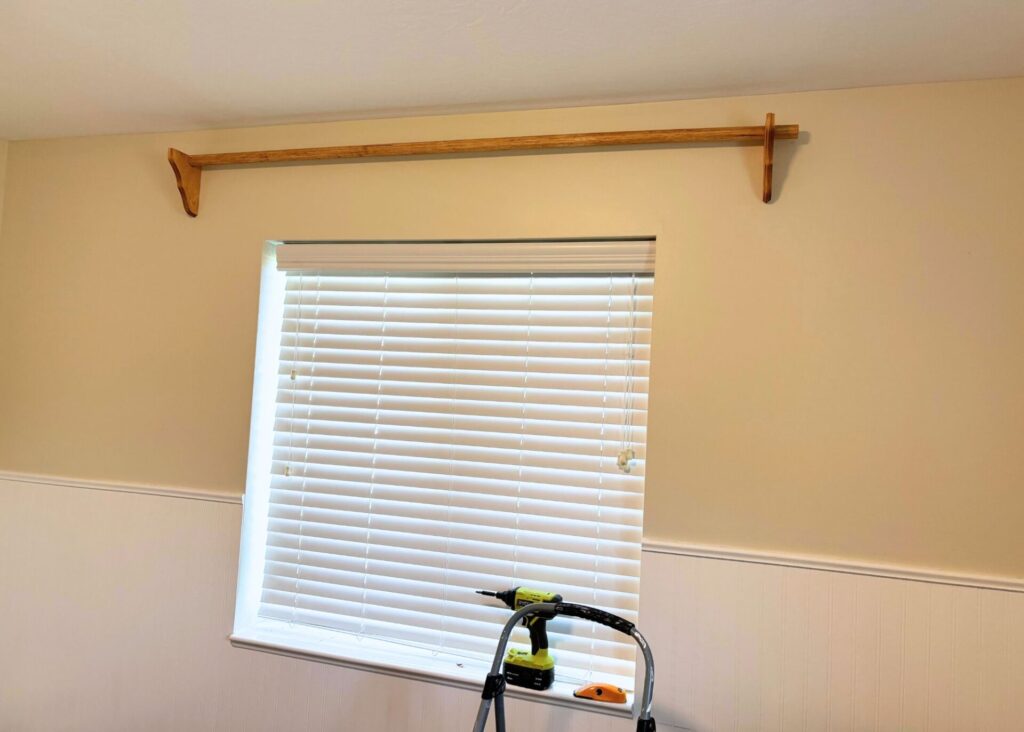
Step 4: Hang Up Your DIY Curtain Rod
Gather up your supplies to get your new curtain rod hung. You’ll want a measuring tape, stud finder, drill or impact driver, pencil, screws, and possibly drywall anchors (don’t settle for the cheap drywall anchors, they will just strip out. Make sure to get the good drywall anchors!).
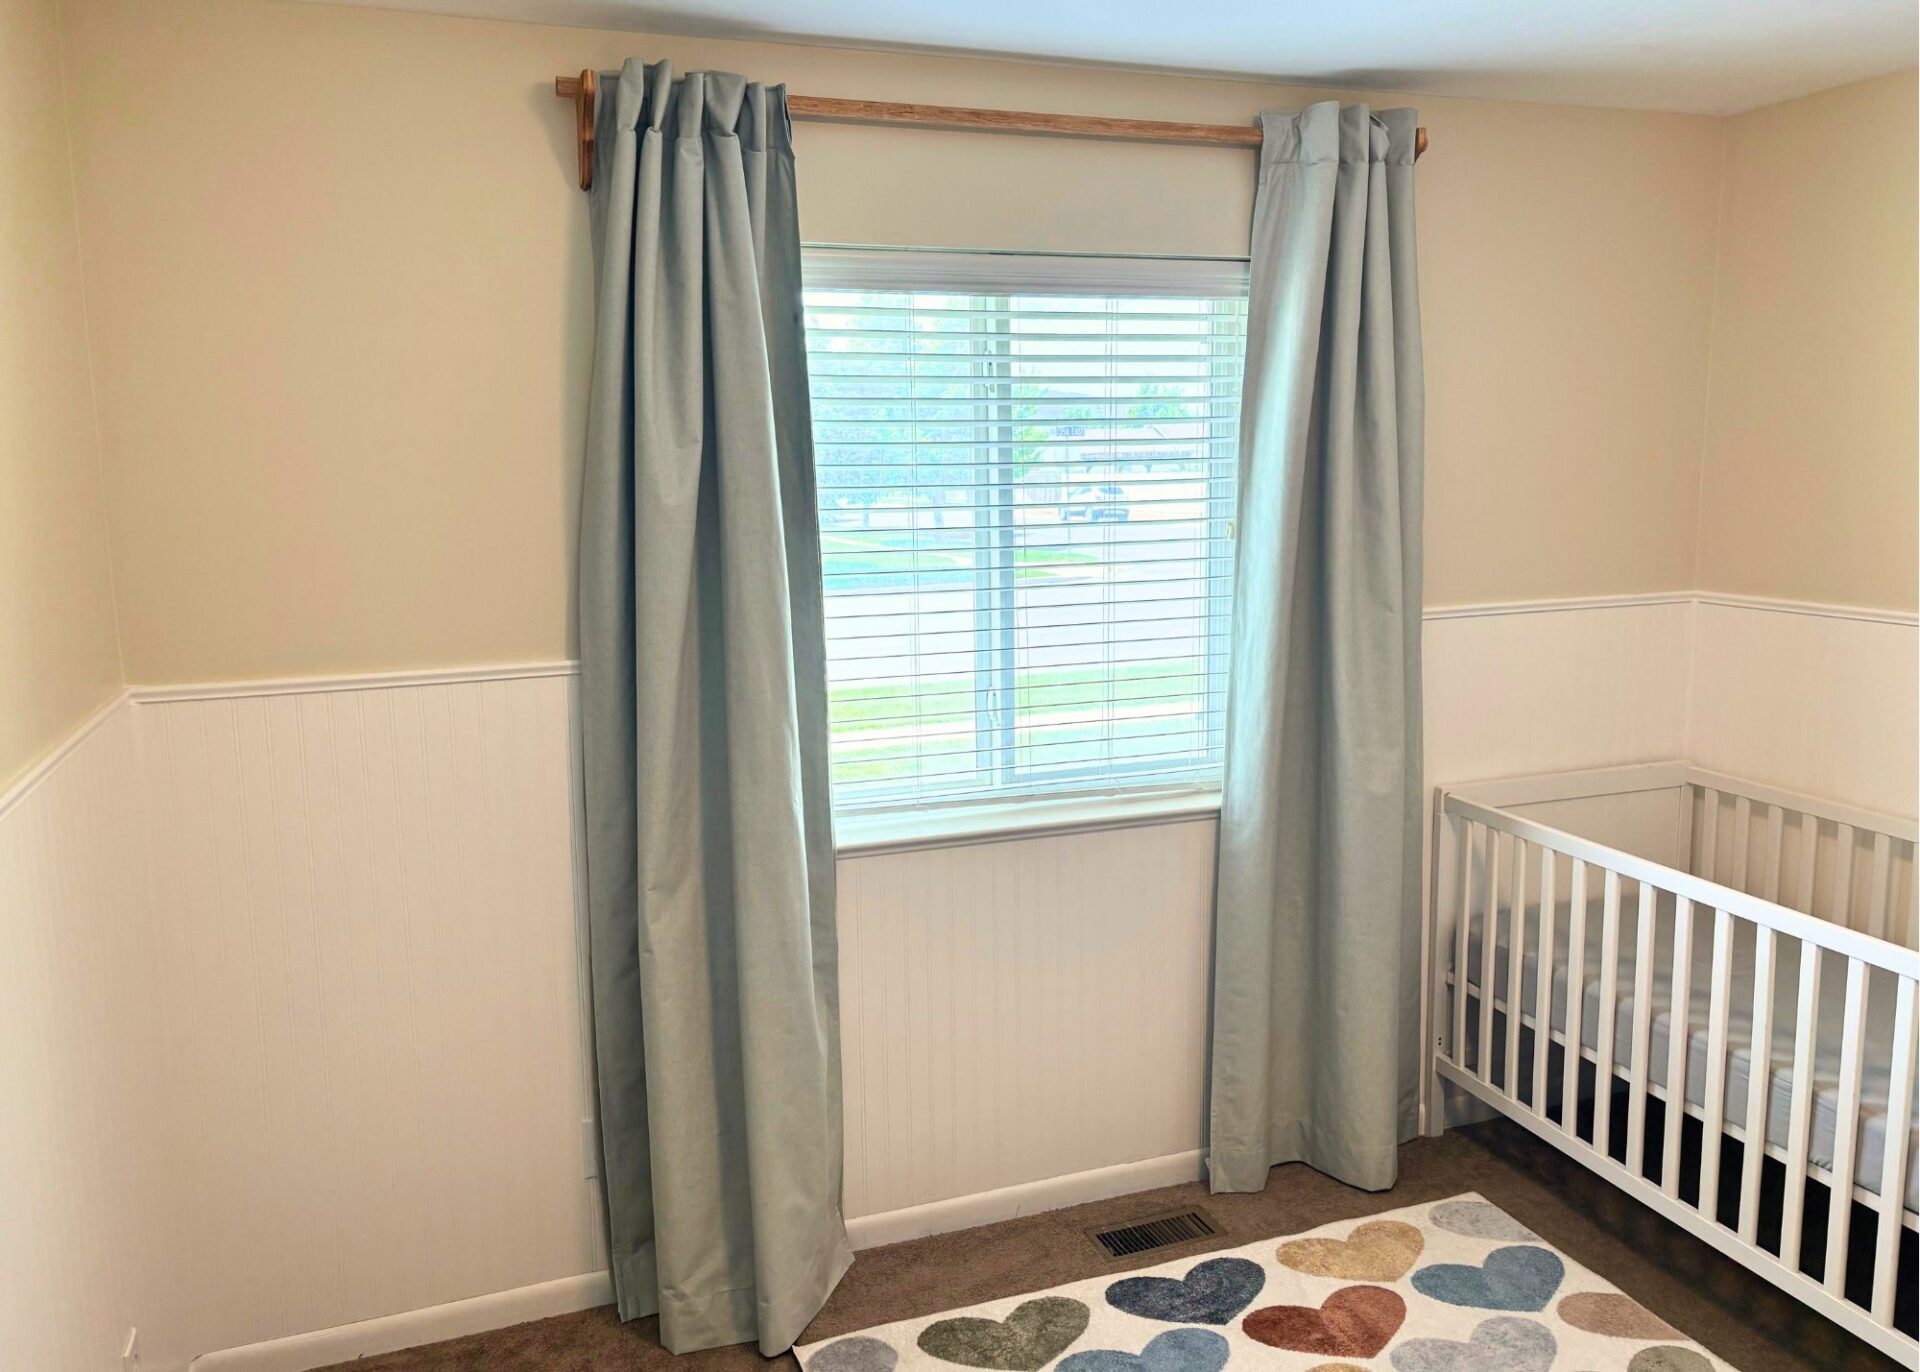
You’ll want your curtains to “kiss” the ground”. So start by measuring how long your curtain is and hang accordingly.
As mentioned previously, you’ll have an extra 12 inches (or so) in excess on each side of the window. I wanted roughly 2 inches of overhang, so I placed my corble about 10 inches out from the window.
Use your stud finder to see if if you’ll need an anchor or if a slight adjust on your placement would allow you to not use an anchor.

Each house will be different, but my corbels ended up being 5″ down from the ceiling and 10″ out from the window.
My Favorite Blackout Curtains
As a sleep deprived mom, I spent countless time in my kids room trying to achieve perfect blackout conditions. I tried so many products that claimed to be “blackout” but always let in some light. I ended up taping cardboard up, which I hated because it looked terrible and didn’t allow me to let in light during the day.
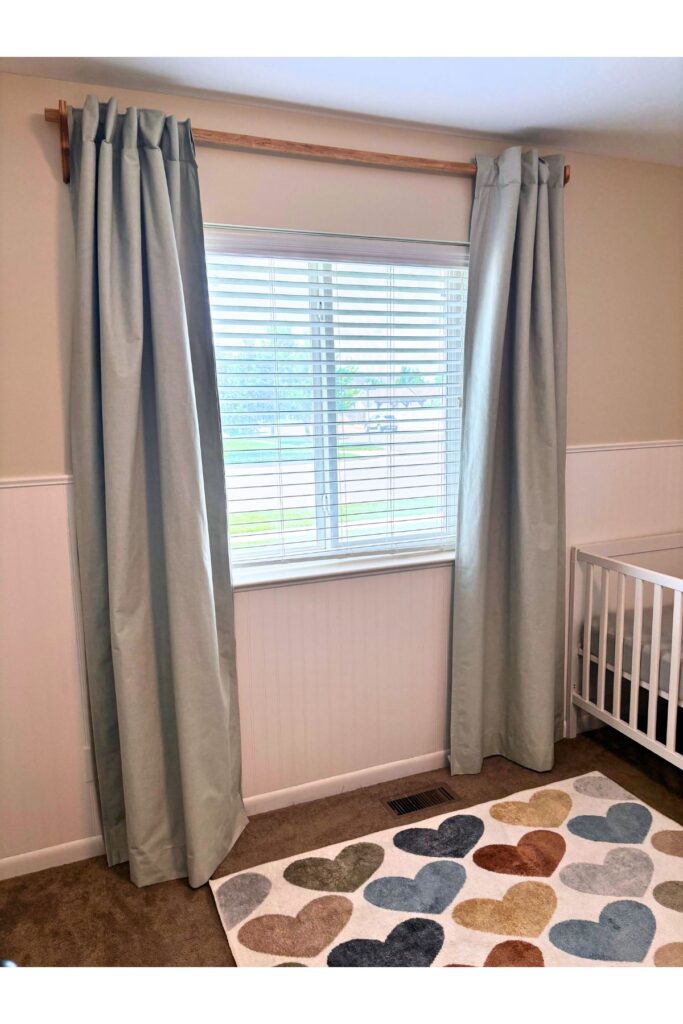
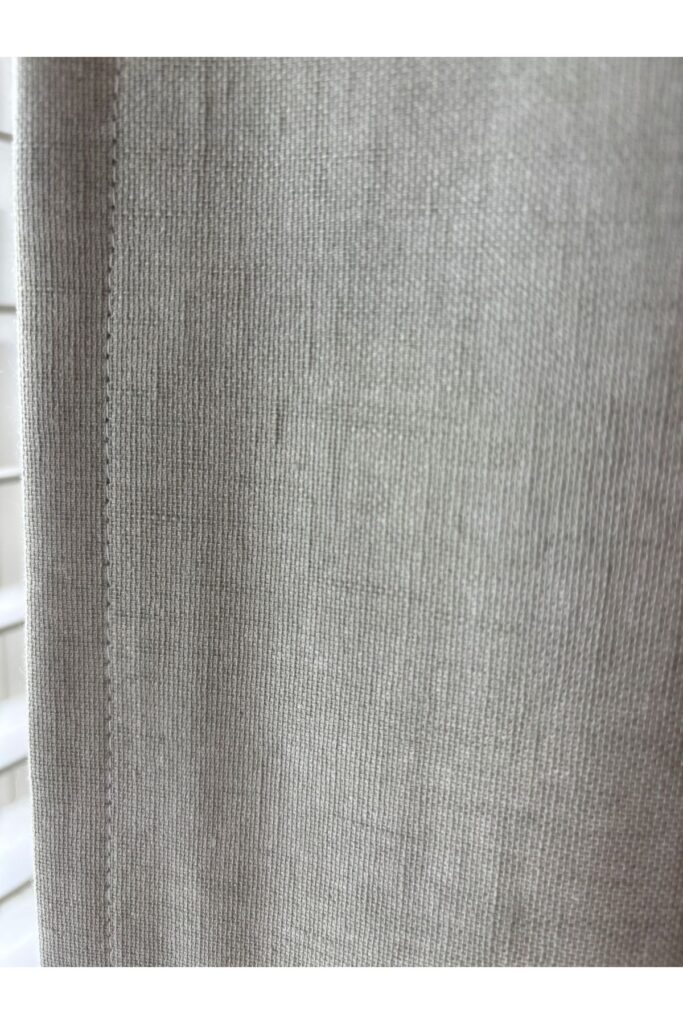
For this project I got blackout curtains from thehues.com, and I have been thrilled with the quality! I went with the Cronin Blackout Curtains in Sage Green. They are more costly than I would typically spend on curtains, but the quality definitely matches the price! I love how customizable their options are. They have literally every option you could think of when it comes to curtains and drapery.
Here’s a close up glimpse at the beautiful quality of these curtains!

How to Hang Blackout Curtains
Here are a few tried and tested tips for how to hang black out curtains for an optimal blackout effect.
- Go wide and high: Mount the rod at least 6–12 inches wider than the window frame and 4–6 inches above it. This helps block light leaking around the sides and top. Plus it makes your windows look bigger!
- Opt for curtains that are a few inches longer and wider than your actual window to help eliminate gaps.
- Make sure the curtains “kiss” the floor or puddle slightly — this prevents light sneaking underneath.
- Consider adding Velcro strips or Magnetic tape along the sides or back edges if light is still leaking in.
- If you don’t have black out curtains, or your curtains aren’t thick enough, consider layering a blackout roller shade behind your curtains.
Pin DIY Curtain Rod to Pinterest