This post may contain affiliate links. I try to make my posts as helpful as possible and have great products easy for you to access. The use of these links provides me a small commission at no cost to you. As an Amazon Associate, I earn from qualifying purchases.
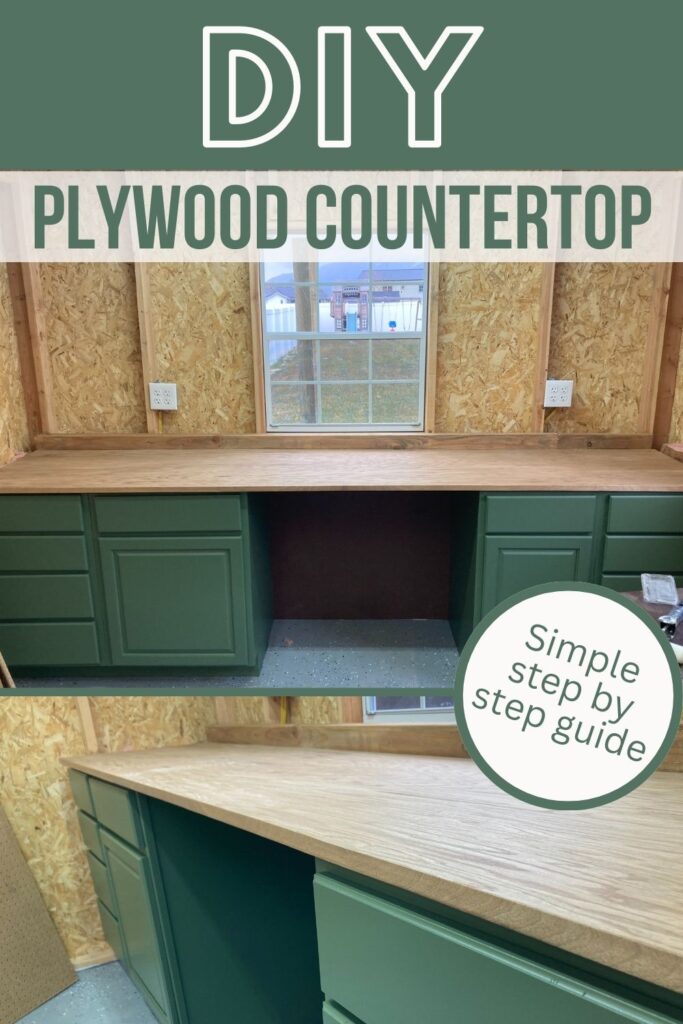
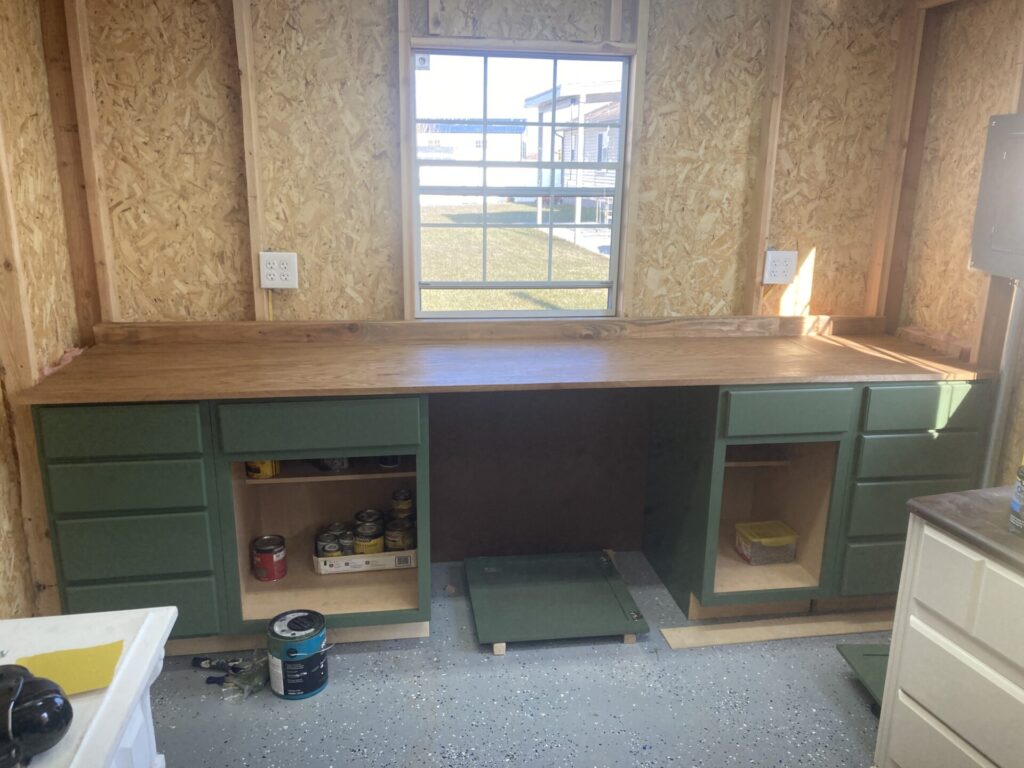
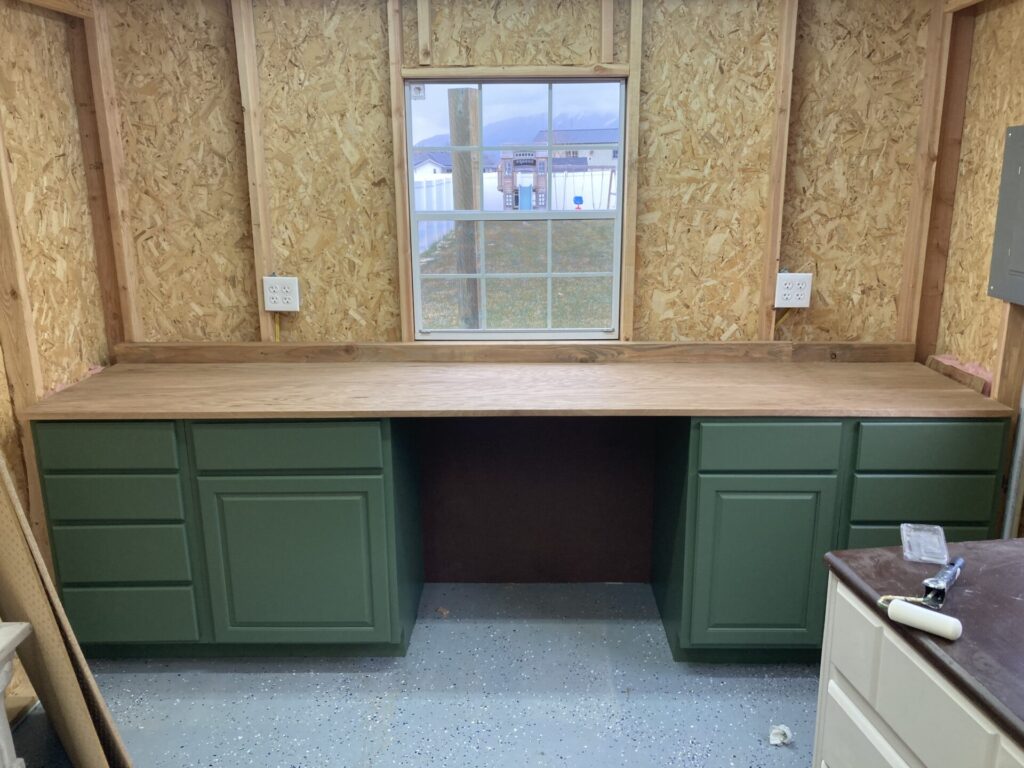
I am continuing my journey to convert my shed into a dream workshop. My next step is building a countertop over some cabinets for some good workspace. I ended up doing a simple DIY plywood countertop, and I LOVE how it turned out.
In this post, I’ll share the details of how I built my DIY Plywood Countertops. This countertop is obviously in a workshop, but you could use a wooden countertop in a variety of spaces!
Overview:
- Step 1: Cut Your Plywood to Size
- Step 2: Attach Plywood to Cabinets
- Step 3: Attach Edge Banding
- Step 4: Paint or Stain Your DIY Countertop
- Step 5: Seal DIY Plywood Countertop
How to Make a Countertop from Plywood
Supplies for DIY Plywood Countertops
Below is a list of the supplies you’ll need to make your DIY wooden countertops.
- 3/4″ thick plywood (I used this sheet of red oak)
- Wood filler (stainable if you plan to stain)
- Construction Adhesive
- Paint or Stain
- Top Coat (I used polyurethane)
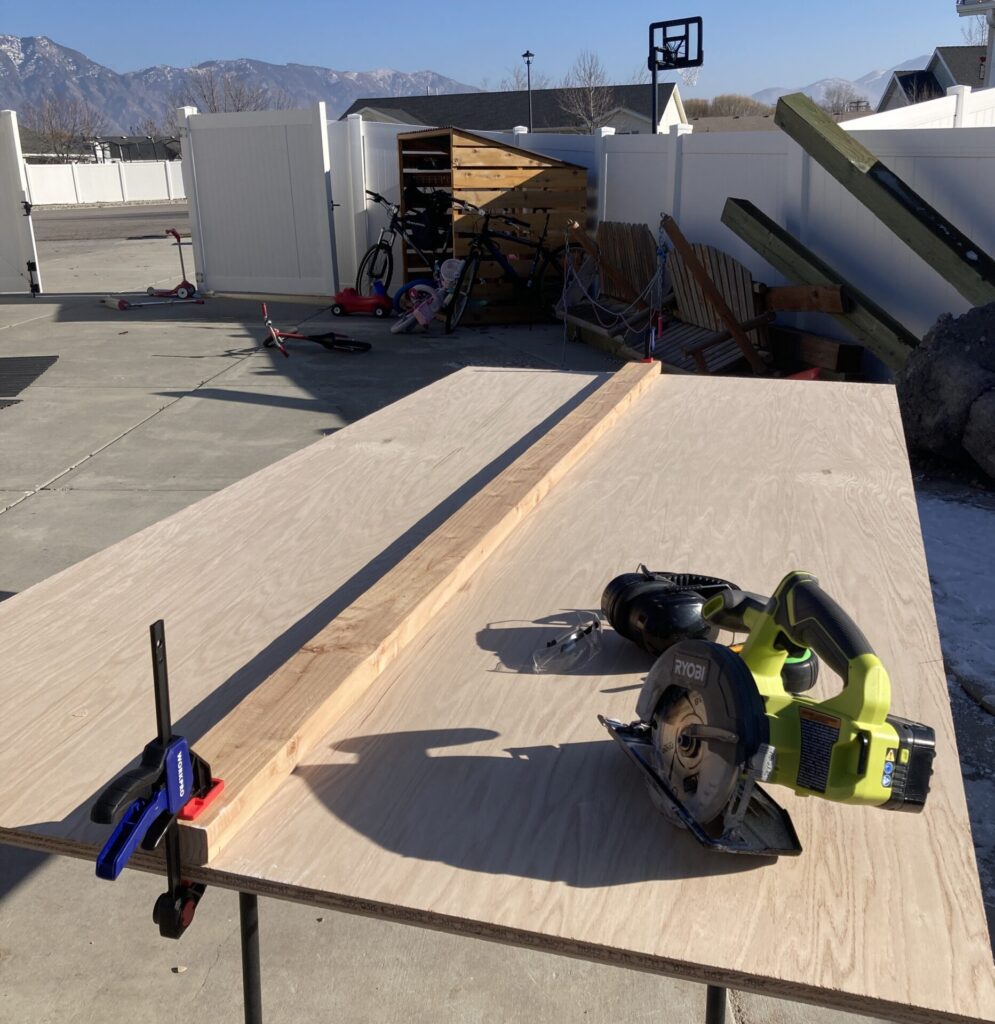
Step 1: Cut Your Plywood to Size
Measure your space to figure out the cut sizes you’ll need. Make sure to add at least 1-1/2 inches in depth for an overhang. You’ll also want to consider whether or not you’ll want a backsplash of any sort and how that will impact your measurements.
To cut the plywood, I used my circular saw. If you’re interested in learning more about circular saws and how to use them – head over to this post about circular saws.
I clamped a 2×4 to act as a guide and help me get a nice straight line. I used these clamps which I love so much and use for just about every project.
A table saw would probably be more ideal here. But sometimes you just have to make do with what you have! And my Ryobi Circular Saw worked like a charm!
Step 2: Attach Plywood to Cabinets
Now it’s time to attach your plywood countertops to your cabinets.
Start by making sure your surface is flat, clean, and level.
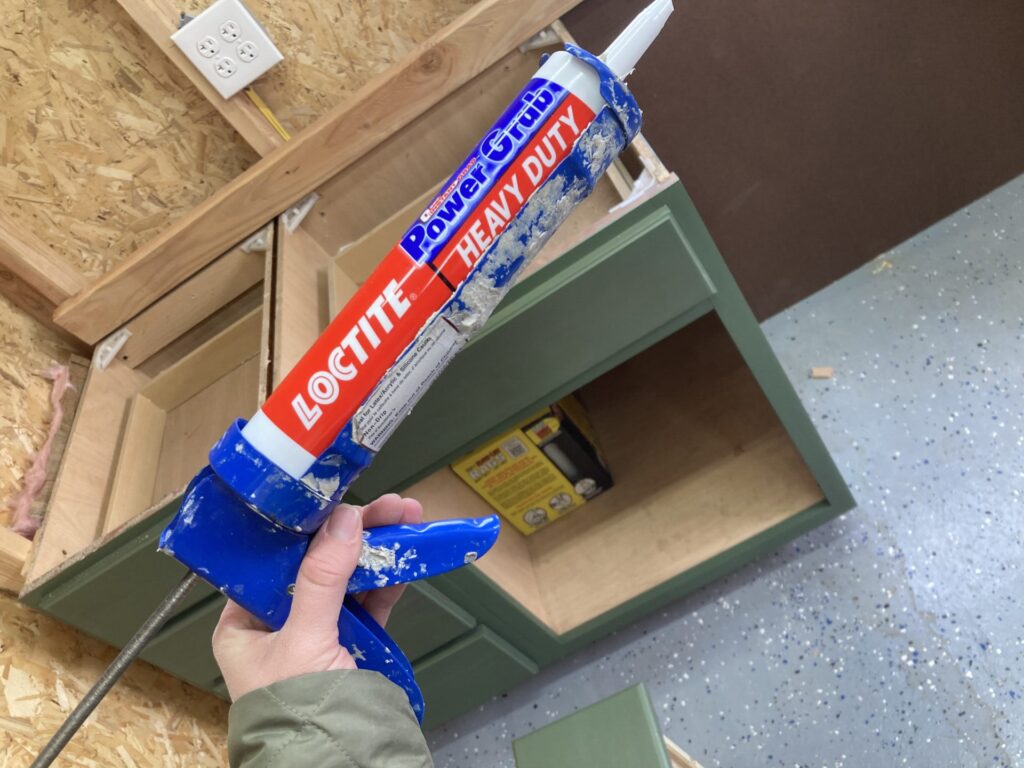
Apply a layer of construction adhesive along all the top edges of your cabinets. Then slide your plywood countertop into place. I used Heavy Duty Loctite Construction Adhesive.
From underneath the cabinets, screw up through the cabinet frame and into the bottom of your countertop.
Make sure the screws you use are the appropriate length. You don’t want your screw breaking the surface up through the top of your counter.
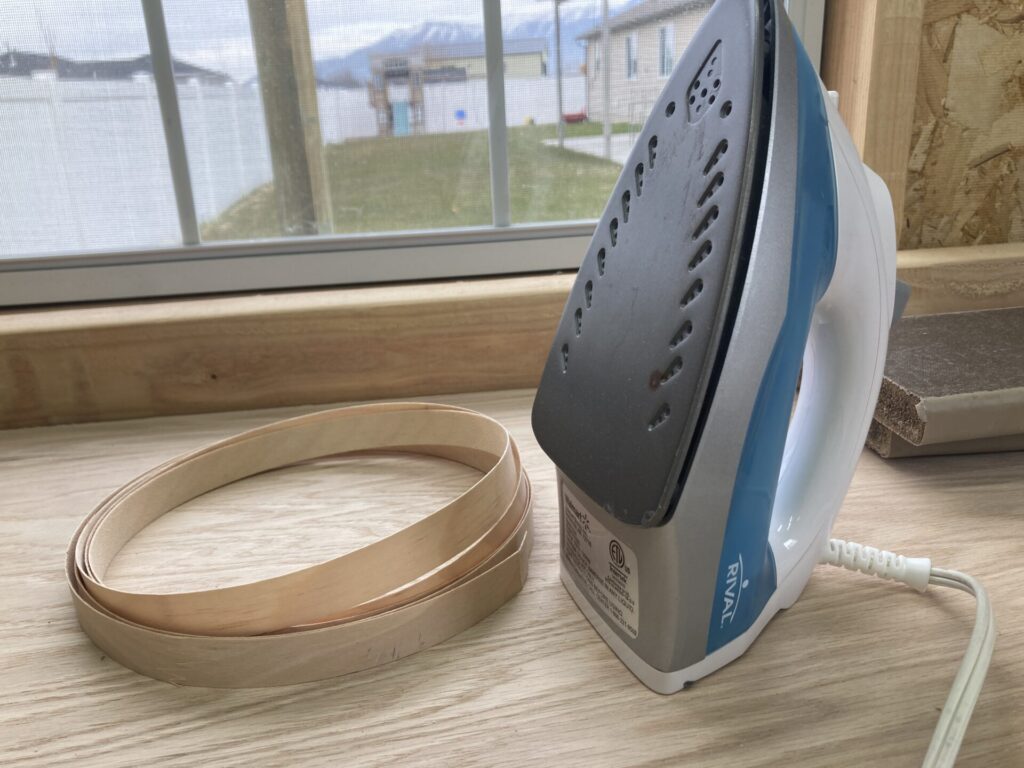
Step 3: Attach Edge Banding
Plywood is made of several thin sheets glued together, so the surface looks great but the edges aren’t so pretty.
There are a couple of options to deal with the edge.
The first option, which I used, is to use edge banding.
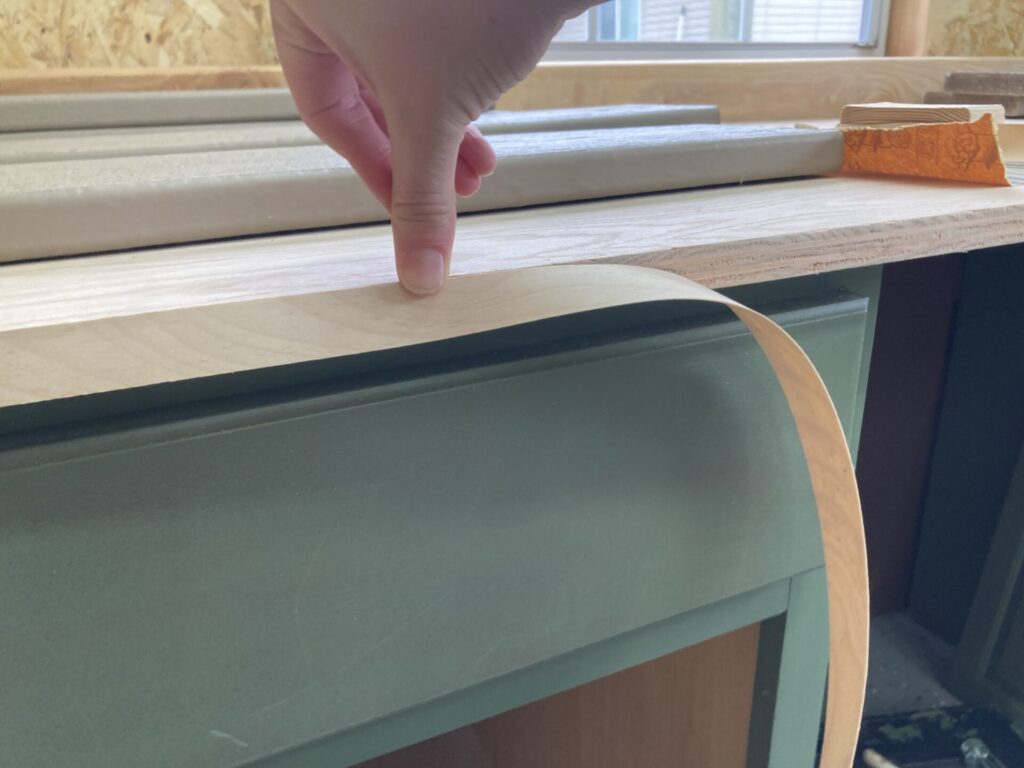
Edge banding is a thin stip of wood with adhesive on the back. You use an iron to heat it up and iron it on. You can purchase edge banding in wood or white PVC depending on your project. For this plywood countertop, I used wood because it is stainable, so I can make it match the rest of the counter.
The other option is to take a 1×2 board and attach it perpendicular to the front edge of the plywood counter. This is a cool option to give the counter a thicker look without the cost of thicker wood.
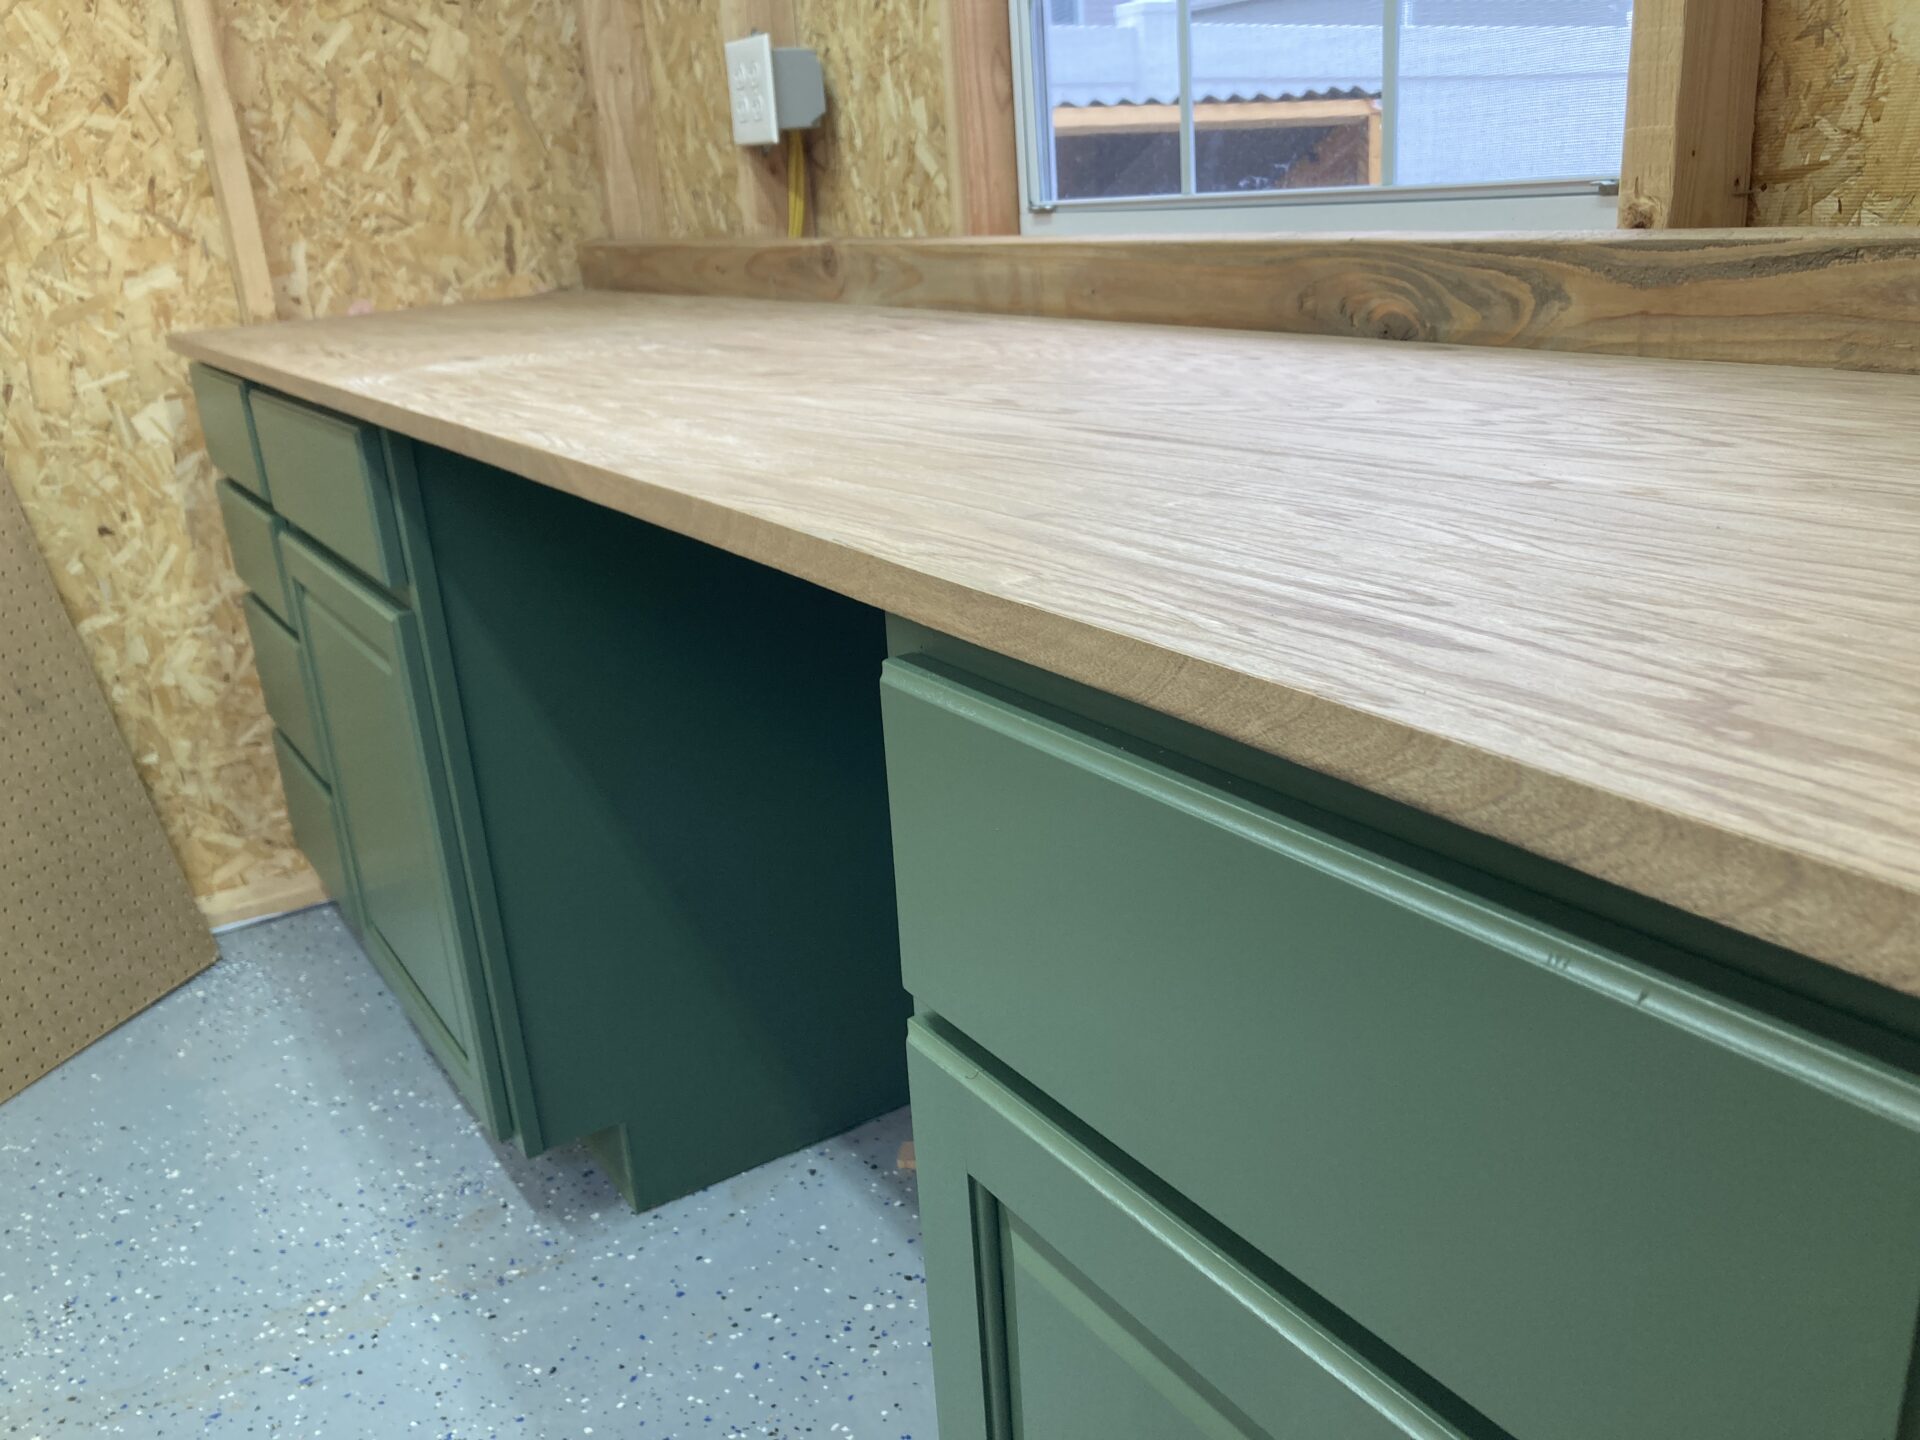
Since I’ll be using my countertop for projects and woodworking with clamps, I left it as the 3/4″ thick and used edge banding.
Isn’t that so satisfying? I love how it makes it look like one nice solid piece of wood.
Step 4: Paint or Stain Your DIY Countertop
Now to make things pretty! Decide the style you want. You could do a solid paint color, sponge on a granite look, paint faux marble or stain it. I have used this Giani Granite Countertop a few times and really loved how it turned out. I’ve also painted faux marble, which is super fun and gives a nice classy look. You can learn more about the process of painting faux marble in this post.
Since my DIY countertop is out in my workshop, I thought staining it would look nice. I’m also a sucker for wood grain.
First, I did a quick sanding with 220-grit sandpaper. Head over to this post if you need more guidance on how to get the most out of your sandpaper.
Then I used Prestain to condition the wood. This helps the stain to absorb evenly. It’s worth the extra step!
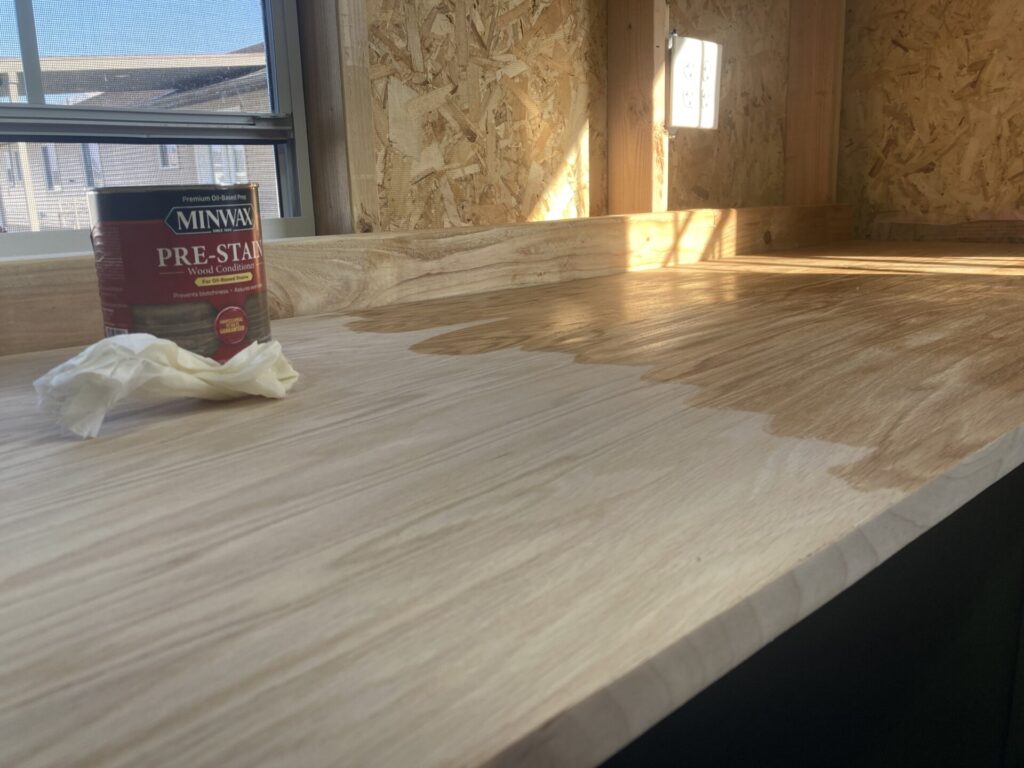
Then I had the hardest time deciding on a stain color so I ended up mixing together a bunch I had on hand, so I can’t get you a link for this exact color
Learn more about how to successfully stain in this post.
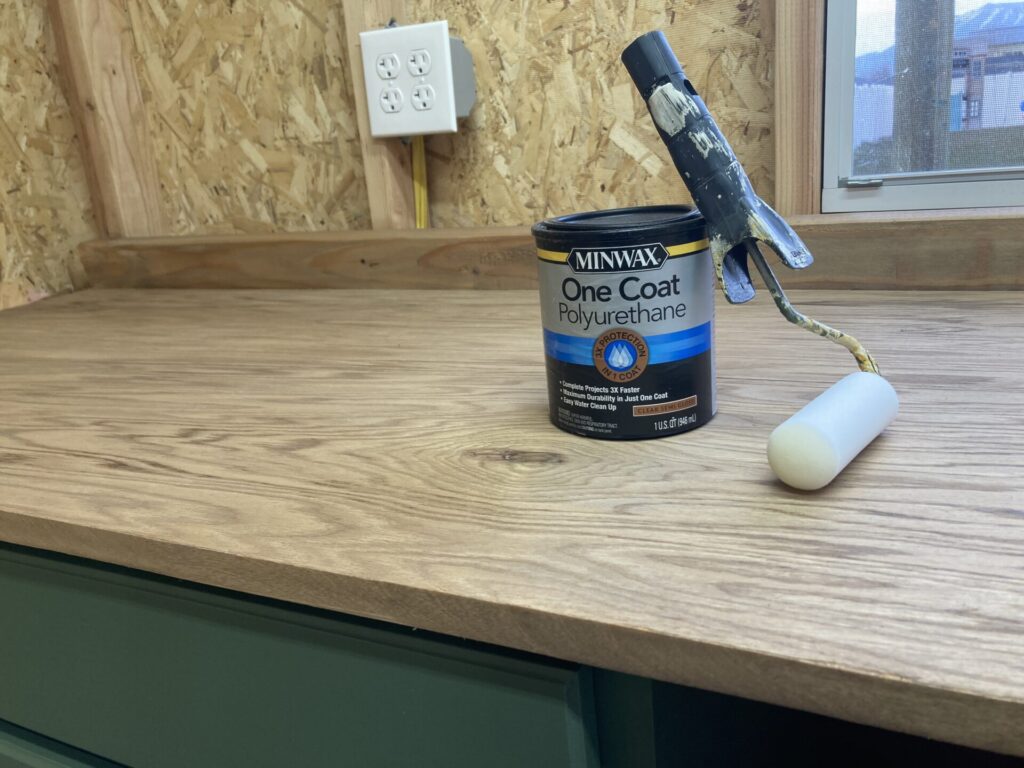
Step 5: Seal DIY Plywood Countertop
Now to finish your DIY plywood countertops with a nice top coat.
Again, there are a few options here.
For a glassy thick top coat, consider getting an epoxy kit. If you stained your plywood countertop or want a thinner top coat, consider using polyurethane.
I used polyurethane for my plywood countertop. If this is your plan as well, make sure to work quickly and don’t brush over areas that have begun to dry.
I am so happy with how it turned out! And now I get to organize all my tools and supplies, which I am very much looking forward to.
And now you know how to make a countertop from plywood! Where will you be adding a DIY plywood countertop? I would love to hear about it in the comments.

Pin “DIY Plywood Countertops to Pinterest!