This post may contain affiliate links. I try to make my posts as helpful as possible and have great products easy for you to access. The use of these links provides me a small commission at no cost to you. As an Amazon Associate, I earn from qualifying purchases.
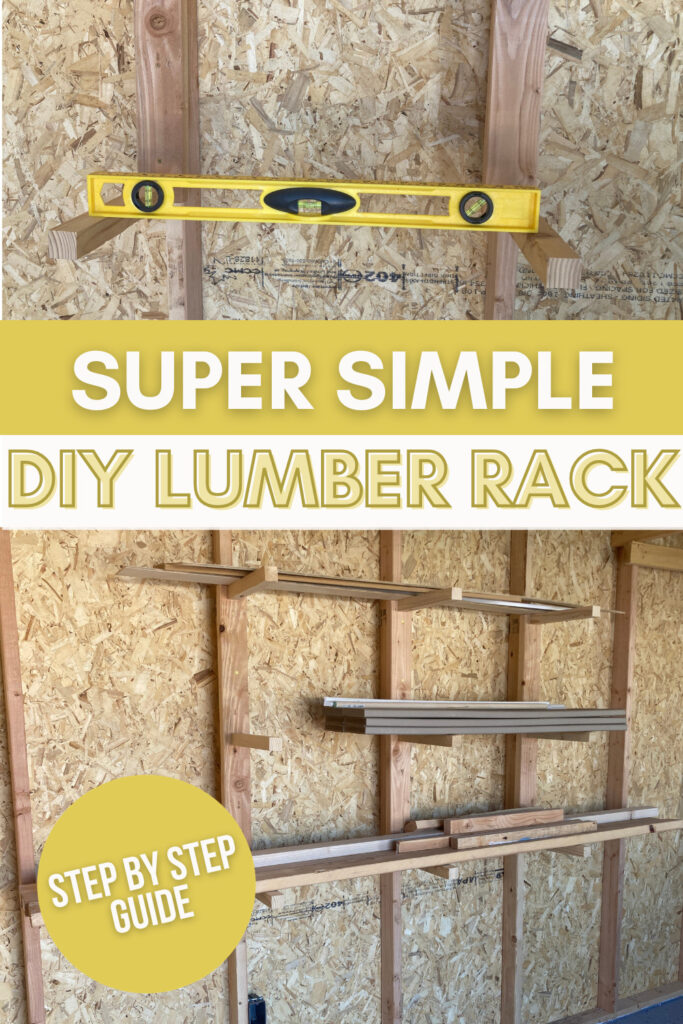
This post is a continuation of my new shed workshop saga! My next project for my new workshop is a DIY Lumber Rack.
I don’t keep a lot of lumber on hand, but I definitely have a lot of scraps, so I wanted something small and simple to add some organization to my shop.
So just as a disclaimer, this DIY Lumber Rack is perfect for smaller wood loads. If you are looking for something to hold really heavy materials like steel or Trex, you might need something heartier. But all that being said, this design has worked perfectly for my 2x4s and other scraps!
Steps to Build a DIY Lumber Rack
- Step 1: Gather Your DIY Wood Storage Rack Supplies
- Step 2: Make Your Cuts
- Step 3: Drill Pocket Holes (optional)
- Step 4: Attach Supports to the back
- Step 5: Install Wall Mounted Lumber Rack
Step 1: Gather Your DIY Wood Storage Rack Supplies
To build your own DIY Lumber Rack you’ll need:
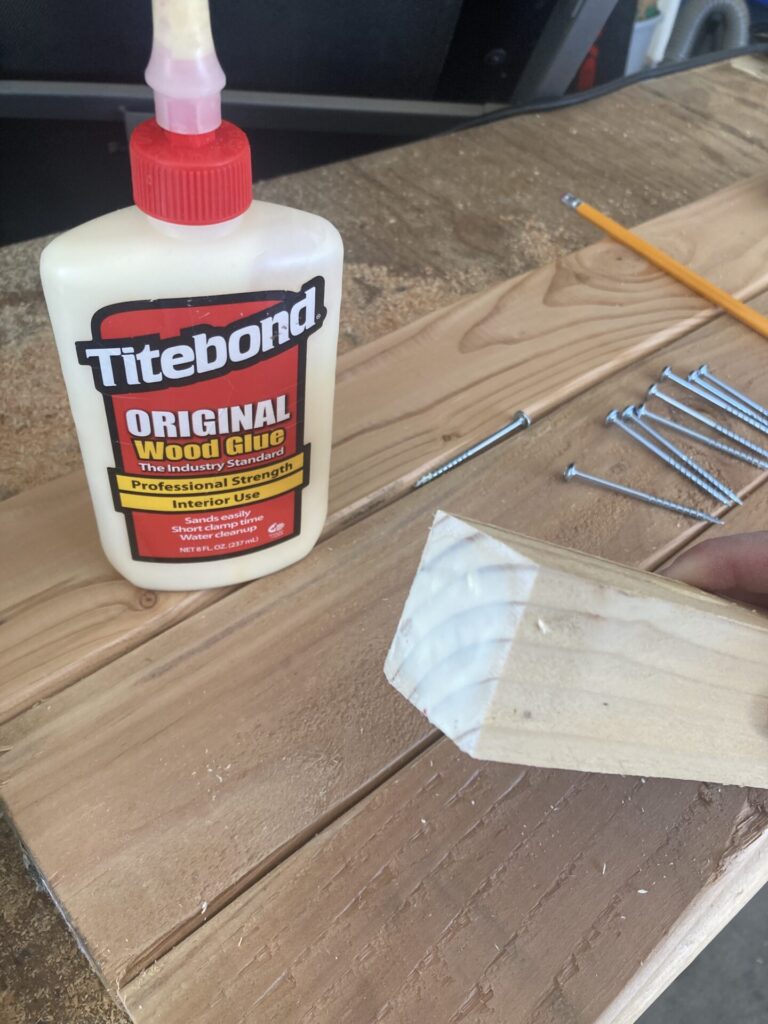
Supplies:
- (2) 2×2
- (2) 2×4
- Wood Screws
- Wood Glue
Tools:
- Saw (I used my Ryobi Miter Saw)
- Drill
- Impact Driver
- Pocket Hole Jig (optional)
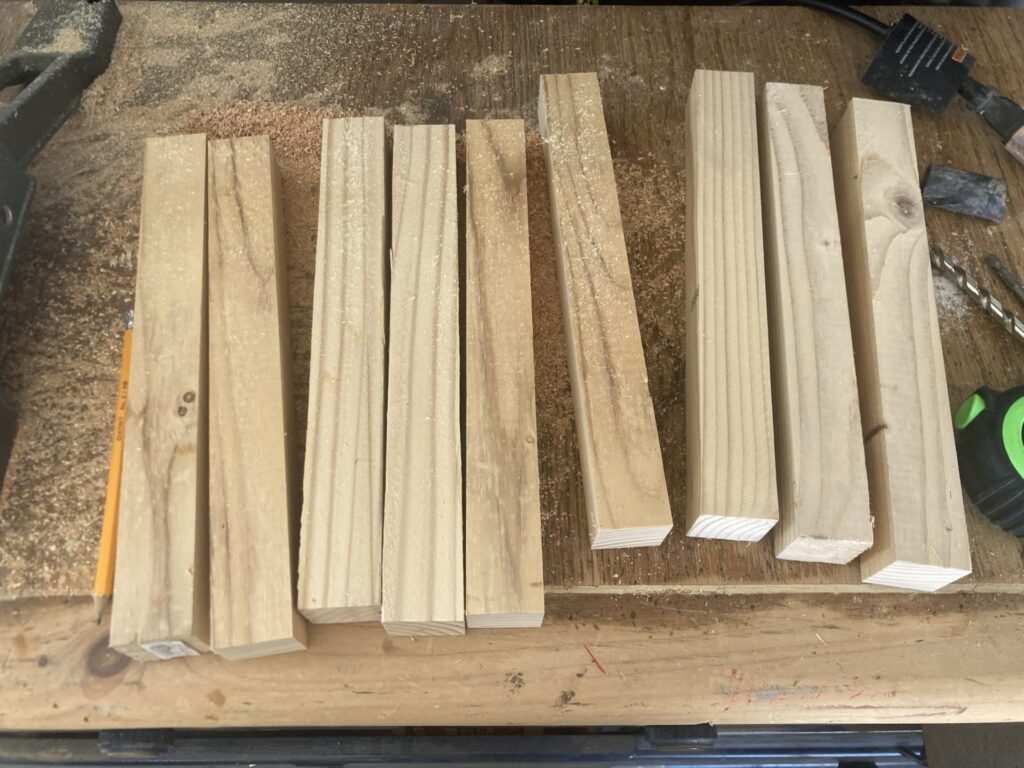
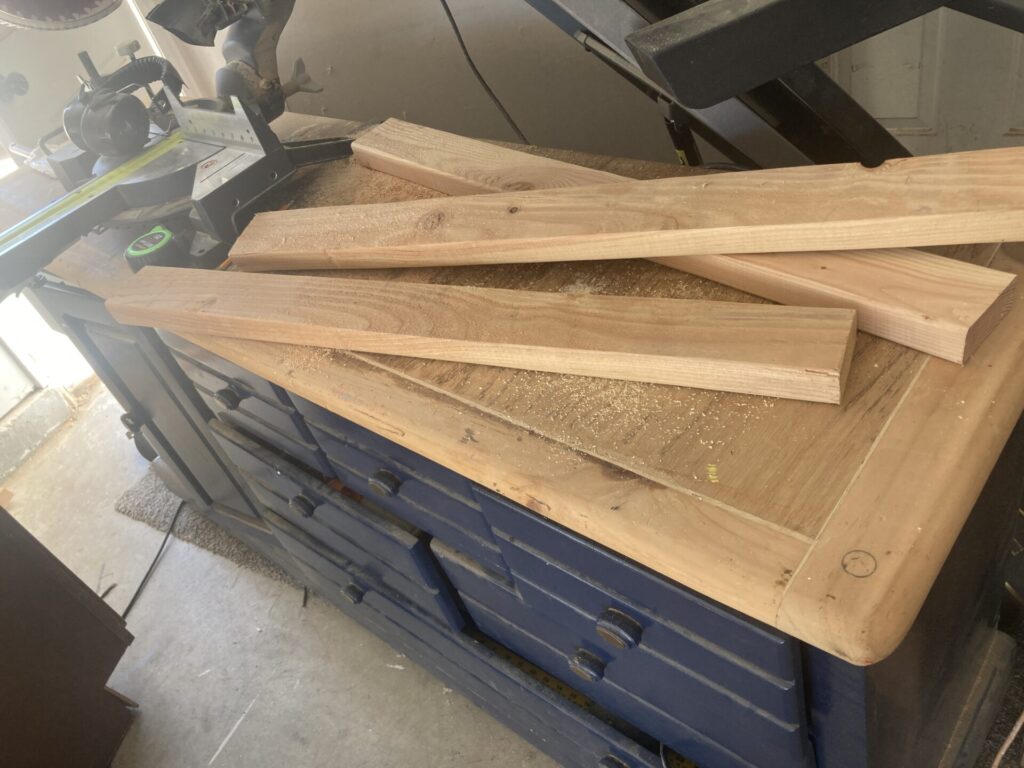
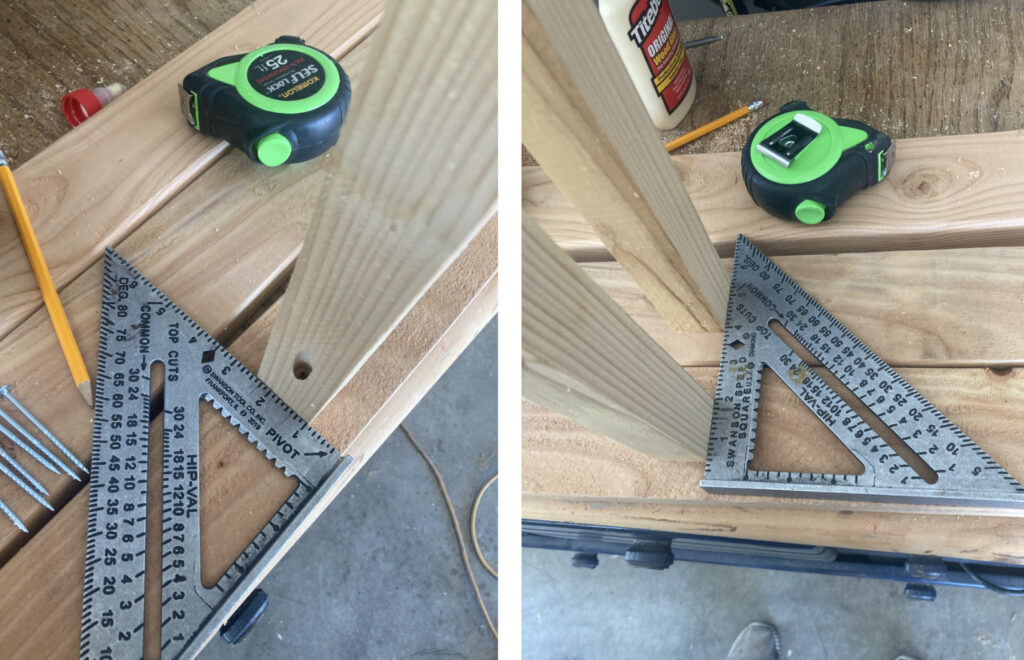
Step 2: Make Your Cuts
I used my Ryobi Miter saw to make my cuts. But most saw can do the job! A circular saw is another good option!
You just need 12 pieces:
- Nine – 12″ 2×2’s
- Three – 3′ 2×4’s
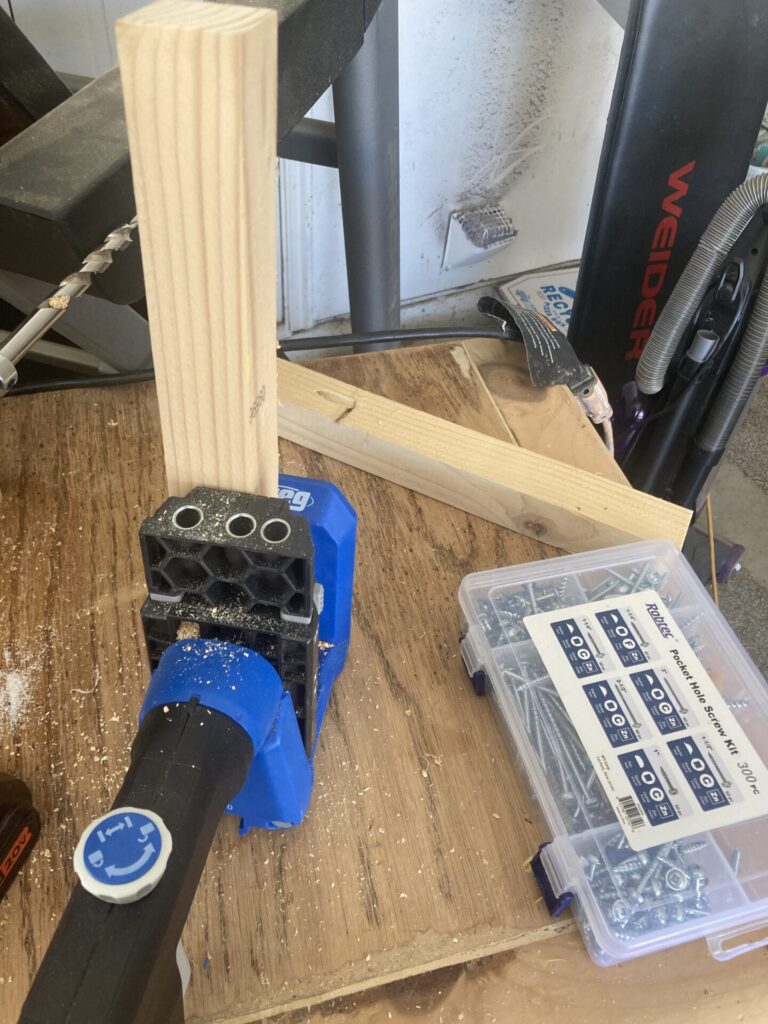
Step 3: Drill Pocket Holes (optional)
Next, take your 2×2’s and drill pocket holes on each piece.
I LOVE my pocket hole jig. I use it for so many projects. Head over to this post to learn more about making pocket holes.
If you don’t have a pocket hole jig, you can drill through the back side of the wood instead.
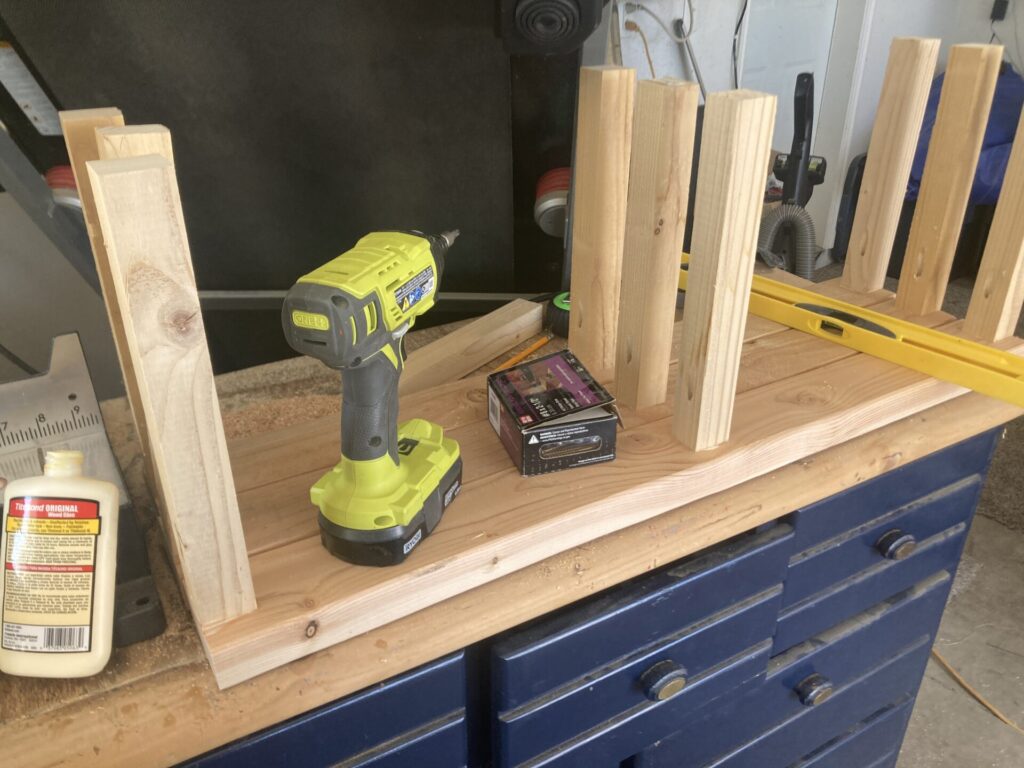
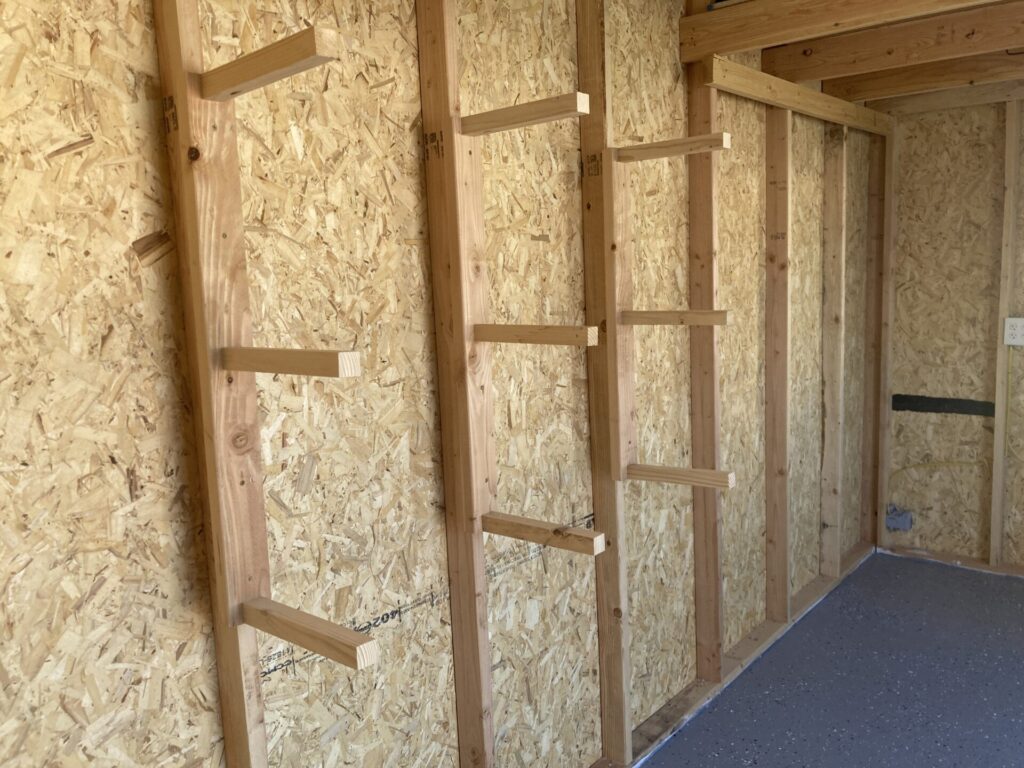
Step 4: Attach Supports to the back
Apply a coat of wood glue to the bottom of your 2×2, and screw it into place with a pocket hole screw.
While doing this step, you have to make sure the piece stays flat, so your lumber and scraps will sit level.
You also want to take special care to make sure that the 2x2s are the exact same distance on each piece.
I also used my square to make sure they were level and aligned with the other pieces (see pictures below).
Step 5: Install Wall Mounted Lumber Rack
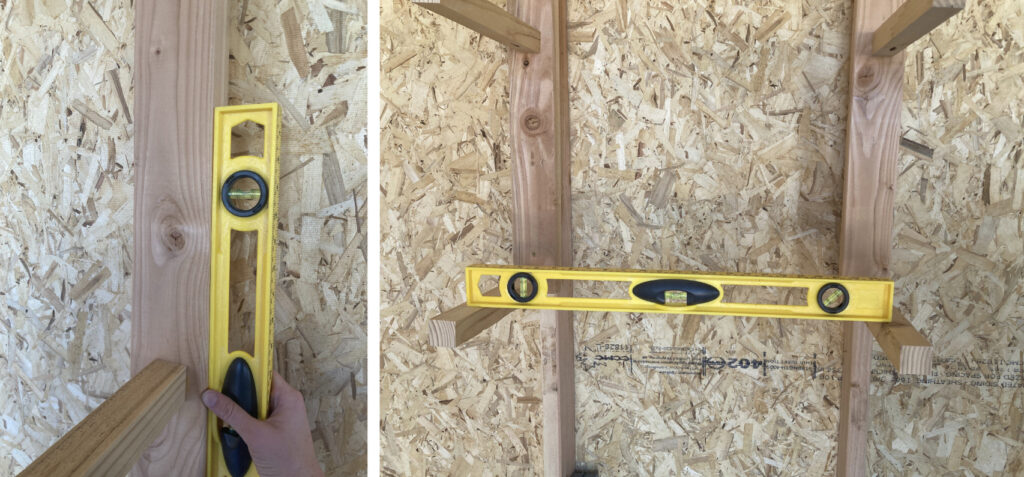
To install your DIY Lumber Rack you will want to have a drill, impact driver, level, and screws on hand. You’ll also want a second person to help. I tried to do it on my own and it did not go well. Luckily my husband came to the rescue.
You’ll want your rack to be screwed into studs. So if you have drywall, make sure to locate your studs first.
Use a level to make sure your rack is nice and level. Drill a pilot hole and screw your rack into the stud.
I really love my impact driver for projects that require screwing into a stud. Make sure to check out my post on impact drivers vs. drills. Knowing when to use an impact driver vs. a drill can be a real game changer in DIY projects.
When you add the second and third pieces, use a level to make sure they are level compared to the one next to it. If they aren’t level your wood won’t sit flat.
I did four screws per piece, so 12 screws total.
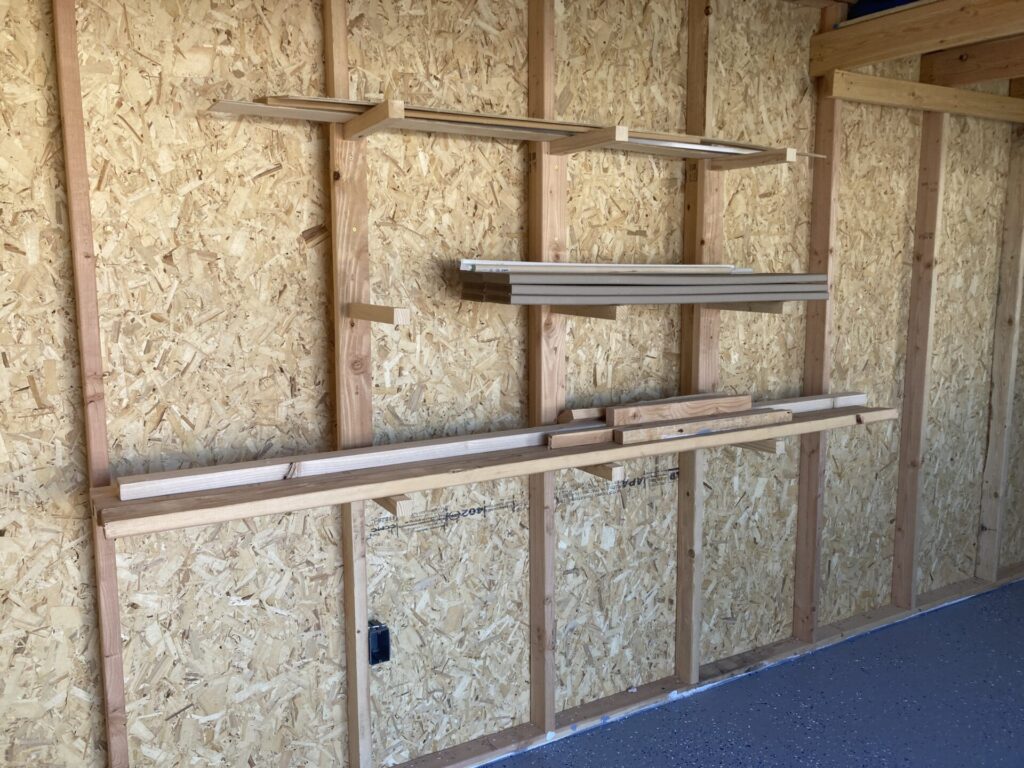
And voila! This was a super quick project that made a huge difference! I was thrilled to get my scraps off the floor of my garage and onto my new DIY lumber rack in my shed!
What do you think? Are you going to add a lumber rack to your space? I’d love to hear from you in the comments!
Pin “How to Build a Super Simple DIY Lumber Rack” to Pinterest