This post may contain affiliate links. I try to make my posts as helpful as possible and have great products easy for you to access. The use of these links provides me a small commission at no cost to you. As an Amazon Associate, I earn from qualifying purchases.
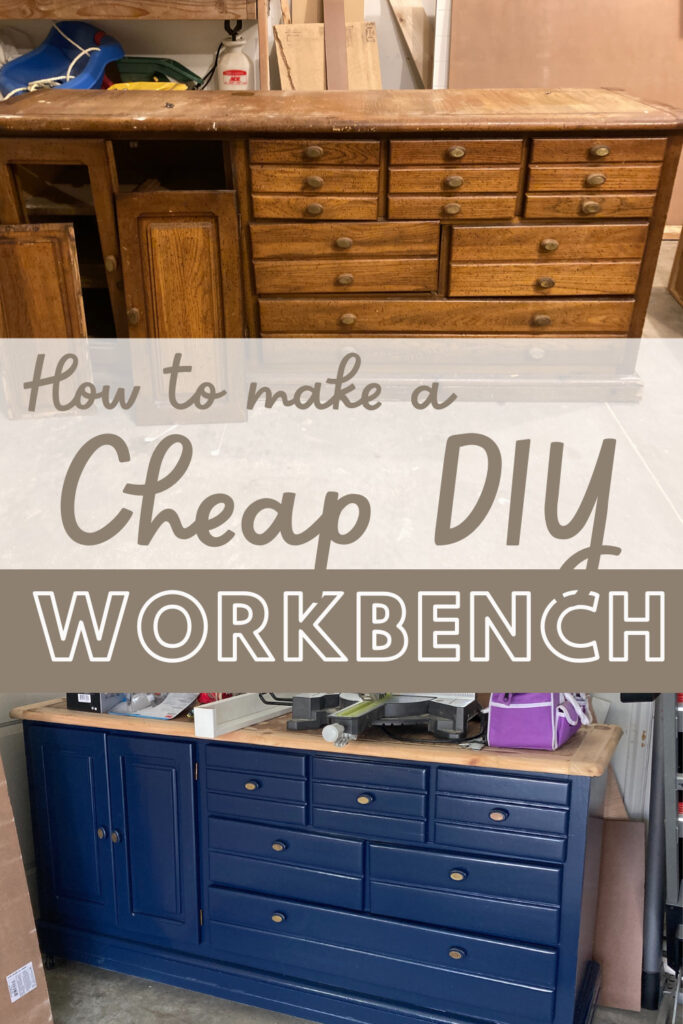
DIY Mobile Workbench
The more I got into DIY projecting, the dirtier my garage got… I found myself spending a lot of my projecting time just looking for where I last put my tools. The disorganization was driving me crazy!
This led me to build a DIY Mobile Workbench. It has been awesome! Now, I spend my precious project time actually doing projects, rather than scratching my head wondering where I put my drill.
In this post, I’ll share with you how I built my DIY Mobile Workbench. I hope you find it helpful!
How to Build a Cheap DIY Workbench for Your Garage
Step 1: Find an Old Large Dresser to convert to a DIY Mobile Workbench
For me, the keyword on this project was “cheap”. I didn’t have a lot of extra money to spend on a nice workbench. So when I saw this dresser posted for free on Facebook marketplace, I knew it would fit the budget 😉
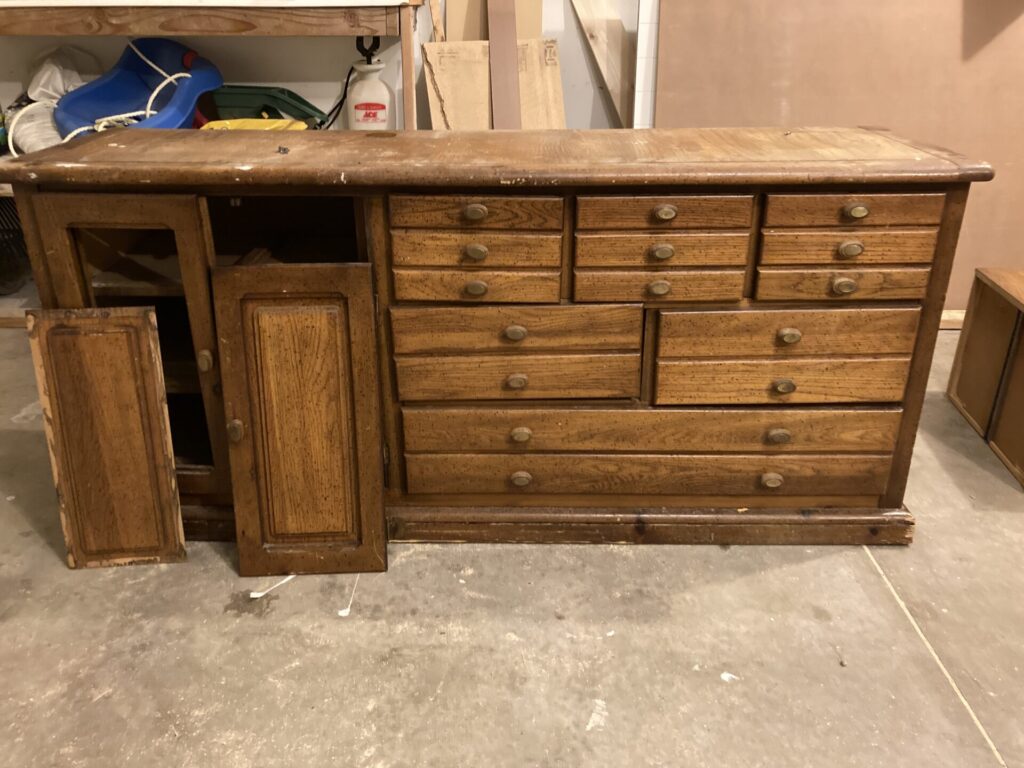
It obviously needed a little work. But it was perfect for my purposes!
I wanted something with a lot of drawers that would be easy to organize my supplies and tools. But also something with a sturdy top surface to store my miter saw on.
There are tons of free, or nearly free, dressers out there if you take some time to look around. It might take a little patience to have the right one come along. But I see old dressers get posted all the time. You can also keep an eye out while you driving around, there are often dressers set on the curb for free as well!
Step 2: Clean the Dresser and Remove the Hardware
Next, I gave it a thorough wipe-down, vacuumed out the cobwebs, and removed all the hardware.
Step 3: Wood Fill and Sand
Start by applying wood filler where needed. I ended up not keeping all the hardware (this dresser had a lot of unnecessary knobs) so I wood-filled those in.
I like DAP Wood Filler, I use it for most of my wood filling needs. But Bondo is a fantastic product that dries really fast and hard. But it is a little more expensive and requires mixing together two parts. You also have to work fast with it so it doesn’t harden before you get it where you want it.
Once the wood filler is dry, sand it down. Then sand the whole dresser. Giving it a full sanding will help your primer/paint adhere better.
The type of sandpaper grit will depend on what you are removing. For the sides of my dresser, I just did a scuff sanding with 180 grit because I planned to paint it. But I knew I wanted to leave the top raw wood. So I started with an 80 grit and worked my way up to 180.
For some great tips and tricks to using sandpaper, make sure to check out this Ultimate Guide to Using Sandpaper.
Step 4: Prime and Paint Your DIY Workbench
I removed all the dust from sanding using these tac cloths. Then started on priming.
I used this paint sprayer to give the dresser and drawer faces a coat of primer and a coat of paint. It is very much a budget-friendly sprayer. Not incredible, but definitely gets the job done!
My paint had great coverage, so it only needed one coat. But you might need two!
Once the paint was dry I added my hardware back on.
If you don’t want to paint, or your dresser has great wood – you could always stain or use Gel Stain.
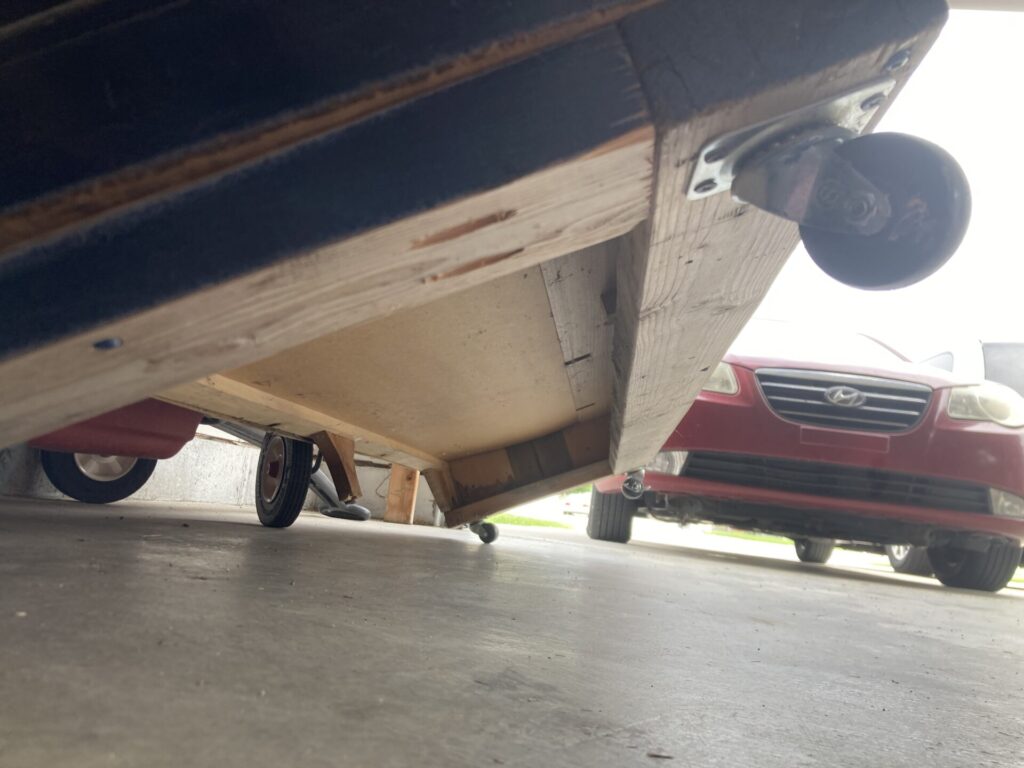
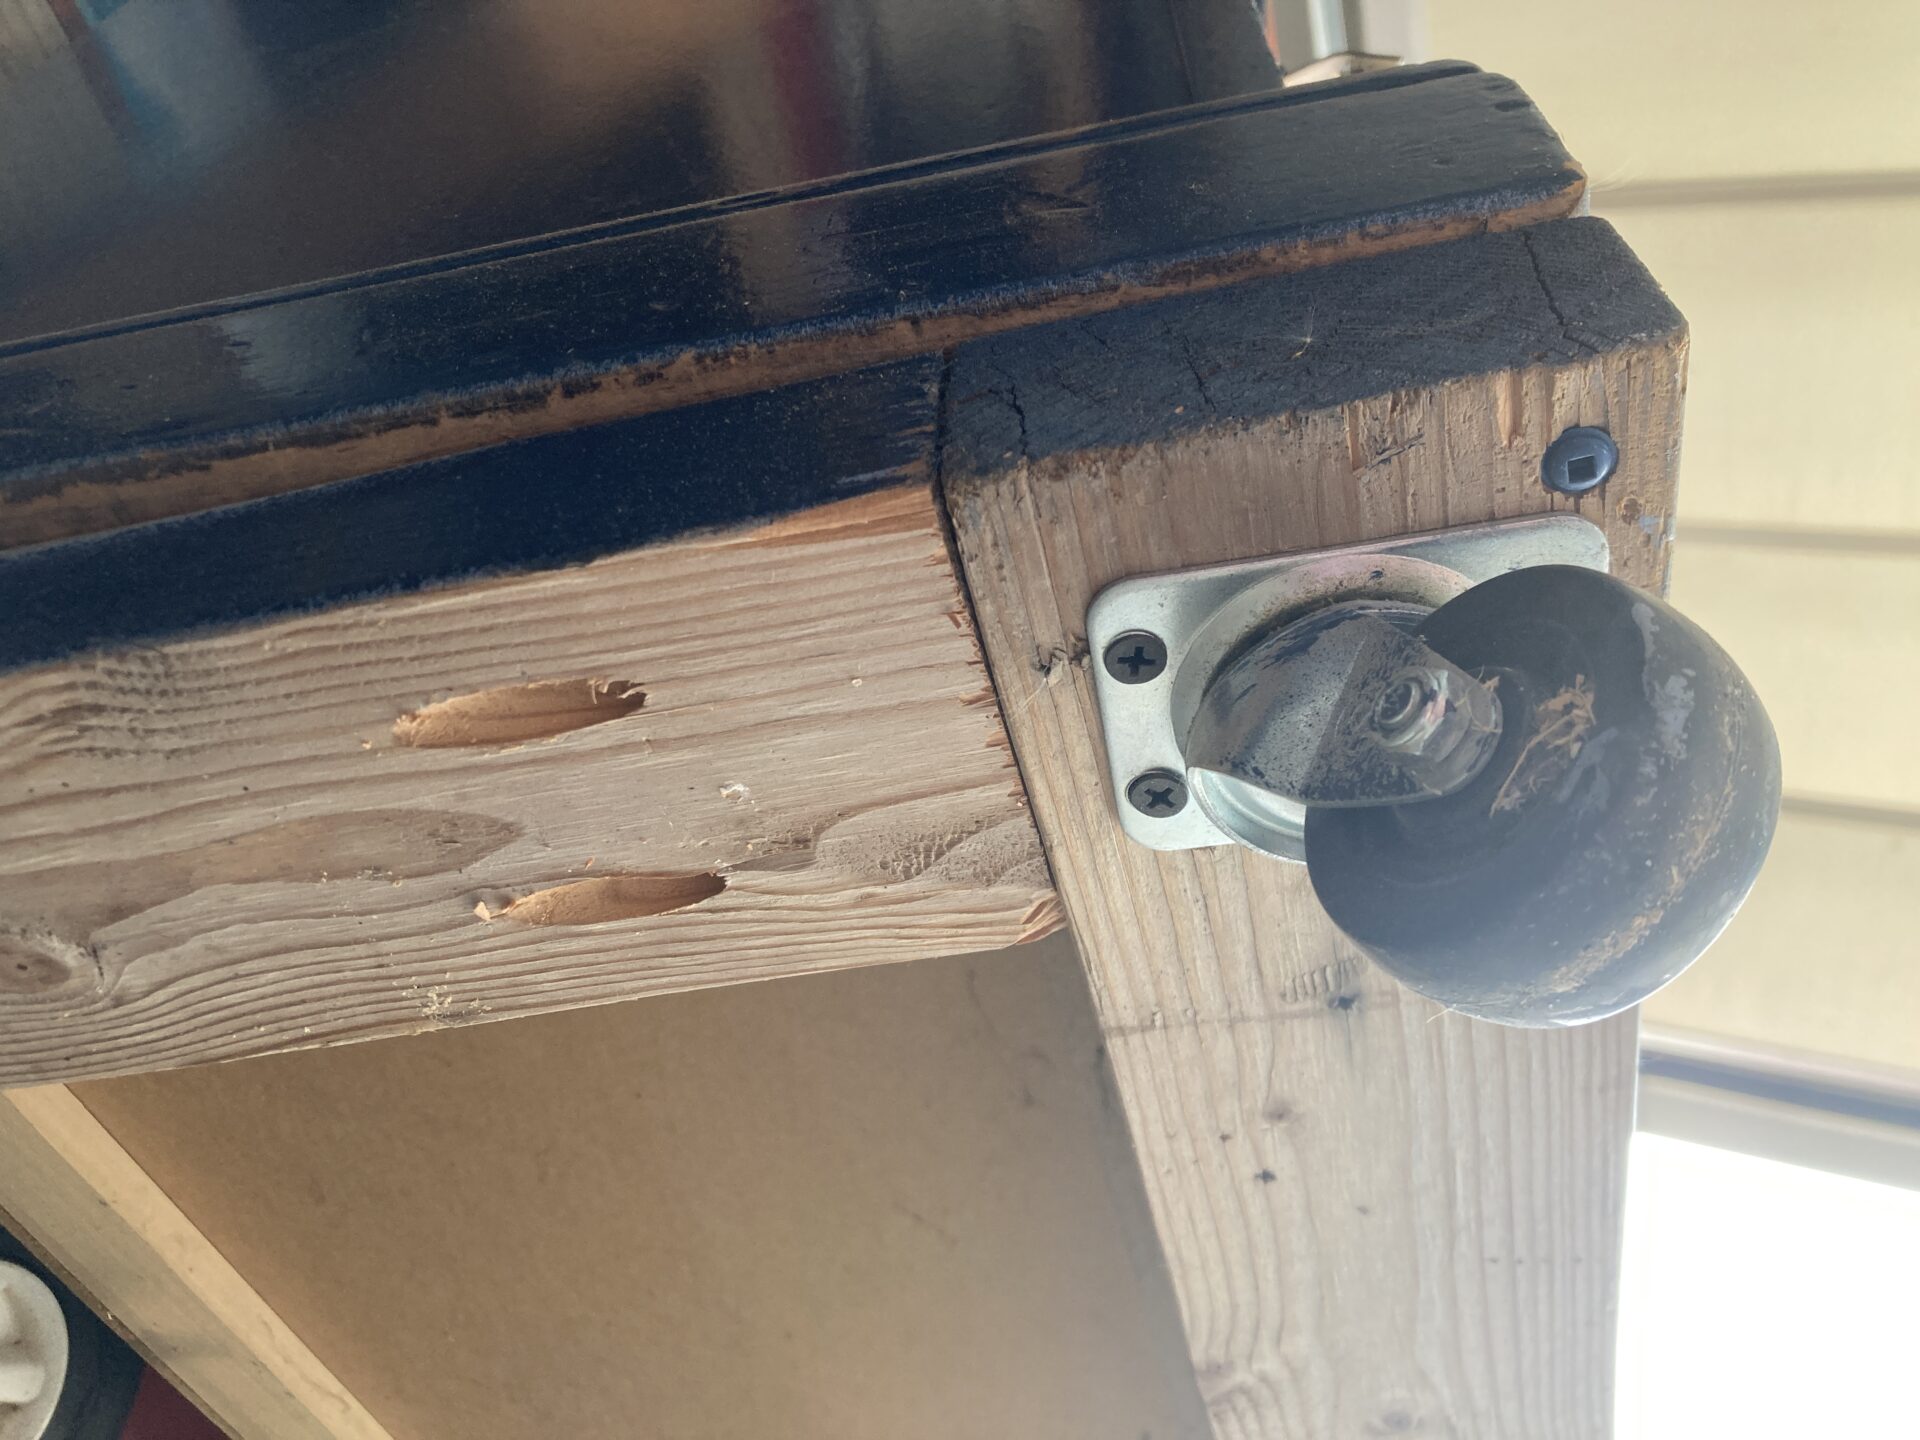
Step 5: Add Base with Wheels to your DIY Workbench
Using 2x4s and pocket holes, I made a rectangle base and secured it to the bottom of the dresser with 2 1/2 inch screws.
I then added caster wheels to each corner.
This is honestly the best part. Being able to move it around depending on the project I am working on is so nice! Since I don’t have a workshop (yet…), I will just pull my car out of the garage and slide this workbench out to work on my projects. The caster wheels make this a slick process.
Average Workbench Height
Have you found yourself wondering: how tall should a workbench be?
Here is a helpful tip for setting the height of your workbench: Stand upright with your arms hanging naturally at your sides. Bend your elbows to a 90-degree angle, as if you were working at a bench. Measure the distance from the floor to your elbow.
This measurement gives you a good starting point for the height of your workbench. With this dresser-to-workbench conversion, you might need to get a little creative to increase the height of your workbench. Luckily, the wheels add a few inches. And you can always add extra 2x4s to your base to get it to your preferred height.
Other DIY Garage Workbench Ideas:
If you can’t find an old dresser to convert to a DIY Workbench, you can get creative with other options:
Repurpose an old solid door as the tabletop and attach sturdy legs or a base to create a spacious and durable work surface.
Use a thick plywood sheet as the tabletop and set it on top of adjustable sawhorses.
Recycled Pallet Workbench: Disassemble wooden pallets and use the planks to construct a sturdy workbench frame. Add a plywood or solid wood top for the working surface.
Convert old or unused garage cabinets into a workbench by removing doors, reinforcing the structure, and adding a work surface on top.
DIY Mobile Workbench
This DIY Workbench was easy and cheap to make. All it took was an old dresser, a little sanding, some paint, and some caster wheels!
But the best part is the organization it has provided for all my project supplies.
Now when I get into project mode, I know exactly where to find my supplies and tools. It is so nice! And it is a big win to have gained such a useful tool for practically free!
Do you need a space to organize your tools? Find yourself an old dresser and make your own DIY mobile workbench! Please let me know how it goes in the comments below. I’d love to hear about it.
Pin “How to Build an Affordable and Functional DIY Workbench” to Pinterest