This post may contain affiliate links. I try to make my posts as helpful as possible and have great products easy for you to access. The use of these links provides me a small commission at no cost to you. As an Amazon Associate, I earn from qualifying purchases.
Something really exciting happened this week… I got a shed! No more makeshift workshop squished in the corner of my garage!
I was able to use the money I made from flipping this 1970 Camper trailer to buy myself a 10′ x 16′ shed/workshop.
There are so many things I want to do to turn this shed into a dream workshop, but my first priority is painting the exterior.
So join me in this post as I share my experience and lessons learned while painting a shed.
In this post you’ll find:
Steps to Painting a Shed
Follow these five steps to paint a shed:
- Step 1: Prime
- Step 2: Caulk
- Step 3: Paint Trim
- Step 4: Cut in the Main Color
- Step 5: Paint the Main Color
Step 1: Prime
My shed came primed, so I got to skip this step! But if your shed isn’t primed, or you are painting over plastic or metal, it’s a good idea to start with primer.
I really like the Zinsser Bullseye primer. Just make sure you give it adequate time to cure before moving on to painting. It’s typically ideal to leave it overnight.
Step 2: Caulk
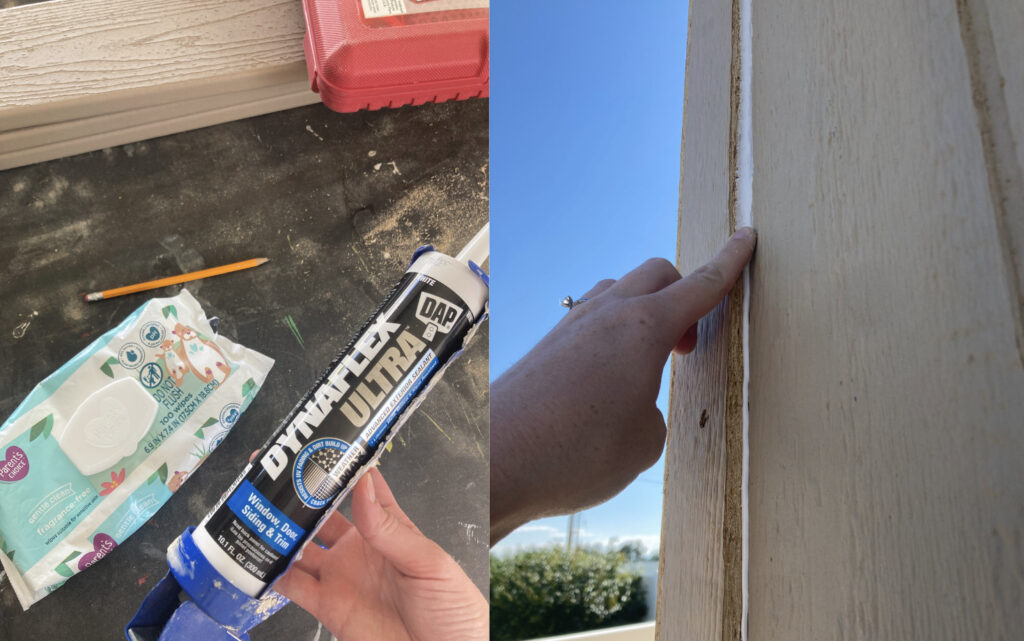
Now it’s time to caulk.
You’ll want a good exterior caulk to caulk all your seams and around the windows.
I used DAP Dynaflex Ultra Exterior Caulk. It came highly recommended, plus it is paintable in an hour!
Another caulking hack that you may have heard of is – baby wipes. I always keep a pack of baby wipes on hand while caulking. It is perfect for wiping my fingers off between swipes. Or sometimes I’ll just wipe the caulk itself with the wipe.
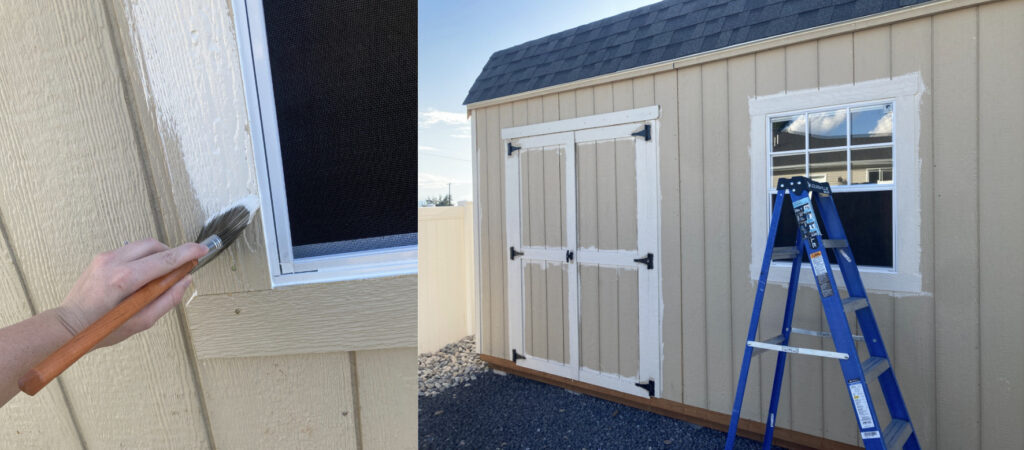
Step 3: Paint Trim
I personally prefer to start by painting the trim, and then move on to painting my main color. This way I don’t have to worry about taping because I’ll just be painting my main color over it next.
For my trim paint, I used “Better Than Beige” by Behr. I bought a quart (which was more than enough) of exterior paint in a satin sheen.
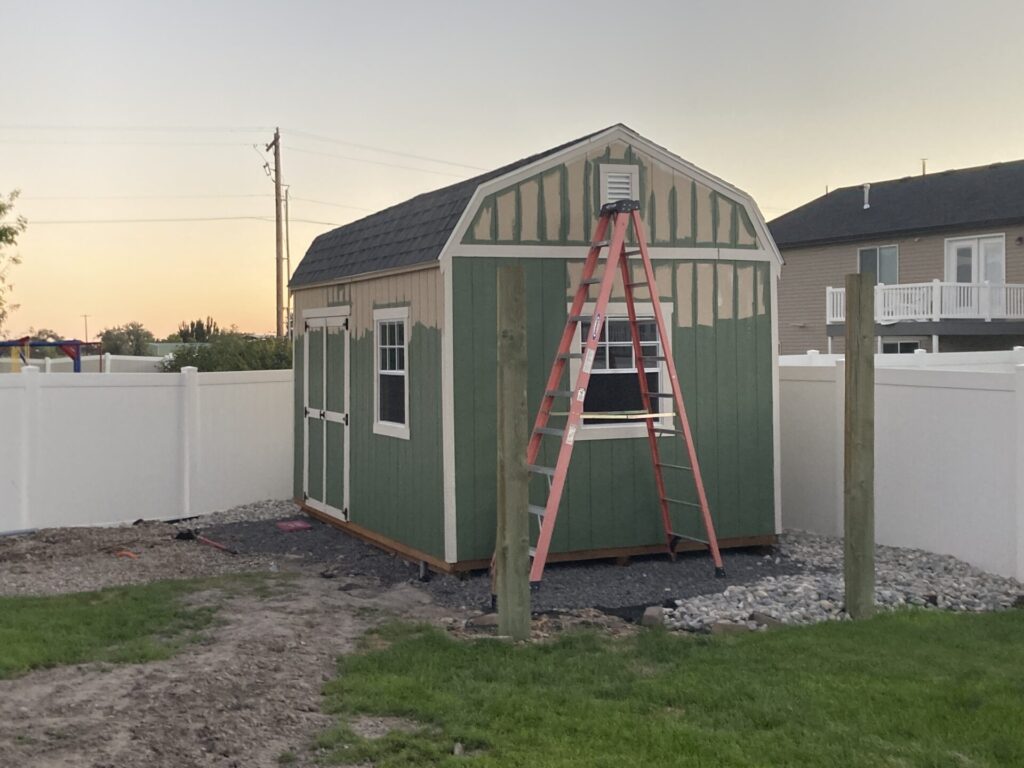
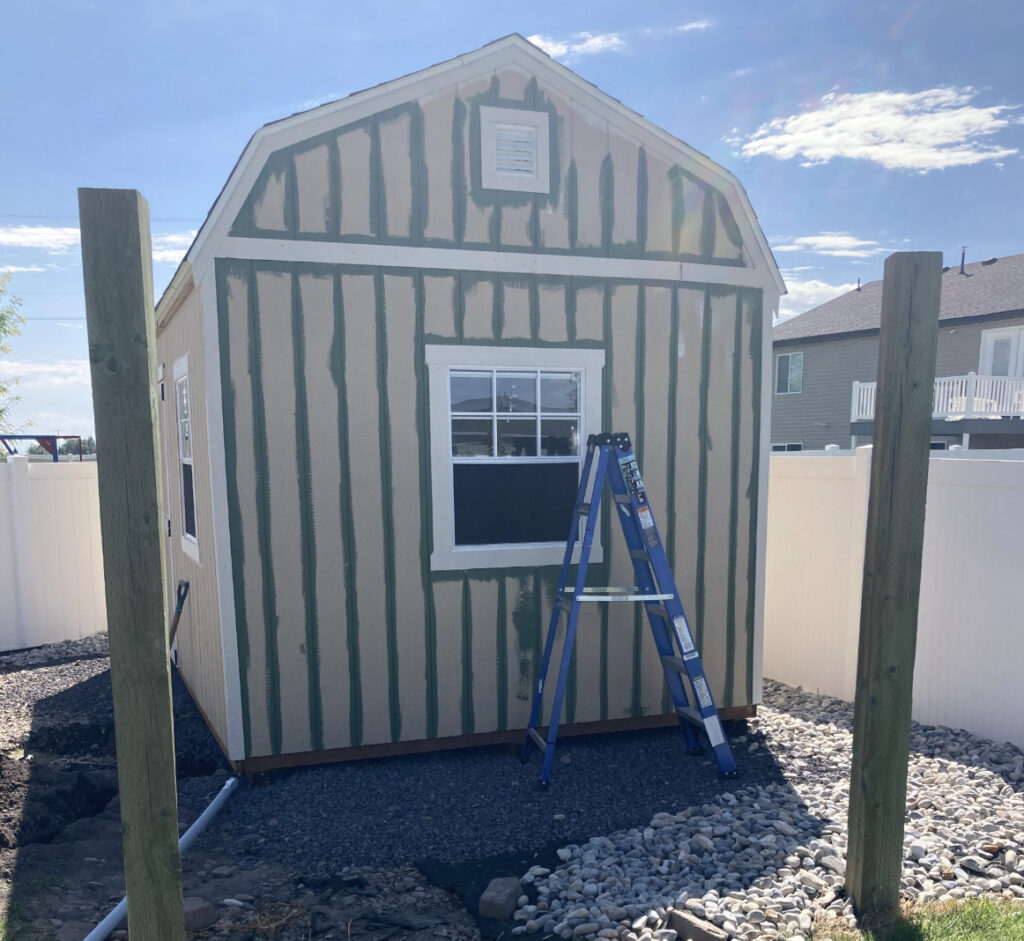
Step 4: Cut in Your Main Color
Using an angled brush, cut in your main color along all crevasses and against trim. This part is a little tedious, but it’s worth it!
I reallllllly love this angled brush for cutting in. I saw it advertised for a while and finally gave in and bought it about a year ago. I was seriously shocked at how much easier it was on my hand to paint for an extended amount of time. They were out of stock when I went to the store for one this week, and I really missed it while cutting in.
For this color, I used Behr Marquee Satin Enamel Exterior Paint in Laurel Garland. The Behr Marquee is a little more costly per gallon (mine was $66 per gallon at the time of writing this post), but I felt like it was worth the investment because it would be exposed to all the elements and I didn’t want to worry a lot about touch-ups.
Step 5: Paint Main Color
Now for the fun satisfying part! Using a paint roller, fill in the rest of your shed with your main paint color.
Because the shed paneling was pretty textured, I made sure to buy paint rollers for “rough surfaces”.
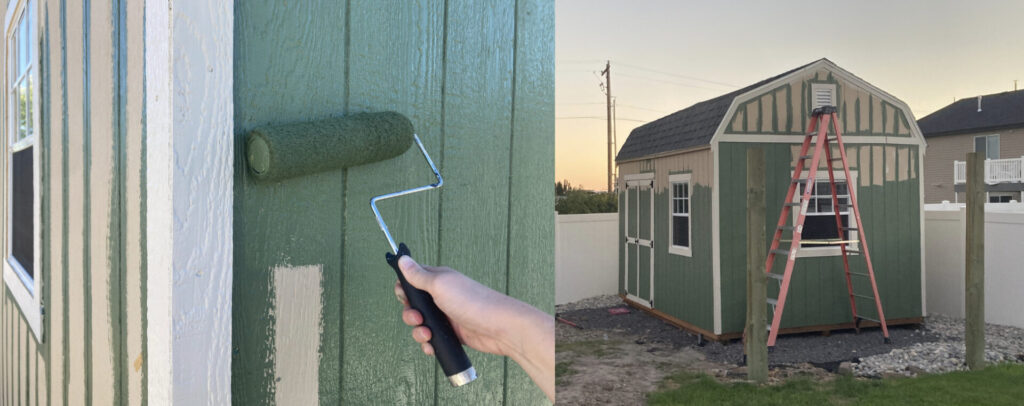
I LOVE this part of the process! You can start to see a glimpse of the final product.
Best Exterior Paintable Caulk
When it comes to selecting the best exterior paintable caulk, there are several reliable options available on the market. The choice of caulk depends on factors like the type of surface you’re caulking, the climate in your area, and your specific project needs. Here are a few top brands and types of exterior paintable caulk that are generally well-regarded:
- DAP Alex Plus Acrylic Latex Caulk Plus Silicone: This is a popular choice for both interior and exterior projects. It offers good adhesion, flexibility, and durability. The addition of silicone enhances water resistance and makes it suitable for outdoor use.
- Sashco Big Stretch Acrylic Latex High-Performance Caulking Sealant: Known for its exceptional flexibility, Big Stretch caulk is ideal for areas that experience significant expansion and contraction. It adheres well to a variety of surfaces and maintains its elasticity over time.
- Sherwin-Williams Shermax Urethanized Elastomeric Sealant: This is a high-performance sealant that offers excellent adhesion, flexibility, and weather resistance. It’s particularly well-suited for areas that need to withstand extreme weather conditions.
- OSI Quad Max Window, Door and Siding Sealant: This versatile sealant is designed for a wide range of exterior applications, including windows, doors, siding, and more. It offers good adhesion and remains flexible over time.
When selecting a caulk, consider the following tips:
- Choose a caulk that is labeled as “paintable” to ensure it can be painted over once it’s dry.
- Look for a caulk that is specifically designed for exterior use to ensure it can withstand the elements.
- Consider the material you’re caulking (wood, concrete, metal, etc.), and choose a caulk that adheres well to that material.
Shed Paint Ideas: 10 Compatible Colors
There are so many options when it comes to painting a shed. Here are 10 compatible color options you can consider when choosing paint for your shed:
- Soft Gray and White: A combination of a soft gray for the main body of the shed and crisp white for the trim can create a clean and elegant appearance.

2. Forest Green and Cream: A deep forest green paired with a creamy off-white can evoke a traditional and cozy feel, blending well with natural surroundings.

3. Navy Blue and Beige: Navy blue is a classic color that can give your shed a sophisticated look. Pair it with a neutral beige for a balanced and timeless combination.

4. Warm Taupe and Olive Green: This earthy combination brings warmth and blends nicely with gardens and landscapes. Taupe can be used for the main body, while olive green can be used for accents or trim

5. Tan and Chocolate Brown: Tan is a versatile color that works well with many outdoor settings. Combined with a deep chocolate brown for the trim, it creates a welcoming and inviting feel.

6. Slate Blue and Light Gray: Slate blue is a calming color that can create a subtle focal point. Pair it with a light gray for a harmonious and muted look.

7. Sage Green and Cream: Sage green is a soft and soothing color that works well in outdoor settings. When paired with a cream color, it can create a tranquil and inviting atmosphere.

8. Warm Beige and Rustic Red: Beige is a neutral option that allows other colors to stand out. Use a rustic red for accents or trim to add a touch of character.

9. White and Black: A clean, all-white shed can create a timeless and fresh look. Black trim will give a nice modern vibe. This option is particularly well-suited if you have a garden full of colorful flowers.

10. Light Blue and White: Light blue gives a shed a gentle and calming appearance. Pair it with white for a combination that’s reminiscent of blue skies and clouds.

Painting a Shed
Painting a shed is a relatively simple process. With a little attention to detail and the right products, your shed will look like a work of art!
What color are you painting your shed? Do you have tips or tricks for painting a shed? Leave it in the comments! I’d love to hear from you.
If you are looking for an affordable way to add a workbench to your shop, check out my post on making an Affordable, Functional DIY Workbench. I can’t wait to move it into my new shed!
Pin “Painting a Shed 101: Tips, Tricks, and Techniques” to Pinterest