This post may contain affiliate links. I try to make my posts as helpful as possible and have great products easy for you to access. The use of these links provides me a small commission at no cost to you. As an Amazon Associate, I earn from qualifying purchases.
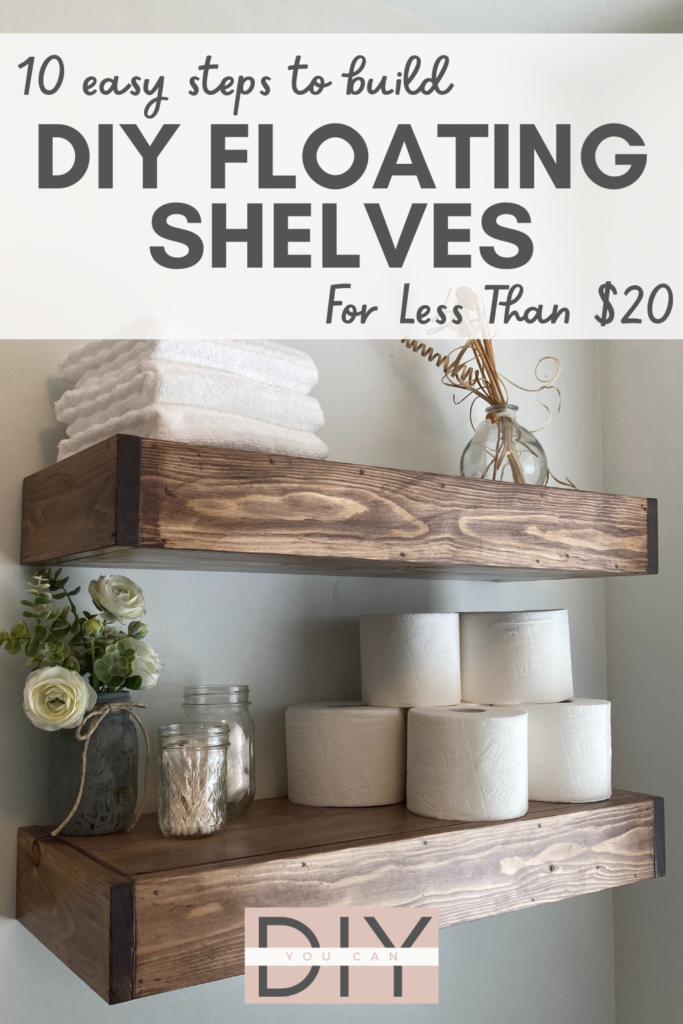
Learning how to build floating shelves has been something I’ve wanted to do for a while. I’ve spent some time wandering the internet looking for bathroom floating shelves ideas. And I ended up creating my own simple DIY Floating shelves design, I’m really excited to share it with you!
Not only is this DIY floating shelves plan DIY-friendly, but also budget-friendly. At the time of writing this blog (2023), the total cost for my wood was just under $20. Two floating shelves for $20 isn’t a bad deal! Pre-COVID days probably would have cost half as much.
This set of instructions makes two floating shelves measuring 25.5″ W x 4″ H x 8″ D
Tools:
Supplies:
- (1) 1X4X8
- (1) 1X8X8
- (1) 2X2X8
- Wood Glue
- Brad Nails
- Wood fill
- Sandpaper
- Wood conditioner
- Stain (there are a lot to pick from but I like this dark walnut stain from Minwax)
- Polycrylic
- 2-inch Wood Screws
Over the Toilet Storage DIY – Simple Steps
Below is a brief summary of how to build the floating shelves. Continue scrolling for detailed instructions.
- Purchase Supplies
- Make your cuts
- Assemble
- Apply Wood Filler
- Sand
- Apply Wood Conditioner
- Stain and Seal Shelves
- Assemble and Install Wall Cleat
- Install Shelves
- Design
Video: How to Make Floating Shelves
Step 1: Purchase Supplies
- When selecting your lumber, check to make sure your pieces aren’t bowed or warped. This video from The Honest Carpenter is great at explaining wood warp and how to check to make sure the boards you are purchasing are of the best quality.
- The rest of your supplies (stain, wood conditioner, sealer, etc…) will typically be near the paint section of your hardware store.
- Picking a stain color can be a tough decision to make. I really like this guide from The Amish Craftsman on choosing the perfect stain.
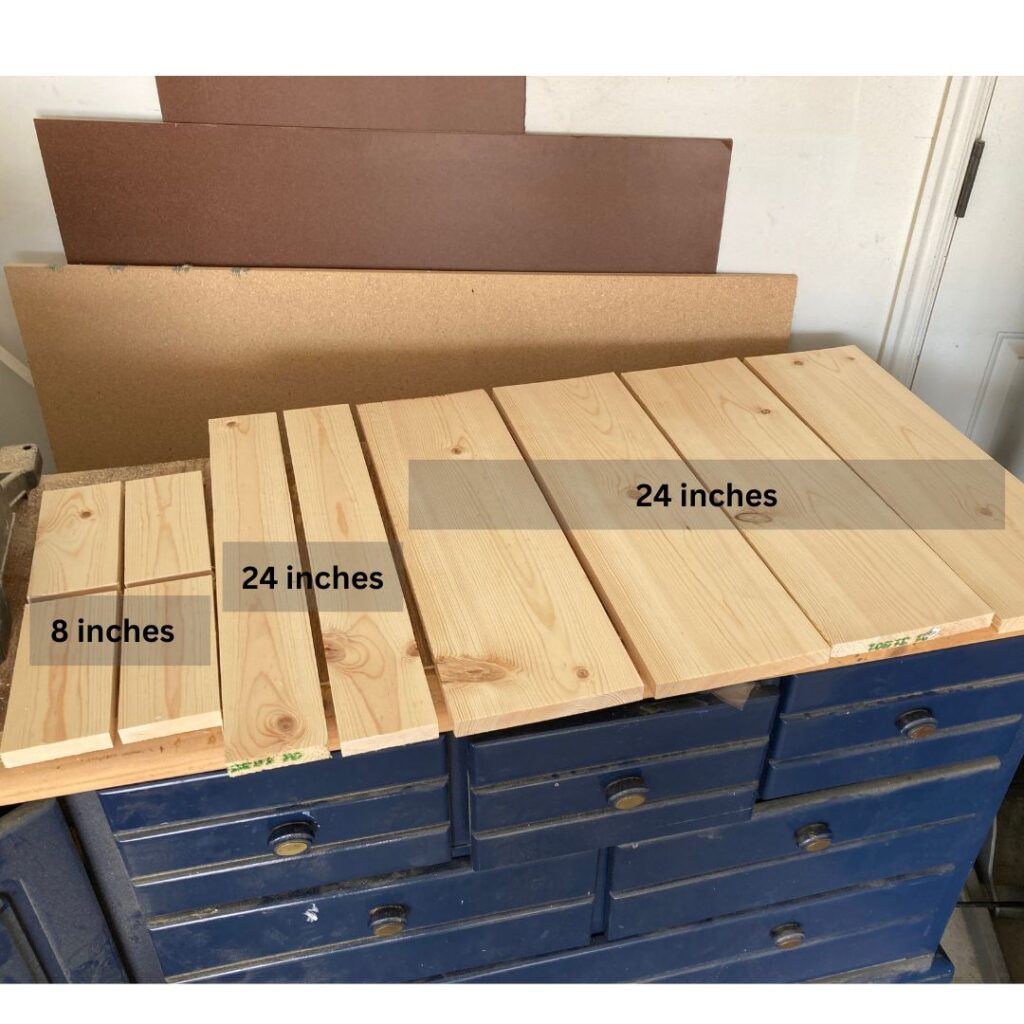
Step 2: Make Your Cuts
- Cut your 1X6 board into four 24” pieces (top and bottom of shelves)
- Cut your 1X4 board into two 24” pieces (front of the shelf)
- and four 8” pieces (shelf sides)
- For your wall mount: Cut your 2X2 into two 23” pieces (wall cleat) and six 5.5” pieces
For extra guidance and tips for using a miter saw for these cuts, check out this Ultimate Miter Saw Guide.
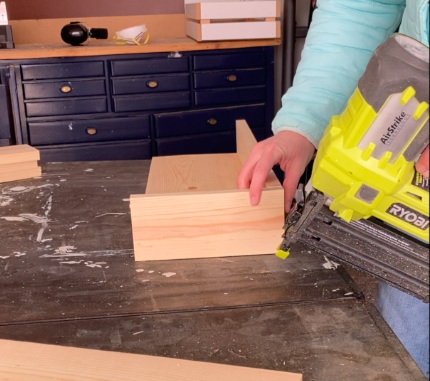
Step 3: Assemble
- Start assembling by attaching the front piece (1×4 – 24″) to your top piece (1×6 – 24″).
- Put a small bead of wood glue along the long edge of your 1×6. Line up your 1×4 and attach it with a brad nailer placing nails every 4-6 inches. For extra tips on using a brad nailer, head to this post.

- Now add your side pieces (1×4 – 8″).
- Add a small bead of wood glue to the short edge of your top and the front piece that you just put together. Line up your side piece so it is flush with the top and front. Brad nail every 4-6 inches.
- Now attach the bottom piece (1×6 – 24″).
- Add a small bead of wood glue to the inside edge of your shelf.
- Slide your bottom piece (1×6 – 24″) in place. Making it as flush as possible with the rest of the edges. Brad nail every 4-6 inches.
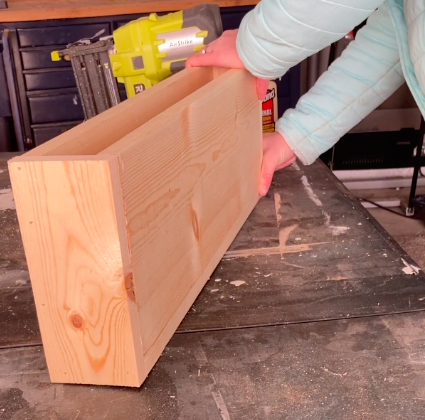
- Repeat each of the previous 3 steps for the second shelf.
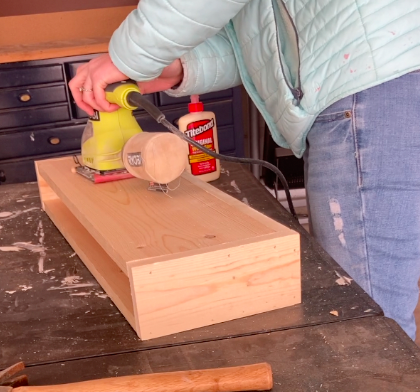
Step 4: Apply Wood Filler
- Press stainable wood filler into each nail hole and along the wood seams. Allow adequate drying time.
Step 5: Sand
- Starting with 120 grit sandpaper, sand your shelves (you don’t have to sand the 2×2 boards because they will be concealed inside your floating shelf, it is the mount).
- Using 220 grit sandpaper go over your shelves once more. For more tips and information on sanding visit The Ultimate Guide to Using Sandpaper blog post.
- Make sure all areas with wood filler are smooth to the touch.
- Add a second layer of wood filling if necessary. Sand again if more wood filler is added.
- Remove all dust from the shelves.
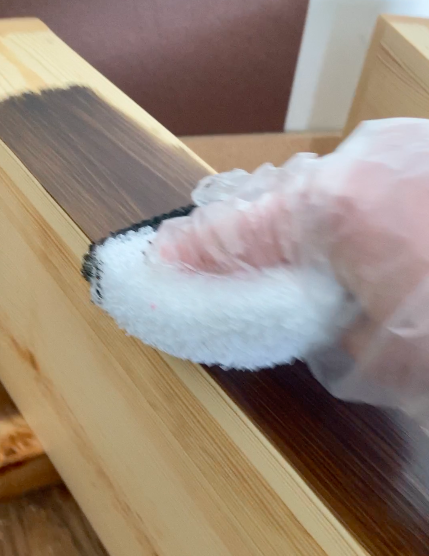
Step 6: Apply Wood Conditioner
- Before any staining job, you’ll want to use a wood conditioner. Wood conditioner allows for even absorption of your stain, so you don’t end up with a blotchy stain job.
- Using an old lint-free rag, a staining pad, or a synthetic brush, spread a liberal amount of the wood conditioner on the wood. Wipe off all the excess and allow to sit according to the instructions according to your can (typically 20 minutes – 2 hours). Make sure you don’t wait longer than the suggested time or it will not work properly. If the wood conditioner sits too long, it becomes more of a sealer than a conditioner.
Step 7: Stain and Seal Shelves
- Once your wood conditioner has set for the recommended time, it is time to stain. Using a lint-free rag or staining pad, rub your stain of choice moving in the opposite direction of the grain. Then rub off moving in the direction of the grain.
- Finish by sealing the wood with polycrylic. Just brush on with a synthetic bristle brush. The polycrlic will add a smooth protective coat.
Step 8: Assemble and Install Wall Cleat

- Make your two wall mounts by attaching your 5.5″ 2x2s to your 23″ 2x2s.
- Predrill 3 holes from the backside of the 23″ piece into your 5.5″ piece (predrilling a hole is essential to prevent your wood from splitting).
- Use a stud finder to find the studs in the area you want your shelves.
- Predrill holes in your mount in spots that will line up with your studs.
- Use a level to make sure the mount is completely level, and screw into the studs
- Repeat this for your second mount.
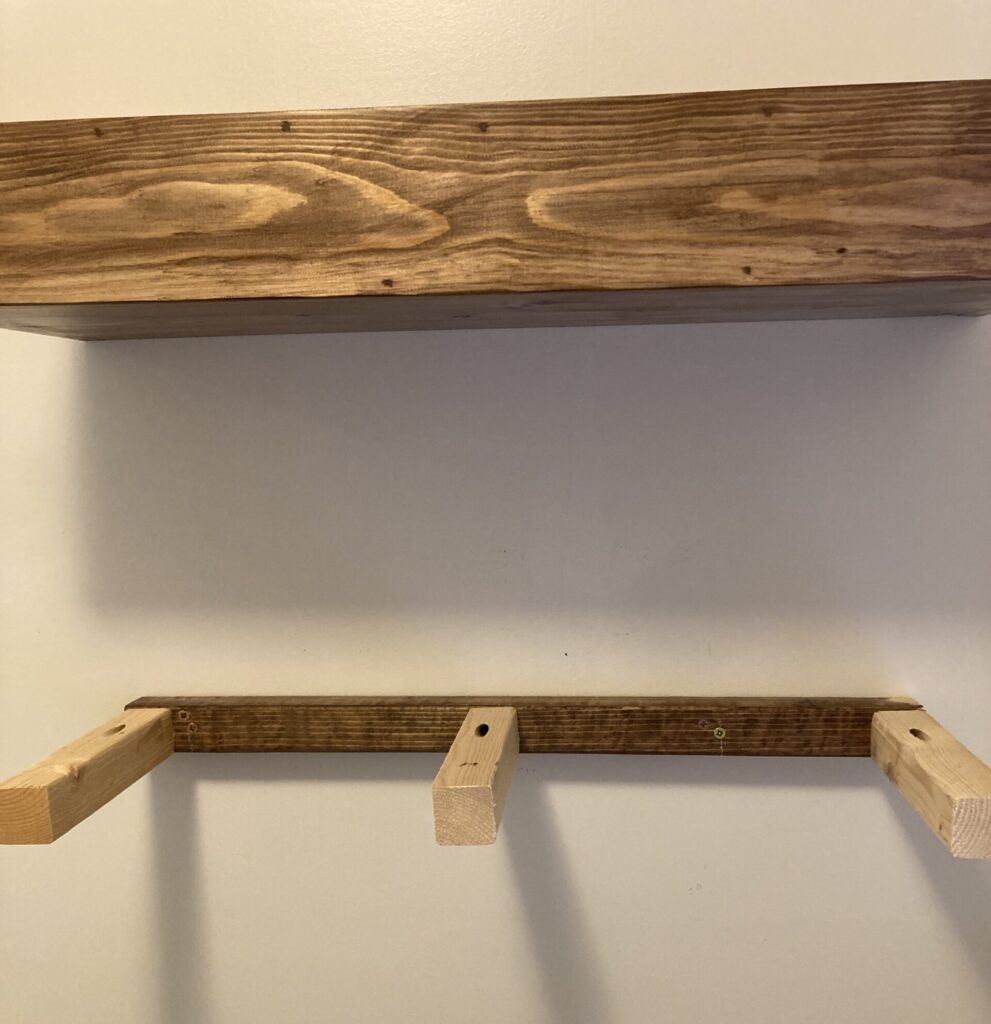
Step 9: Install Shelves
Now for the most satisfying moment, slide your shelves onto the mounts, stand back, and smile.
For a little extra stability, you can brad nail the shelves to the wall mounts. For mine, I decided to not nail them so I can easily move them if I want to.
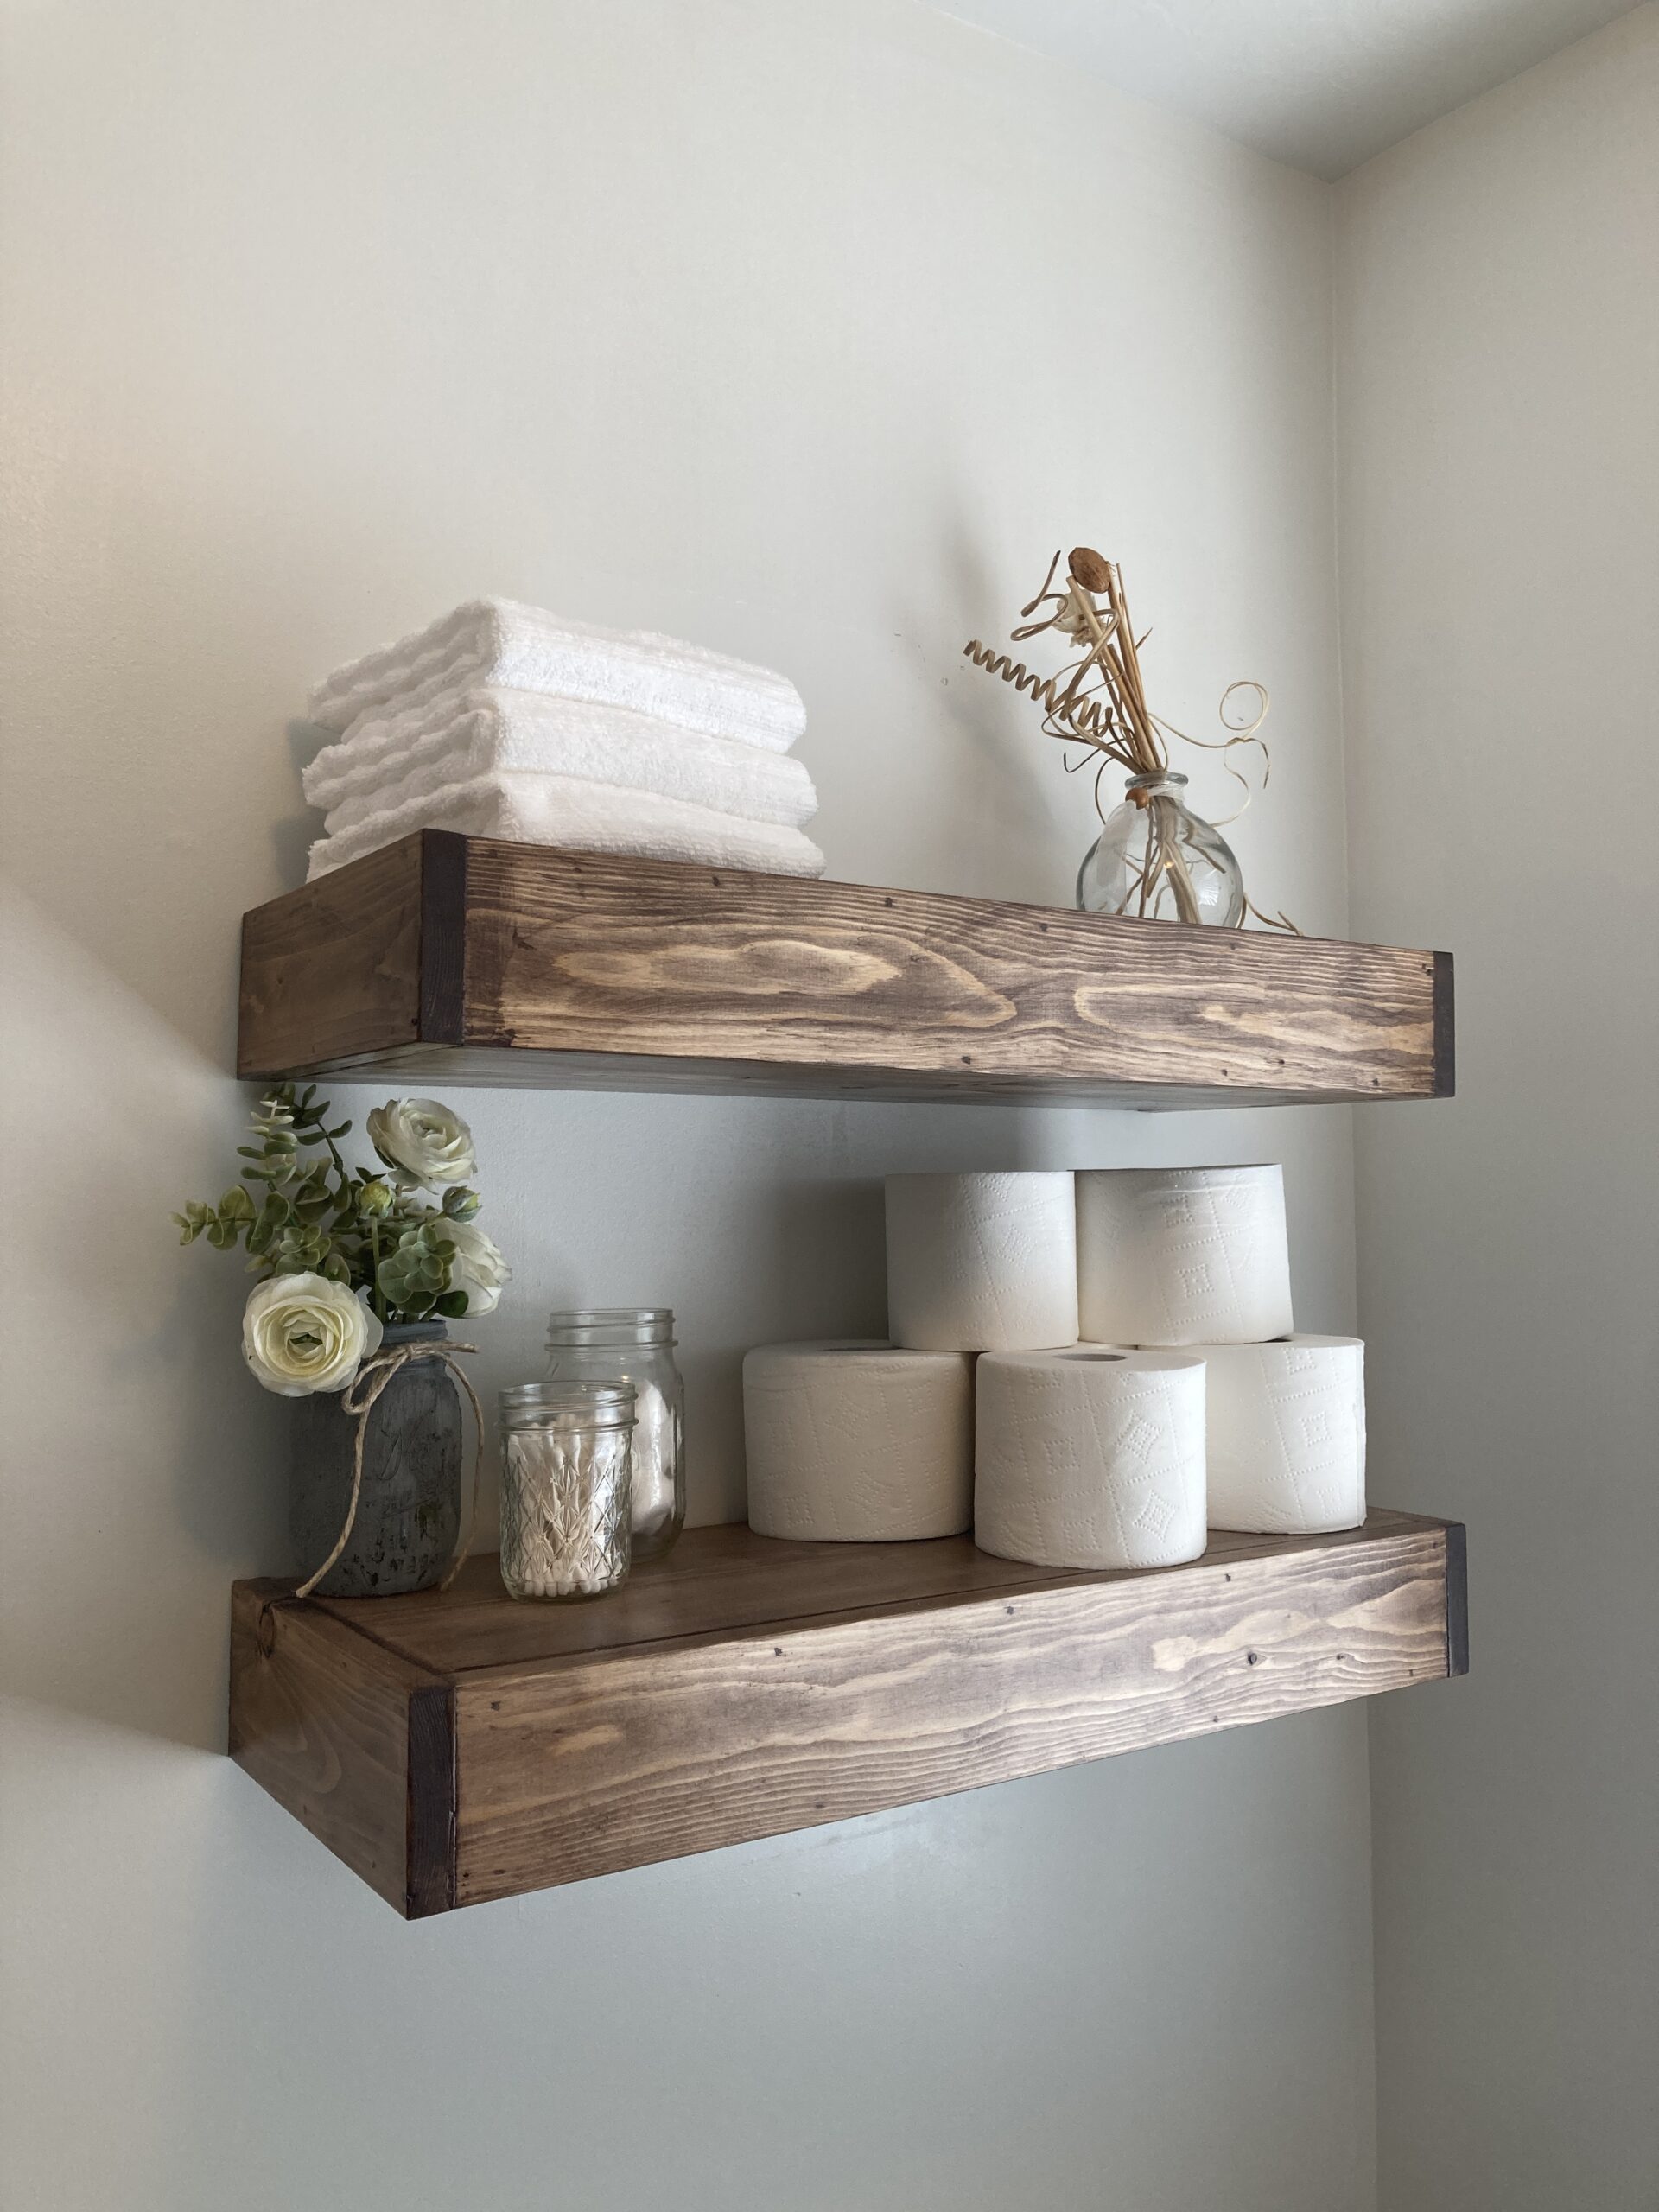
Step 10: Design – Over The Toilet Decorating Ideas
Designing your floating shelves is a ton of fun, but it can be hard to know where to start. I like to search on Pinterest to get ideas of what items I want on my shelves. Then I search for similar products online or in stores. Target is an especially fun place to buy floating shelf decor IMO.
Here are some tips for styling your floating shelves:
- Vary the heights and sizes of objects. This adds visual interest and prevents the shelves from looking too cluttered.
- Use a mix of decorative and functional items. Books, plants, vases, and framed photos are all great options.
- Stick to a color scheme or theme to keep the shelves looking cohesive. For example, you could use all white objects for a clean and modern look, or mix natural materials like wood and greenery for a more rustic feel.
- Use the rule of threes. Arranging items in groups of three creates balance and symmetry.
For a little more guidance on styling your shelves and over the toilet decorating ideas, check out this blog post from Polished Habitat.
If you’re putting your shelves in your bathroom like I did, make sure you check out my post on 12 Free Bathroom Decor Printables to add a fun, stylish but affordable touch to your beautiful new floating shelves.
Three boards. $20 dollars. Two DIY Heavy duty floating shelves! Voila!
I hope you find these DIY shelves easy, and fun to make!
Frequently Asked Questions
What is the Best Wood for Floating Shelves?
When selecting the best wood for floating shelves, it’s important to consider the strength, durability, and aesthetics of the wood. You want a wood that can hold the weight of your items, is resilient over time, and looks great in your home.
Here are some common options for floating shelf wood, including both hard and soft woods:
- Solid Hardwood: Oak, maple, and cherry are popular choices for floating shelves due to their strength and durability. They also have an attractive, natural grain pattern that complements any decor.
- Solid Softwood: Softwoods like pine, cedar, and fir can be used for floating shelves, but they aren’t as strong as hardwoods. They are lightweight and easy to work with, and they have a natural look that many people appreciate.
- Plywood: Plywood is a composite material made from thin layers of wood veneer. It’s strong, lightweight, and can be stained or painted to match your home decor. Plywood is an affordable option that is commonly used for floating shelves.
- MDF: Medium-density fiberboard (MDF) is another composite material that is made from wood fibers and resin. It’s less expensive than solid wood, and it’s easy to work with. However, it’s not as strong as hardwood or plywood. And it can’t be stained, only painted.
- Reclaimed Wood: Reclaimed wood is a popular choice for floating shelves because it’s eco-friendly and has a unique look. You can use reclaimed softwoods like barn wood or pallet wood for a rustic look.
When deciding on the right wood for your floating shelves, consider the weight of the items you plan to place on them. If you plan to store heavy objects like books, solid hardwoods or plywood are recommended. If you’re looking for a more affordable option or if you’re using the shelves for decorative purposes only, softwoods or MDF may be a good choice.
For this specific post, I just used pine (softwood). I chose pine because it is affordable but still gives a beautiful wood grain when stained! Also, since I’m just using my floating shelves for lightweight decor, the softwood is sufficient!
Should I stagger my shelves or hang them in line?
When it comes to hanging your floating shelves, there are a few options. You can hang them in a staggered or in-line arrangement, depending on the look you’re going for.
Staggered: Hanging the shelves at different heights and distances from each other creates a more dynamic and visually interesting display. This is a great option if you have multiple shelves and want to create a gallery wall effect.
In-line: Hanging the shelves in a straight line creates a more cohesive and streamlined look. This is a good option if you have fewer shelves or want to create a more minimalist look.
I used my shelves to update the look of my bathroom. They worked perfectly for some over the toilet storage DIY.
These easy DIY heavy duty floating shelves would look great in a kitchen or bedroom! Or any room for that matter.
What do you think? Where will you put your floating shelves? Leave a comment below if you plan to take this project on! I would love to hear how it goes for you.
Want to share how to make floating shelves? Pin it!