This post may contain affiliate links. I try to make my posts as helpful as possible and have great products easy for you to access. The use of these links provides me a small commission at no cost to you. As an Amazon Associate, I earn from qualifying purchases.
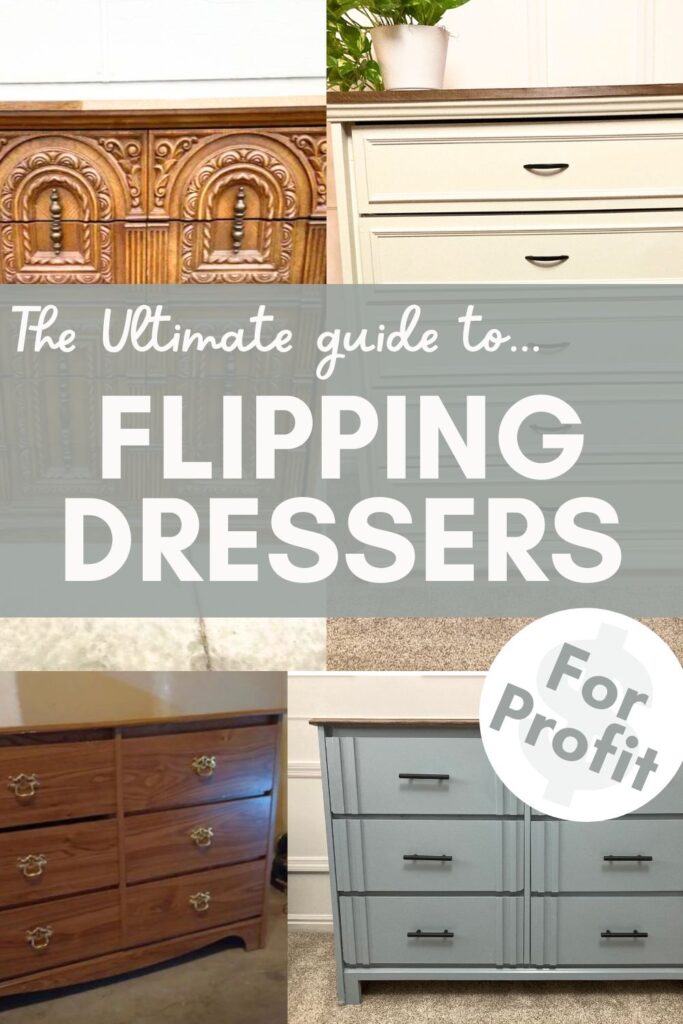
The Best Furniture to Flip for Profit
One of my favorite beginner DIY projects is dresser flips. It is low-cost, doesn’t require expensive power tools, and can make you quite a bit of money in the end! Which, in my case, I desperately need to fund my power tool and project addition.
There are a lot of options for furniture to “flip”. But I and other fellow furniture flippers have come to a consensus, dressers are the best furniture to flip for profit. Everyone needs dressers, not everyone needs a desk or hutch. So if you are going to spend your time and money anywhere, dressers are an ideal place to do it.
Learn more about how dressers are the best furniture to flip for profit. And get all the tips and tricks for a beautiful fun dresser flip.
- What is Flipping Furniture?
- Where Do I Find Dressers to Flip?
- How to Flip Furniture: Simple Steps to Follow
- Flip Furniture For Profit: The Financial Breakdown
- Frequently Asked Questions About Flipping Furniture
What is Flipping Furniture?
Flipping furniture is the process of purchasing an old or outdated piece of furniture and giving it a new life by updating or renovating it, with the goal of reselling it for a profit.
Flipping furniture can involve various techniques such as painting, staining, reupholstering, and adding or updating hardware. The idea behind flipping furniture is to transform an old or outdated piece into something that is modern, stylish, and desirable.
Where Do I Find Dressers to Flip? And What Should I Keep in Mind When Choosing a Dresser?
There are a variety of places you can search to find the right dresser to flip. My go-to places are local classifieds groups and Facebook Marketplace. But you could also try searching for one at a thrift store, garage sale, Craigslist, or OfferUp.
If you are lucky, you might even find one for free! Often people will post free dressers in online marketplaces or even just set them out on the curb. So keep your eyes peeled while you’re out and about!
When searching for a dresser to flip, just keep in mind how much you are spending to purchase it, how much it will cost to update it, and how much you want to sell it for. Check out the cost breakdown section of this post for more on that topic.
Another thing to keep in mind when choosing a dresser to flip is the state it is in. Obviously, most dressers you’re going to be looking at will not be in great shape. But things like water damage and broken drawer tracks are pretty difficult (but not impossible) to repair.
How to Flip Furniture: Simple Steps to Follow
Follow these simple steps to learn how to flip furniture.
1. Clean and Remove Hardware
The first step is to get to a (relatively) clean slate. Remove all hardware and give the whole dresser a good cleaning.
I start by vacuuming out any dust or hair, then I like to wipe it down with hot water with a pinch of powdered Tide (a tip I learned from GoCleanCo).
2. Add Wood Filler and Sand
There are a variety of options when it comes to wood filler.
If you are refurbishing a wood dresser and plan to stain it, make sure you purchase stainable wood filler.
If you plan to paint your dresser, use paintable wood filler.
If you have especially large gaps, Bondo is a great product. Bondo is nice because it doesn’t shrink, it dries fast and it typically only requires one layer, while regular wood filler often requires more than one (especially for larger gaps).
Once your wood filler has dried for the recommended amount of time, sand it flat.
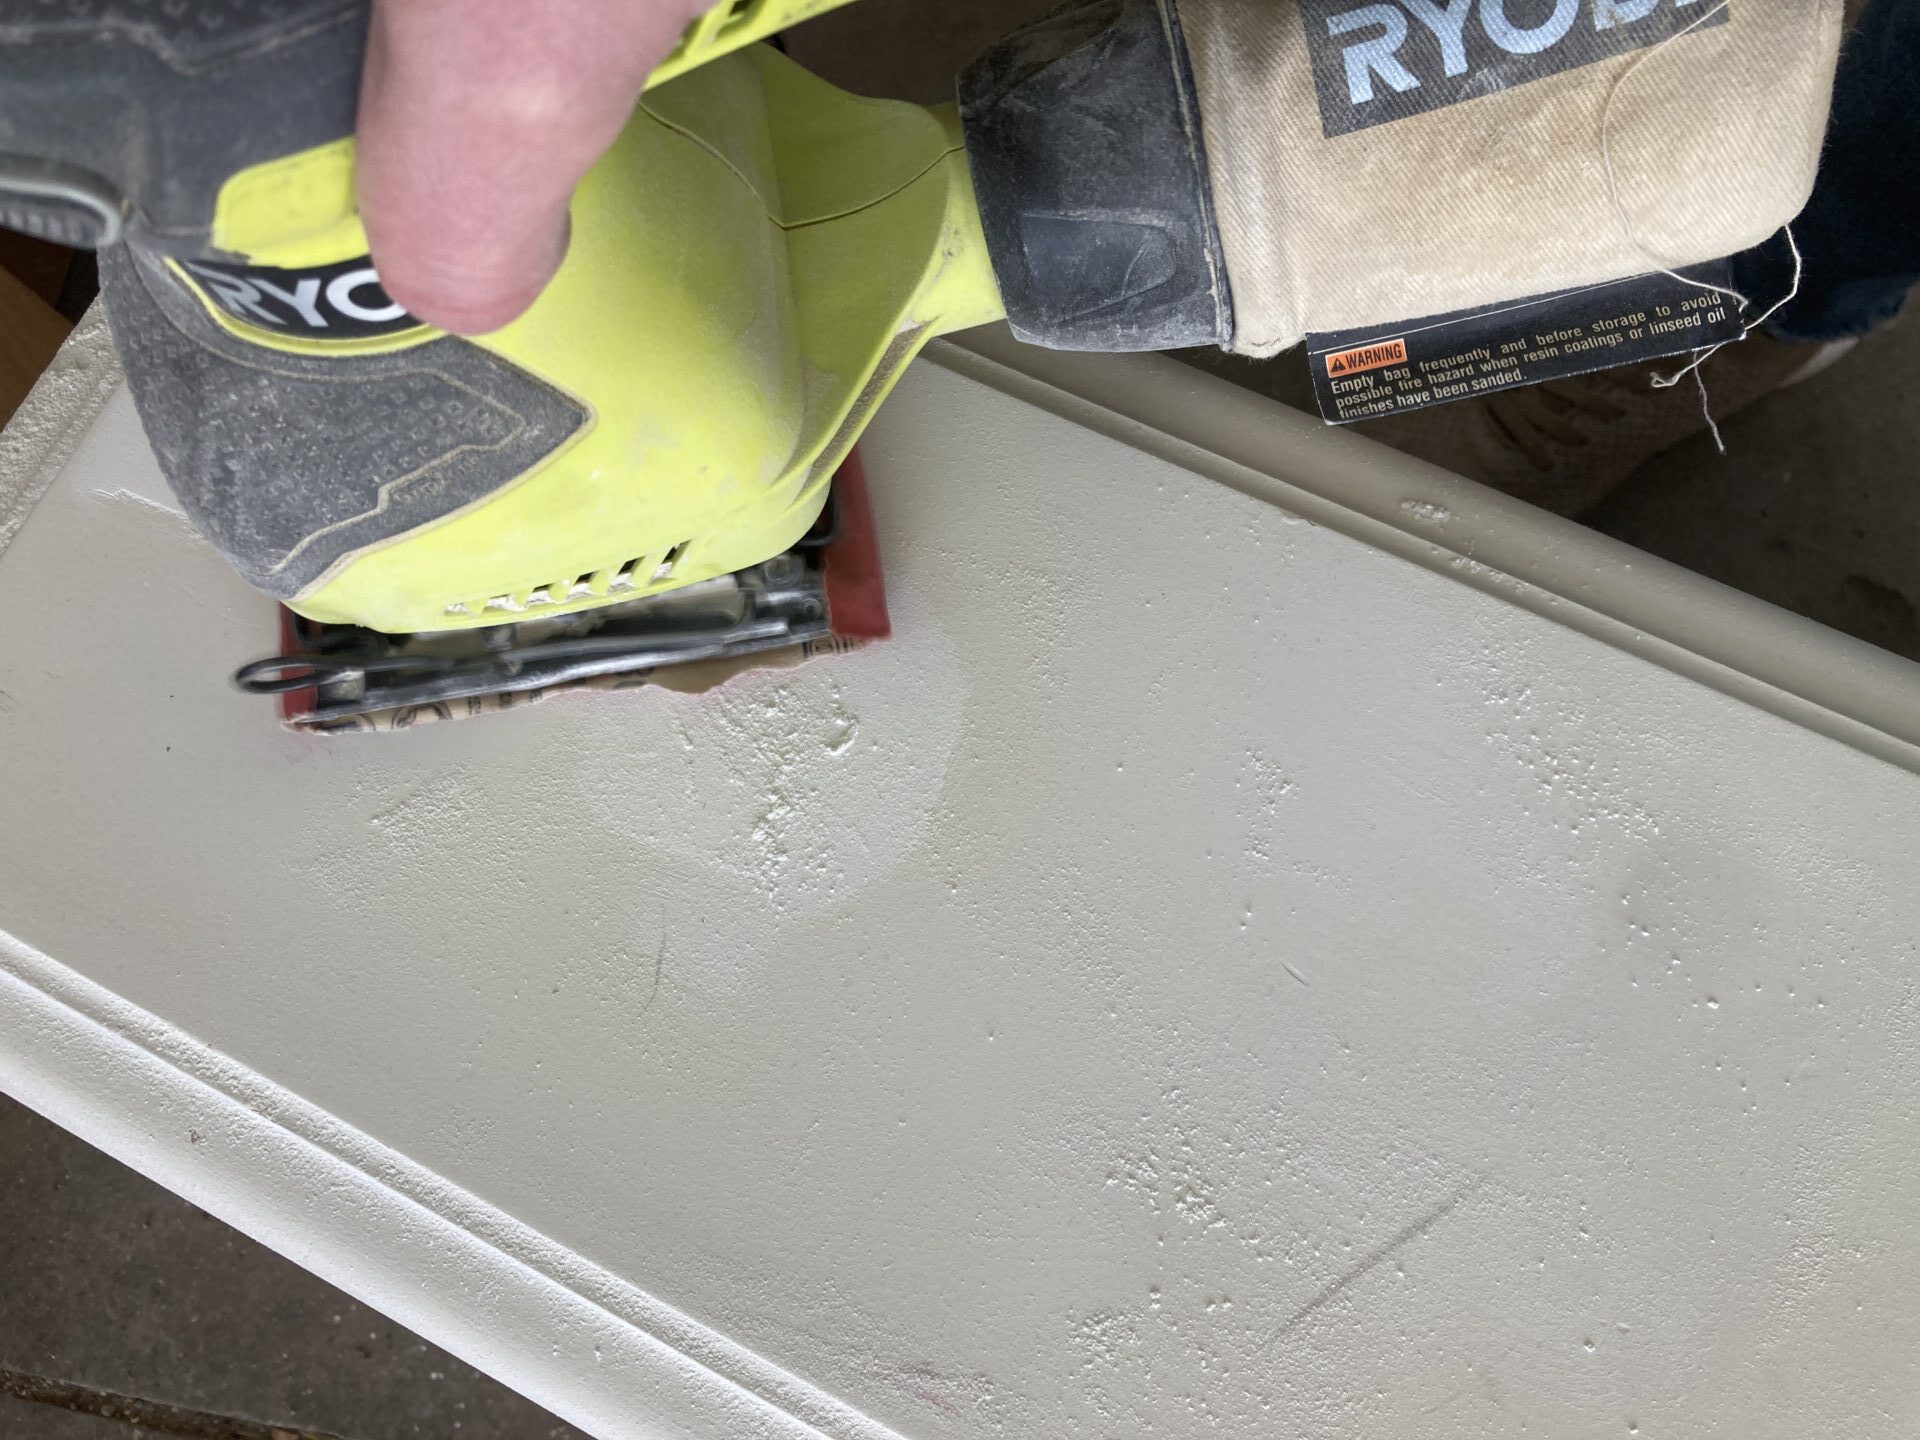
If you are just sanding down the wood filler, I would use around a 220 grit. If you are removing more than the filler, start with a lower grit number (80-120). For more guidance on sanding, check out The Ultimate Guide to Using Sandpaper.
**Important** Before you sand or remove any old paint from a dresser, always test for lead. Lead was a common ingredient in paint before 1978 when it was outlawed. Failure to properly dispose of the lead paint can lead to lead poisoning. Lead poisoning can result in a host of issues for adults, and especially children. If you have a positive lead test or are concerned about your dresser having lead, refer to the section in this article titled: What do I do if my dresser has lead paint?
3. Remove/Reshape Structure if Needed (add your special touch)
This is one of the most fun parts of the process, in my opinion! Other than paint, this really transforms the dresser.
Most dressers you will be flipping may have outdated styles. Take some time to look at what is popular and new on the market. Find ways to modernize your dresser.
Here are a few examples:
As you can see in the picture below, the dresser originally had a scalloped edge along the bottom. It might have been cute in the 90s, but it definitely made it look a little dated. So I simply traced a straight line and cut it with my jig saw. This was a quick (and free) way to make a big difference!
I also used this trim from Home Depot to add modern vertical lines to the drawer fronts on this dresser. Another quick and affordable way to remodel a dresser.
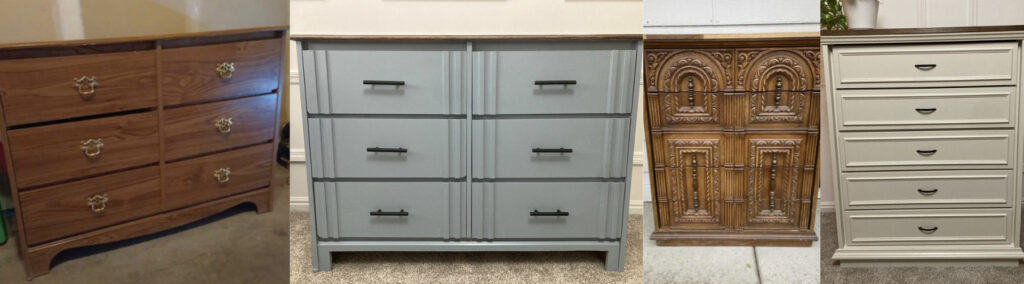
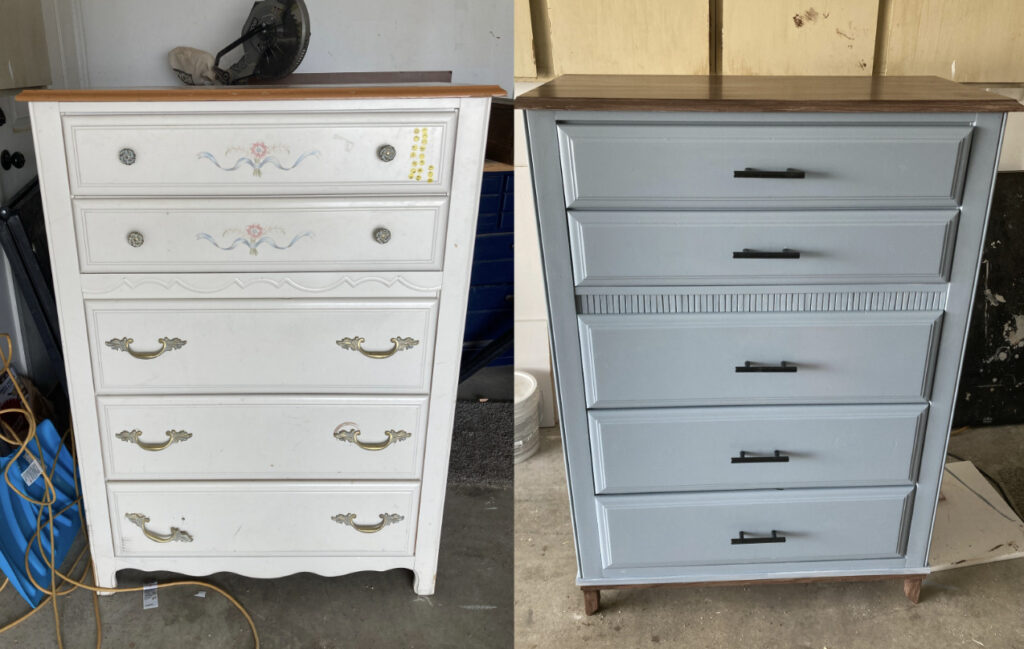
For the dresser below, I first removed the decorative drawer faces. They were actually just faux wood plastic casing.
Then I used my miter shears and this trim from home depot to create picture frame moulding on the drawer fronts. For everything you need to know about using miter shears, check out this post.
I also used edge banding to replace the broken banding along the top edge of the dresser. Then I stained it to match the top.

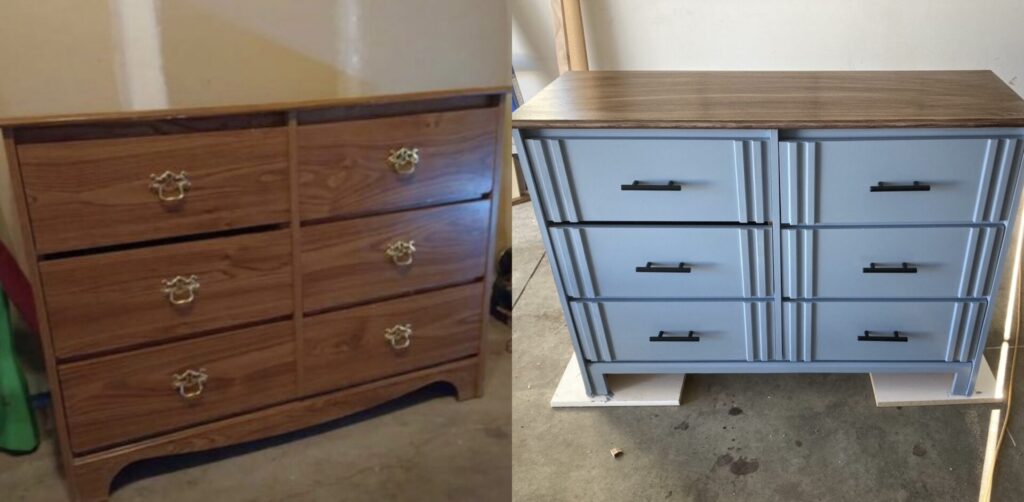
For this dresser, I actually used popsicle sticks to give a “reeded” look to the little middle section of the dresser. This was a really fun and affordable way to upgrade the dresser!
The base was outdated and damaged on the back. So I used my jigsaw to cut a straight line across. I bought a redwood 2×2 to create a new base. For the feet in front, I cut a 50-degree angle.
There are loads of options when it comes to altering the structure of your dresser to modernize it. Some dressers might require very little, and some might require a lot. Just take a little time to analyze your dresser and what it needs to look new.
Take some time to Google dressers, get inspiration from designs that stick out to you, and find ways to make it happen!
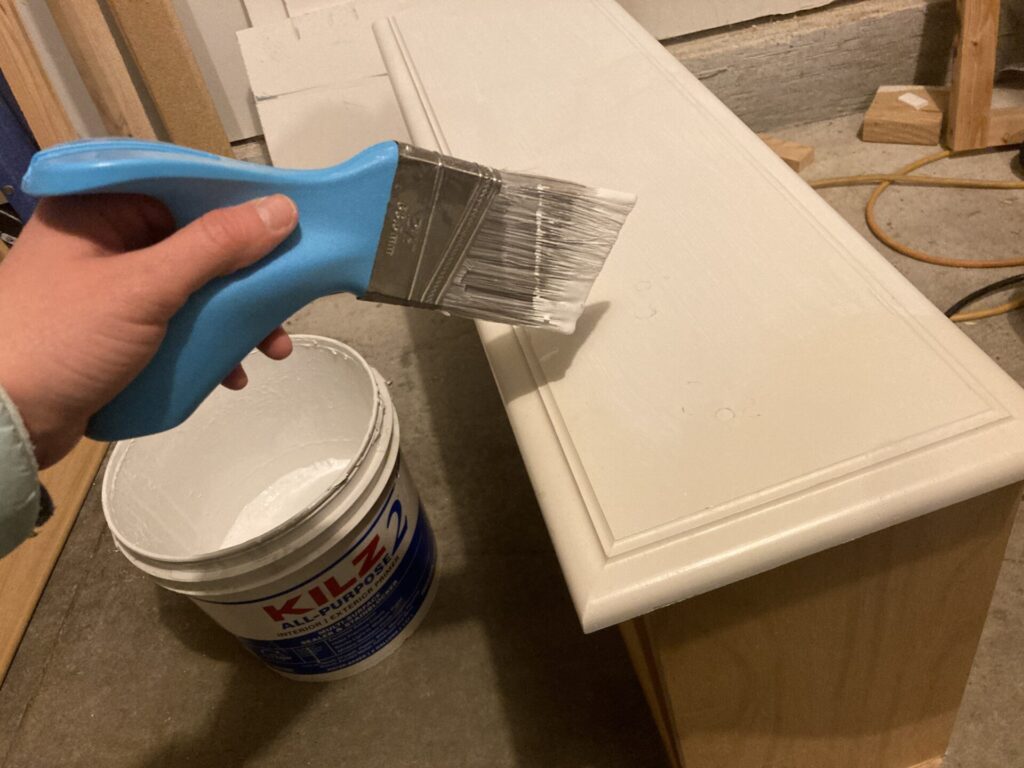
4. Prime Your Dresser
Once you have your holes filled and structure set, it is time to prime. Make sure you have removed all dust. I really like these tac cloths, but you can also just use a lightly damp cloth.
This is the primer I have been using, but this primer is really great too!
The primary purpose of priming is to create a smooth, even surface that will allow the paint to adhere properly and look its best. It creates a surface that is more receptive to paint, helping it to adhere better and last longer.
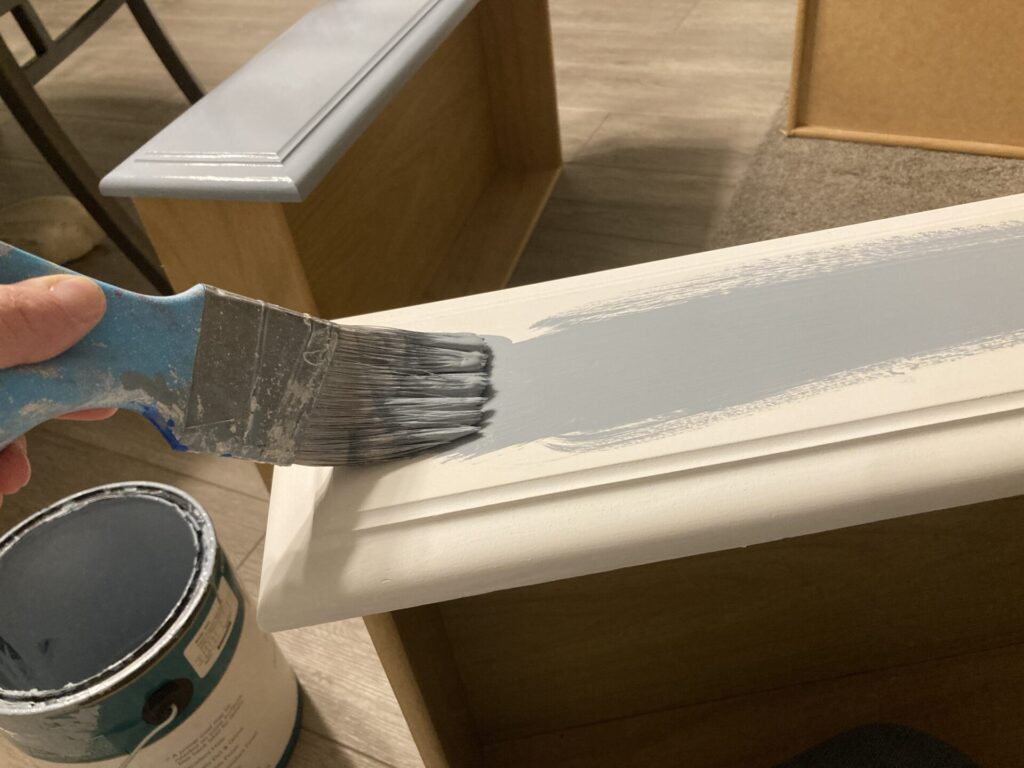
5. Paint Your Dresser
Tips for Painting Your Dresser
- Allow the primer to completely dry according to the instructions on your product. This will insure the most optimal surface for your paint to adhere to.
- Choose a semi-gloss sheen paint. Semi-gloss is easier to clean and has good adherence.
- Be sure to use long, even strokes, and apply the paint evenly to avoid drips or streaks. You may need to apply multiple coats of paint to achieve the desired coverage and finish.
- Multiple thin coats are better than one thick coat. Allow the paint to dry completely between coats.
Types of Paint for Your Dresser
The best paint for a dresser will depend on your personal preferences and the type of finish you want to achieve. Here are some common types of paint that you might consider for painting a dresser:
- Latex paint: Latex paint is a popular choice for painting furniture because it dries quickly, is easy to clean up with soap and water, and has low odor. It also tends to be more durable and resistant to cracking and peeling than oil-based paints.
- Chalk paint: Chalk paint has become increasingly popular for furniture painting because it requires little to no prep work, adheres well to most surfaces, and has a matte, vintage-looking finish. It also dries quickly and is easy to distress for a more rustic or shabby chic look.
- Milk paint: Milk paint is a non-toxic, water-based paint that can create a soft, matte finish on furniture. It can be more difficult to work with than other types of paint, as it requires multiple coats and can be prone to chipping and peeling if not applied properly.
- Oil-based paint: Oil-based paint is a durable, long-lasting paint that can create a smooth, high-gloss finish on furniture. However, it can be more difficult to work with than other types of paint, as it has a strong odor and requires solvents for cleanup.
Ultimately, the best paint for your dresser will depend on your personal preference and the look you want to achieve. Be sure to follow the manufacturer’s instructions for the best results.
6. Apply a Protective Coat to Your Dresser Flip
My favorite top coat to use on my dressers is this Minwax Polycrylic in a semi-gloss finish. It might require a couple of coats, but it goes on smooth and glossy. When I have tried to use polyurethane as a top coat, it often gives a cloudy look and alters the look of the paint. So be cautious when using other top coats!
Here are some tips to keep in mind when applying your top coat to your newly refurbished dresser.
- Wait for the paint to fully dry: It is important to allow the paint to dry completely before applying a top coat.
- This can take anywhere from a few hours to a full day depending on the type of paint used, the humidity, and the temperature. You can check the paint’s drying time on the label of the paint can.
- Choose the right top coat: There are many different types of top coats available, such as polycrylic, varnish, and wax. Choose a top coat that is compatible with the type of paint you used and the level of protection you desire.
- You can add a small amount of your paint to your top coat to prevent cloudiness.
- Apply in thin coats: It is better to apply multiple thin coats of top coat rather than one thick coat. This will help prevent drips and uneven coverage. Allow each coat to dry fully before applying the next one.
- Use a quality brush: A good quality brush will help you achieve a smoother and more even application of the top coat. Synthetic brushes work well with water-based top coats, while natural bristle brushes are better suited for oil-based top coats.
- Sand lightly between coats: After each coat of top coat has dried, you can lightly sand the surface with fine-grit sandpaper (220 grit or higher) to help smooth out any bumps or imperfections. Be sure to remove all dust before applying the next coat.
- Allow for adequate curing time: The top coat may feel dry to the touch after a few hours, but it can take several days for it to fully cure. Be gentle with the dresser during this time to avoid any scratches or marks.
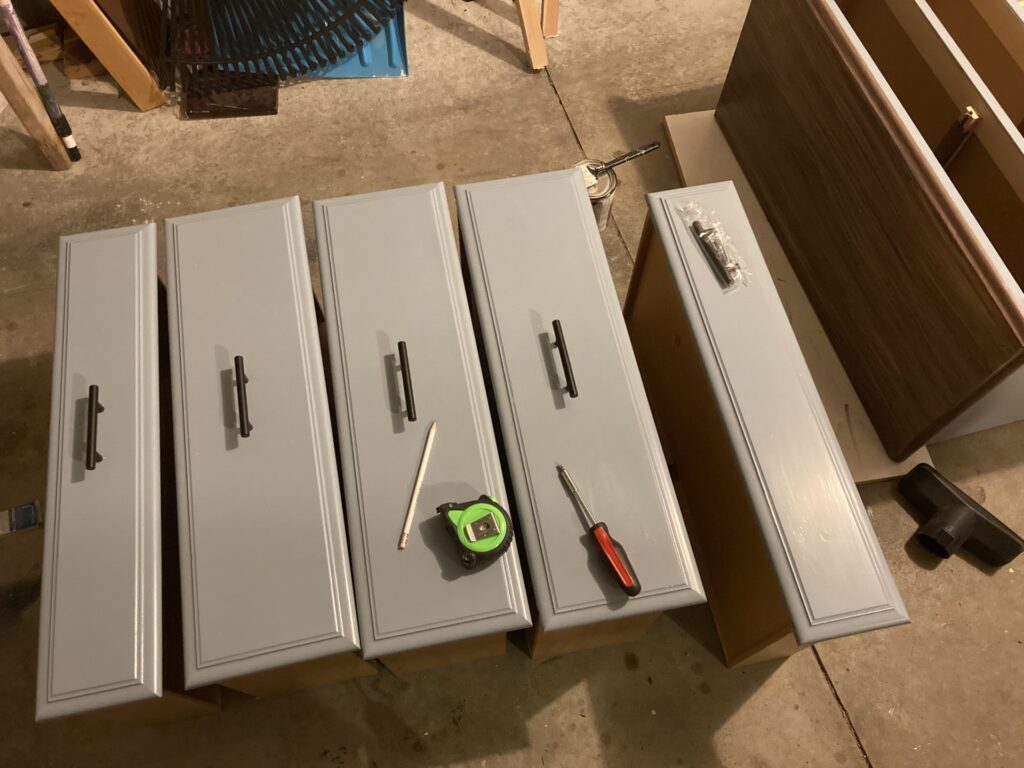
7. Add New Hardware
Adding new hardware handles to a dresser is a fun way to update its look and give it a fresh new style. Honestly, it’s both my favorite and least favorite of the process. It’s not a fun one to mess up, and it is easy to mess up. But with the right tools and knowledge, it is totally possible to do and completely transforms your dresser flip.
Here are some steps to follow when adding hardware to your dresser flip:
- Choose the right hardware: Before you start, you will need to choose the right hardware for your dresser. Consider the style, size, and color of the hardware and how it will fit with the overall look of the piece.
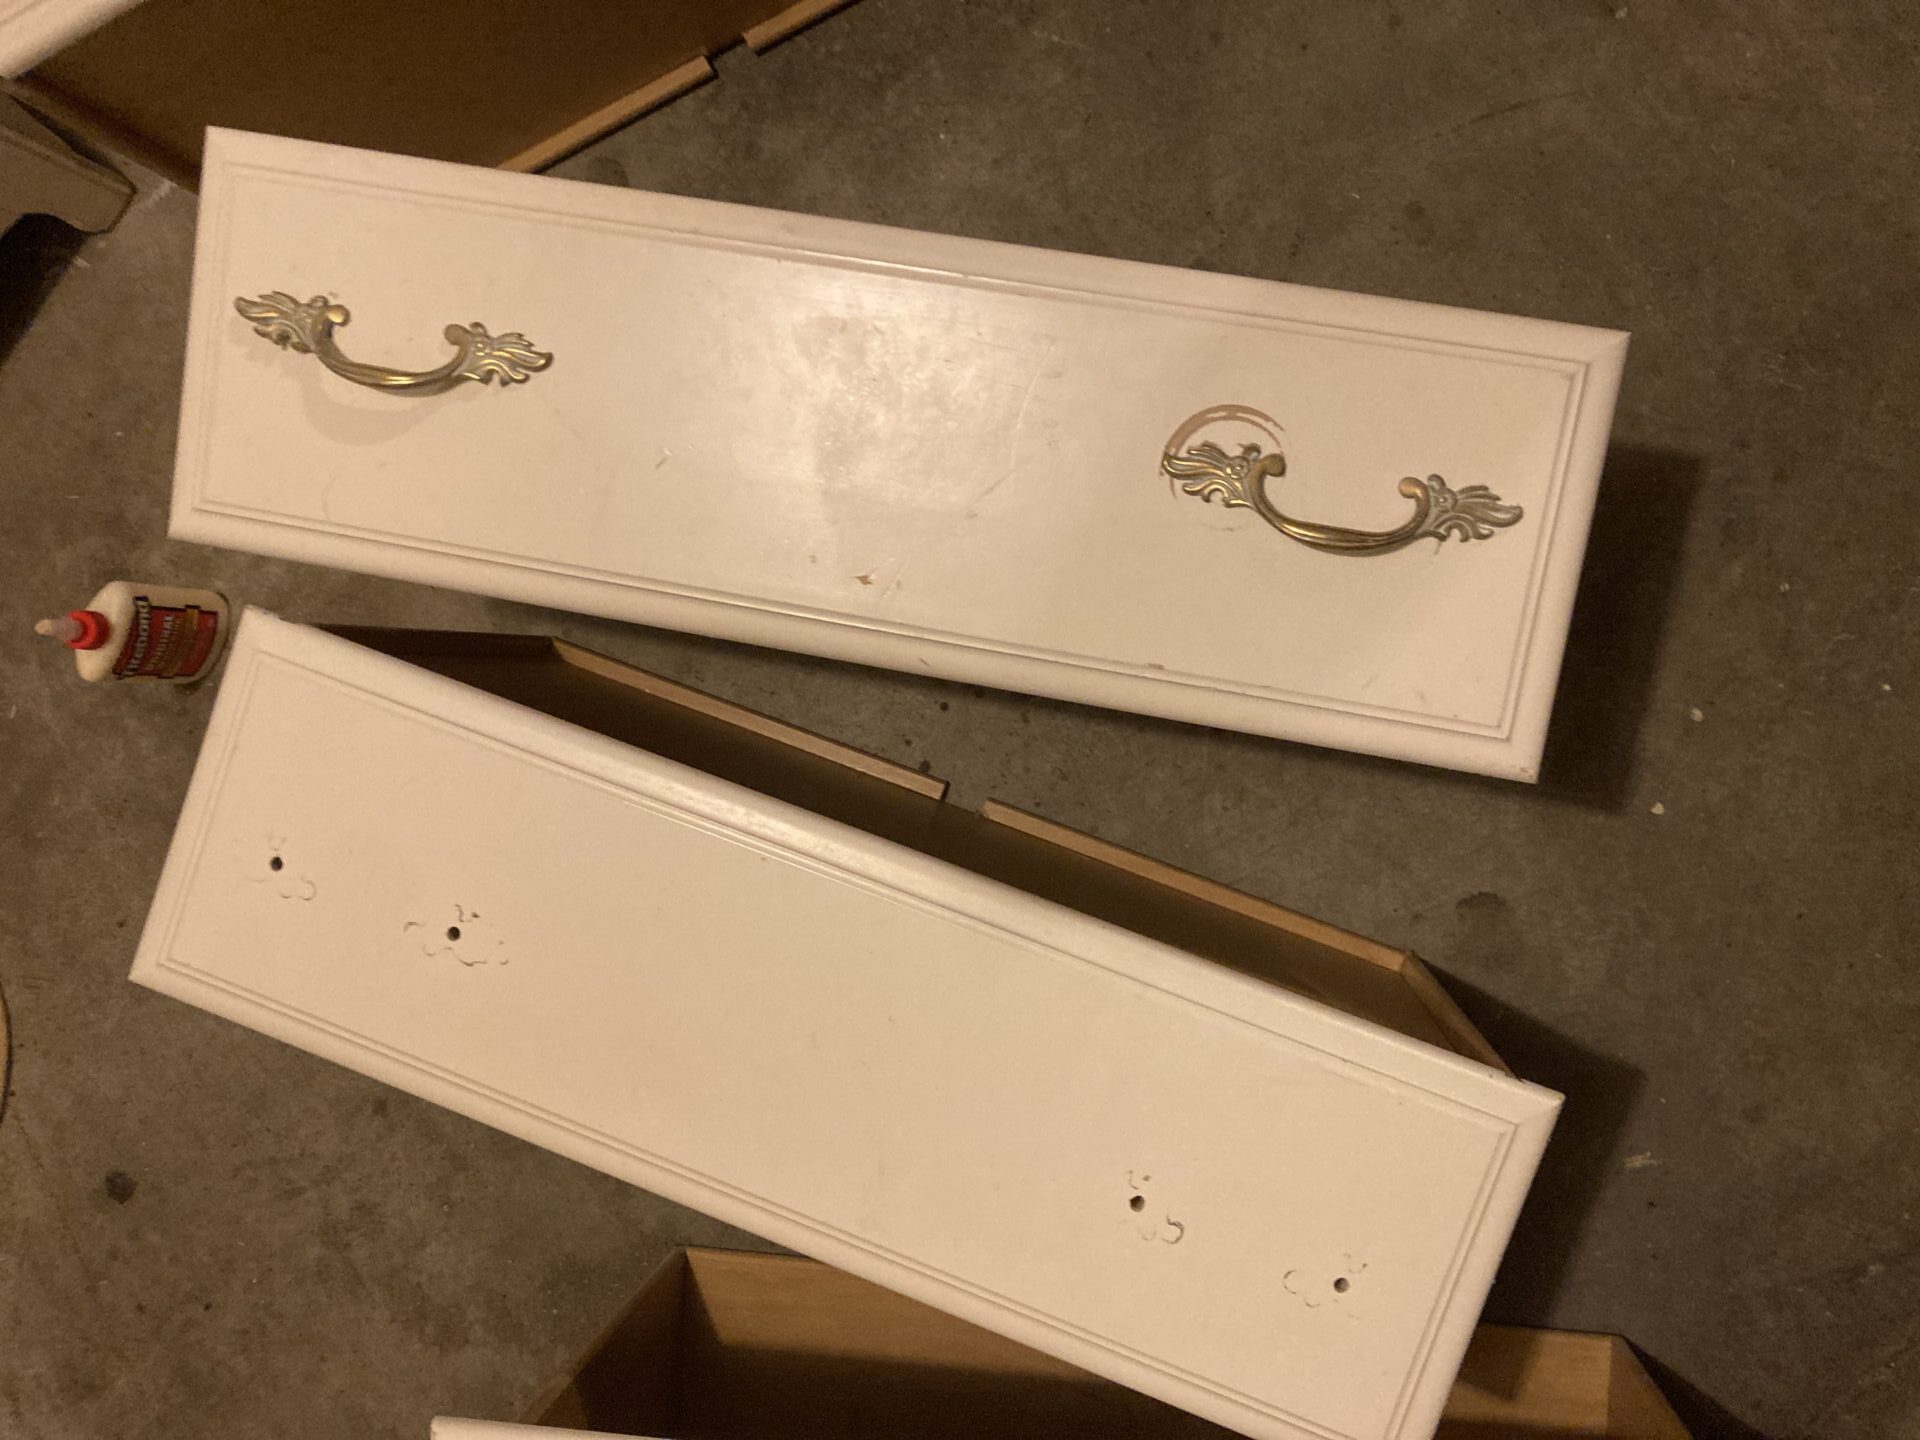
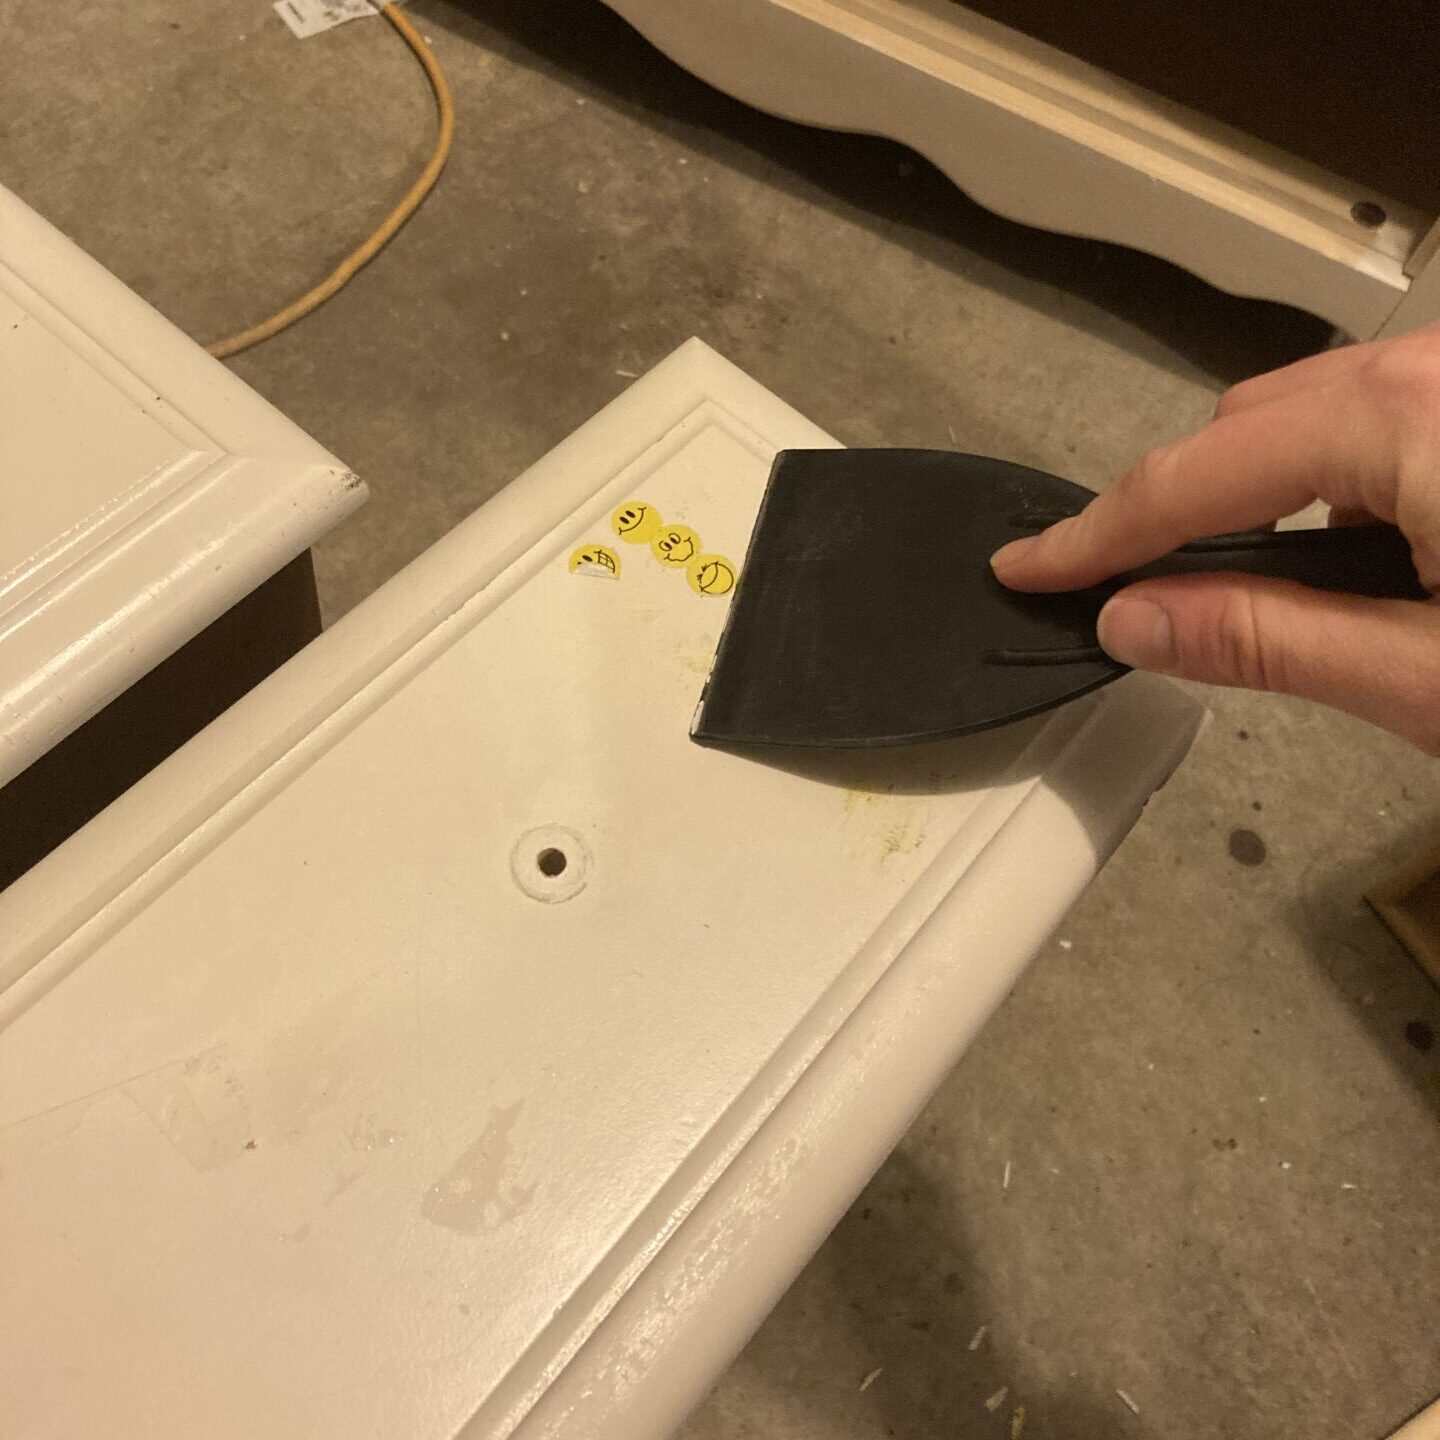
- Fill old holes: If the new hardware does not match the placement of the old hardware, you may need to fill the old holes with wood filler or putty as mentioned in step 2. Once the filler is dry, sand the area smooth.
- Measure and mark the new holes: Use a measuring tape (or this really cool hardware jig) to mark the exact placement for the new handles. You want to make sure it is centered and level. Double-check your measurements. This is one step you really don’t want to mess up. Trust me…I have learned this the hard way.
- Drill new holes: Use a drill bit that is the same size as the screws for the new hardware to drill new holes into the dresser. Be sure to drill straight and at the correct depth so the screws will fit snugly.
- Attach new hardware: Insert the screws into the holes in the new hardware and then through the holes you drilled in the dresser. Use a screwdriver to tighten the screws, being careful not to over-tighten and damage the wood.
If you like the style of the original hardware, you can always update the existing hardware with Rub and Buff. Or you could spray paint black or another color to give them a new look. Just make sure you deep-clean the hardware before taking this step.
Flip Furniture For Profit: The Financial Breakdown
Flipping Furniture for Profit: The Financial Breakdown. There are several things to take into consideration when planning the cost of your dresser flip. Review the list below for some things you may want to consider for the financial breakdown of your dresser flip:

- Cost of the dresser itself (if you’re purchasing it second-hand)
- Cost of cleaning and sanding materials (e.g., soap, water, sandpaper, etc.)
- Cost of paint, primer, and/or other decorative materials (e.g., chalk paint, stencils, decoupage materials, etc.)
- Cost of new hardware (e.g., knobs, handles, drawer pulls, etc.)
- Cost of tools (e.g., paintbrushes, rollers, spray paint gun, etc.)
The total cost of a dresser flip will depend on a variety of factors, including the size and condition of the dresser, and the type of materials and techniques you use.
Here are some examples of dressers I have flipped and roughly how much I spent and profited on each:
Financial breakdown example #1:
- Dresser: $20
- Sandpaper: $5
- Paint/primer: $0 (used leftovers)
- Hardware: $6
- Additional trim: $10
Total cost: $41| Sold: $200 | Profit: $159
Financial breakdown example #2:
- Dresser cost: $0 (found free on a curb)
- Sandpaper: $5
- Paint/primer: $0 (used leftovers)
- Hardware: $10
- Additional trim: $20
Total cost: $35| Sold: $250 | Profit: $215
Financial breakdown example #2:
- Dresser cost: $10
- Sandpaper: $5
- Paint/primer: $0 (used leftovers)
- Hardware: $5
- Additional trim/wood: $15
Total cost: $35 | Sold: $300 | Profit: $265
Frequently Asked Questions About Furniture Flipping
Is furniture flipping profitable?
Is flipping furniture profitable? Flipping furniture can be profitable if you approach it as a business and are strategic about the pieces you choose to flip, the materials you use, and the price at which you sell them.

How to refurbish a laminate dresser?
Flipping a laminate dresser is similar to wood dressers. But laminate cannot be stained like traditional wood. So you can paint it, or create a faux wood look.
Painting Laminate Dressers:
It is important to know that paint will not properly adhere to the laminate without proper priming.
Start by lightly sanding the surface: Using fine-grit sandpaper (220-grit), lightly sand the surface of the dresser. This will help the new primer and paint adhere better to the surface.
Then apply primer. Apply a coat of primer to the entire surface of the dresser using a paintbrush or foam roller. Allow the primer to dry completely before moving on to painting.
Faux Wood Look for Laminate Dressers:
Another option instead of painting is to create a faux wood look. You can do this by painting an undertone (usually a beige). Then apply a gel stain on top. Before the gel stain drys, run a textured brush, similar to the texture of a broom along the gel stain to create “wood grain”. It takes several passes of the brush to get the right look. But this is a great affordable way to get a wood look for materials like laminate that do not allow for staining.
Where should I sell my flipped furniture?
There are several places where you can sell your dresser flip, depending on your preferences and target market. Here are some popular options:

- Online marketplaces: This is probably going to be your best bet and my go-to option. There are various online marketplaces where you can sell your flipped furniture, including Etsy, Facebook Marketplace, Craigslist, Letgo, and OfferUp.
- Consignment shops: Consignment shops are stores that sell pre-owned items on behalf of the seller, and they take a commission on the sale. Consignment shops can be a good option if you don’t have a lot of storage space and prefer not to deal with the sales process yourself.
- Flea markets and craft fairs: These events are popular for selling handmade and vintage items, including flipped furniture. They are great opportunities to showcase your work to potential customers and network with other vendors.
- Local furniture stores: Some local furniture stores may be interested in buying and selling flipped furniture. It’s worth reaching out to furniture stores in your area to see if they’re interested in your products.
- Social media: Use your social media accounts to promote and showcase your dresser flip. You can create a dedicated page or account for your business and use social media platforms such as Instagram, Pinterest, and TikTok to showcase your work and reach potential customers.
Also – when you post your product, make sure it is “staged”. Add a little decoration and take the picture in good lighting.
What do I do if my dresser has lead paint?
- Avoid sanding: Sanding can create dust that contains lead particles, which can be dangerous if inhaled. Instead, use a chemical paint stripper to remove the lead paint. Follow the manufacturer’s instructions carefully and wear gloves, a mask, and protective eyewear.
- Work in a well-ventilated area: When using a chemical paint stripper, work in a well-ventilated area, such as outside or in a garage with the doors and windows open.
- Dispose of lead paint properly: You cannot dispose of lead paint in the regular trash. Contact your local government or hazardous waste disposal facility to find out how to properly dispose of lead paint.
- Consider professional help: If you’re unsure of how to safely remove lead paint, consider hiring a professional who is trained in lead paint removal.

Refer to the EPA for additional guidance on Lead-safe renovations for DIYers.
How is Furniture Flipping Good for Planet Earth?

When you flip a dresser, you are preventing it from ending up in a landfill. Instead of discarding it, you are giving it a new life and purpose, which reduces the amount of waste that would otherwise be generated.
Additionally, when you flip a dresser, you are creating a piece of furniture that is unique and personalized, which can reduce the demand for new furniture. This, in turn, can reduce the number of resources and energy required to produce new furniture.
Pin this Furniture Flipping Guide to Pinterest!