This post may contain affiliate links. I try to make my posts as helpful as possible and have great products easy for you to access. The use of these links provides me a small commission at no cost to you. As an Amazon Associate, I earn from qualifying purchases.
My daughter didn’t have any hair until she was two years old… Now she has the most beautiful full curls. So you can imagine I went a little crazy with hairbows and headbands. My bathroom has never been the same. The disorganization has been driving me a little crazy… so I came up with a little design for a DIY hairbow holder.
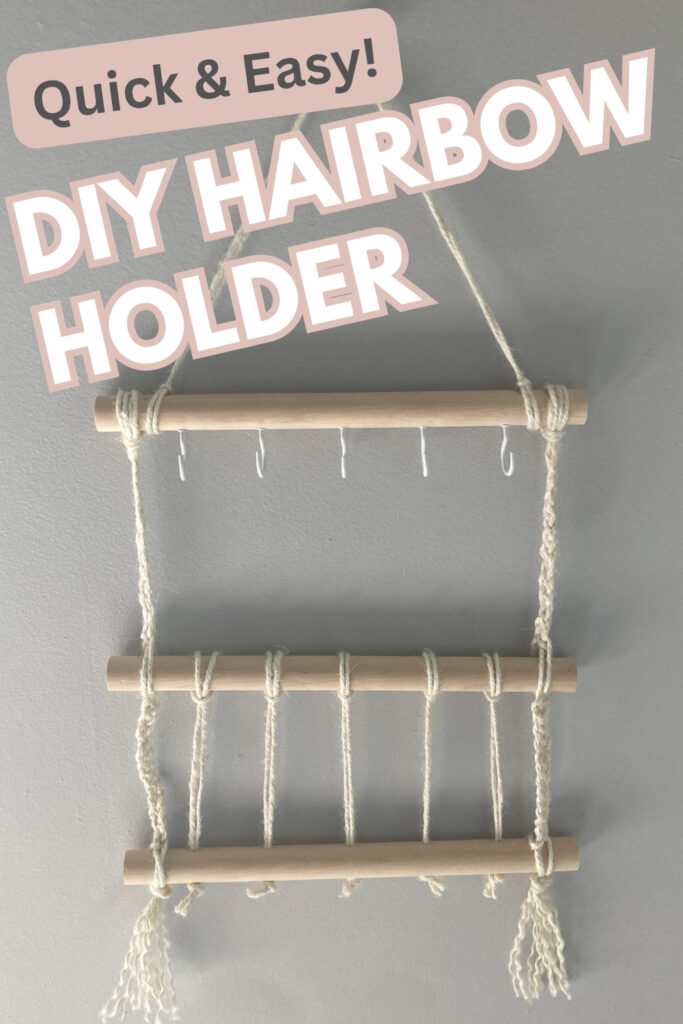
This DIY hair bow holder is not only adorable but easy to make! It is the perfect touch to a little girl’s bathroom. It adds a little charm with functional organization!
Follow These Steps to Learn How to Make a Bow Holder:
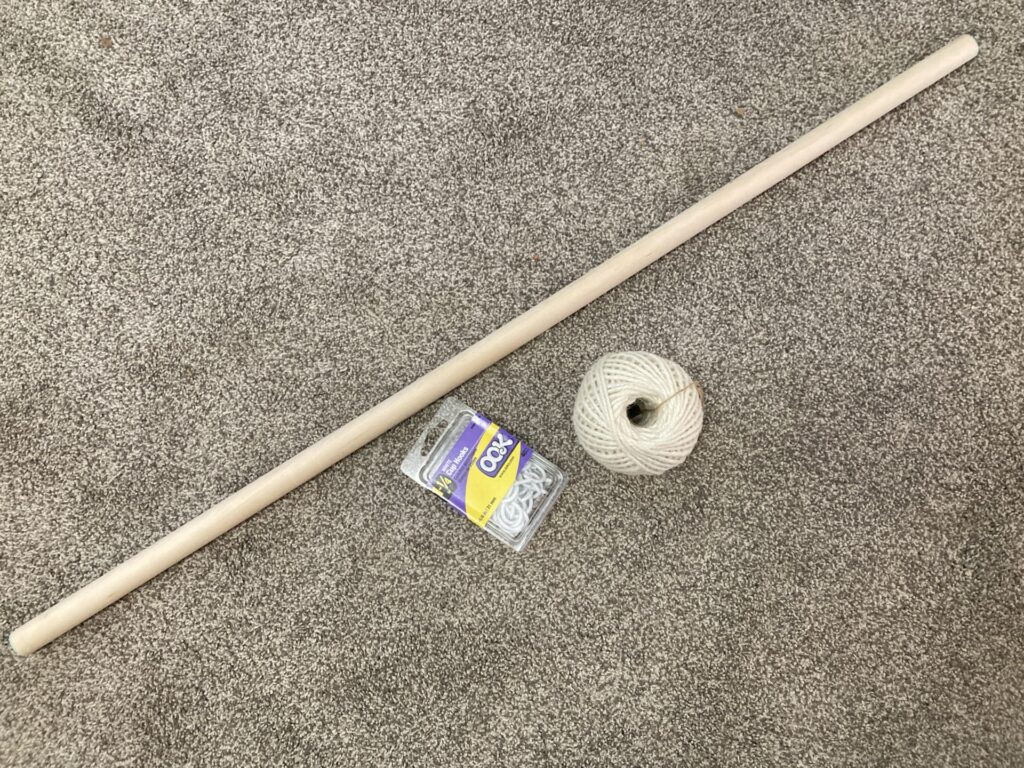
Supplies for Hair Bow Holder DIY:
Here are the supplies you will need to make your own DIY hair bow holder. All of these supplies only cost me a little over $8!
Step One: Cut Your Dowels
Cut your 36″ dowel into three equal, 12″ pieces. This can be done with a miter saw or a circular saw. I used my Ryobi Miter saw, it is one of my all-time favorite tools. I use it for so many projects.
If you don’t have a saw **don’t let this stop you from doing this project!**. Hardware stores like Lowes, Home Depot, and Ace Hardware all make free cuts. So don’t be afraid to ask!
I cut a little extra off because one end had paint on it.

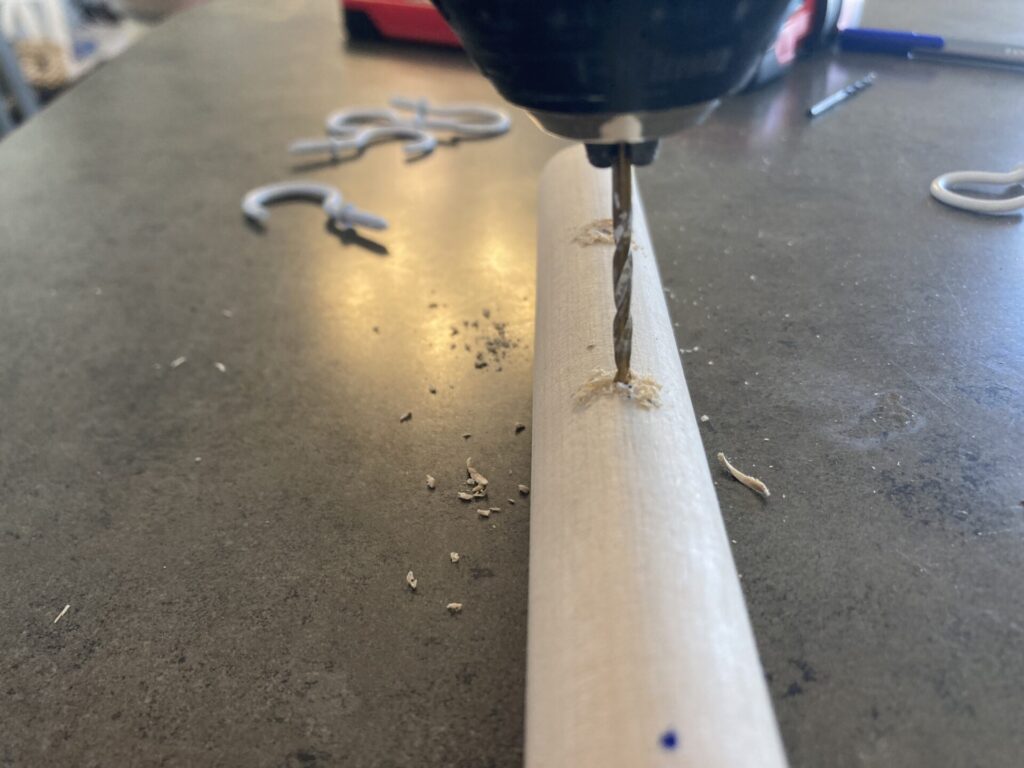
Step Two: Drill Holes and Add Hooks
Using a 1/8″ drill bit. Drill holes every 2-3 inches along one dowel. Only go about halfway through the dowel. This is for your hooks.
Then on a second dowel drill completely through the dowel. This will be to thread your string through on the bottom.
For tips on using a drill, make sure to check out this post.
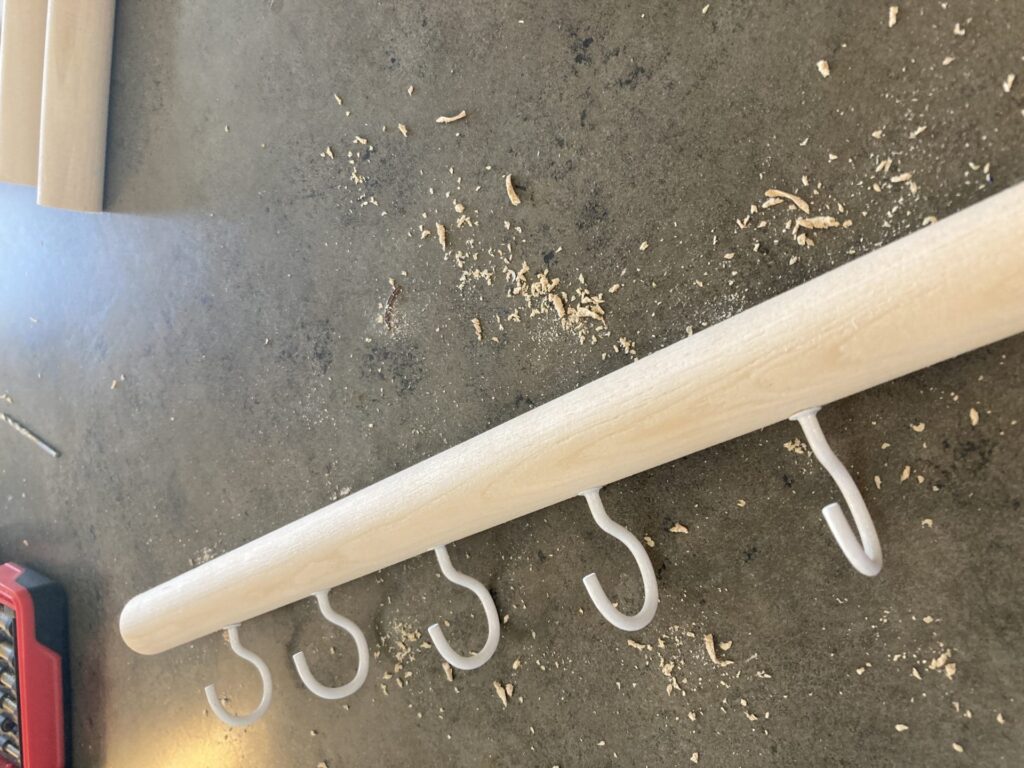
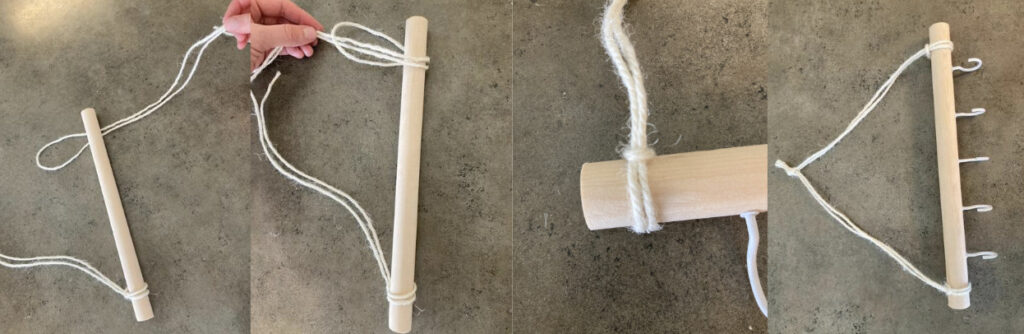
In the dowel that you drilled halfway through, add hooks to each hole. Twist them so they are all facing the same direction.
Step Three: Add Twine
I started with the top string, the one that will the DIY hairbow holder will hang from. I used two 32″ strands for this.
I folded each strand in half, then looped it through itself on each side of the dowel. Then I tied them together at the top.
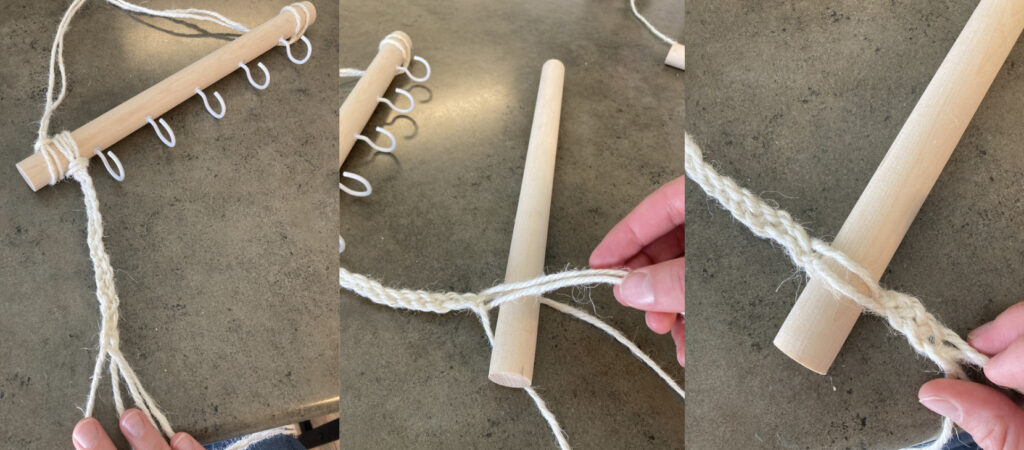
Then I started with the twine down the two sides.
There are a lot of different ways to do this. But I really liked the four-strand braid shown in this youtube video at the 3:40 minute mark.
I started with two strands that were about two arm lengths. When folded in half, this made the four strands for the four strand braid.
The picture below shows the four strands on the inside edge of the other string. But I ended up liking it better on the outside edge. But either way works!

Then I braided about 4-5 inches down and added the next dowel in. This is the dowel without any holes. I added it by lifting the two middle strands and continued braiding on the other side.
Then I braided another 4-5 inches and tightly tied a knot at the end.
I separated the strands to give it a slightly frayed look.
Repeat on the other side. Make sure to keep the other side the exact same lengths as the opposite side. Otherwise, it will end up lopsided.
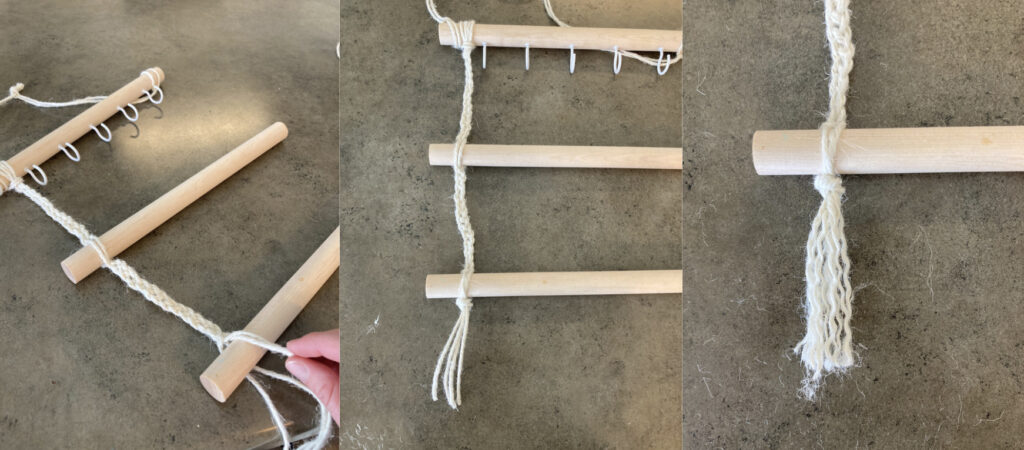
The last section now is the strands between the bottom two dowels. These will be the strands that can hold clip on bows.
I looped the string over the middle dowel. Then, using tape, I wrapped the end of thread to create a hard tip to thread it through the hole on the bottom dowel.
Then I tied a knot at the end on the other side of the dowel. Making sure to keep each strand the same length.
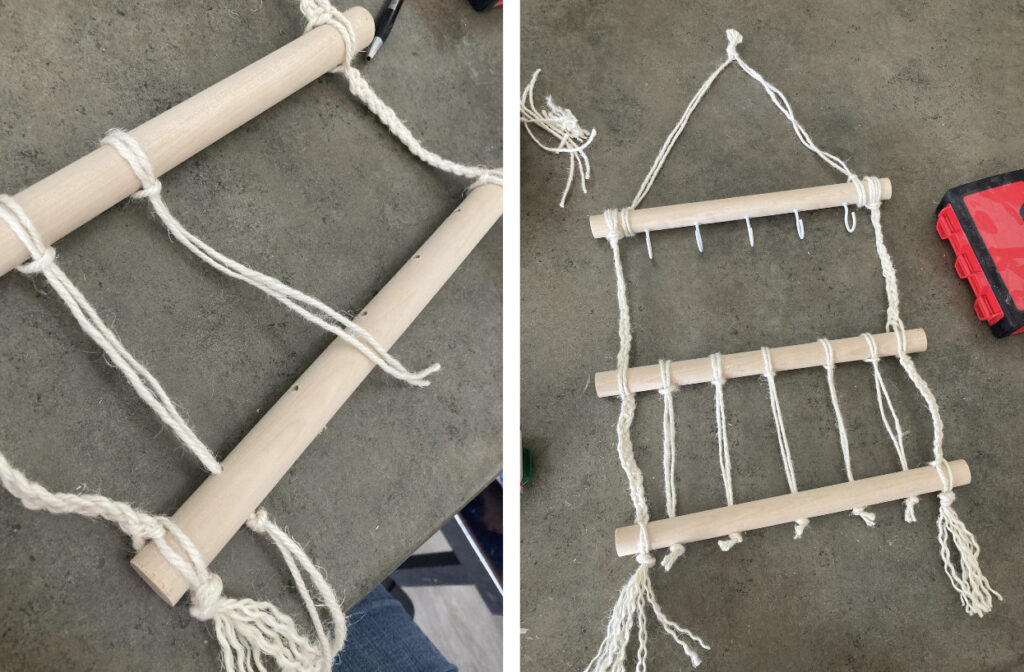
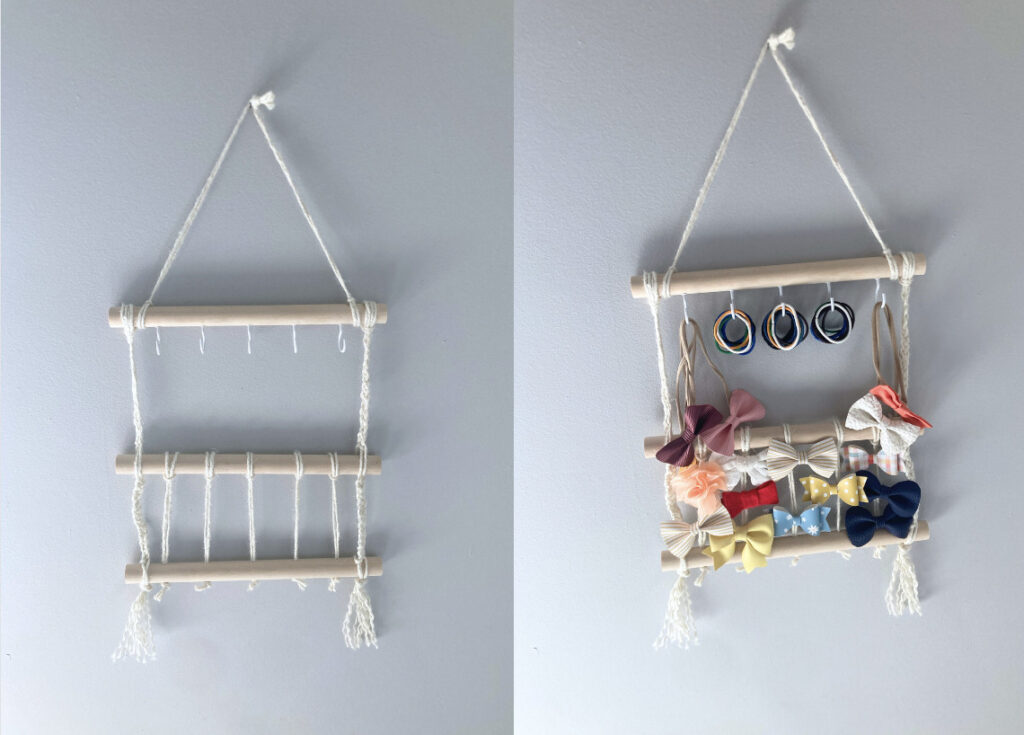
Step Four: Hang Up Your New DIY Hairbow Holder and Get Organized!
Once I had it all put together, I hung it up and added all our bows and headbands.
I am so excited about how it turned out! And my daughter is too. She is loving having a place for all of her bows.
If you are looking to add some hairbows to your collection, these bows from amazon are some of my absolute favorite.
How did yours turn out? Have any questions? Let me know in the comments below!
Pin “DIY Hairbow Holder” to Pinterest