This post may contain affiliate links. I try to make my posts as helpful as possible and have great products easy for you to access. The use of these links provides me a small commission at no cost to you. As an Amazon Associate, I earn from qualifying purchases.
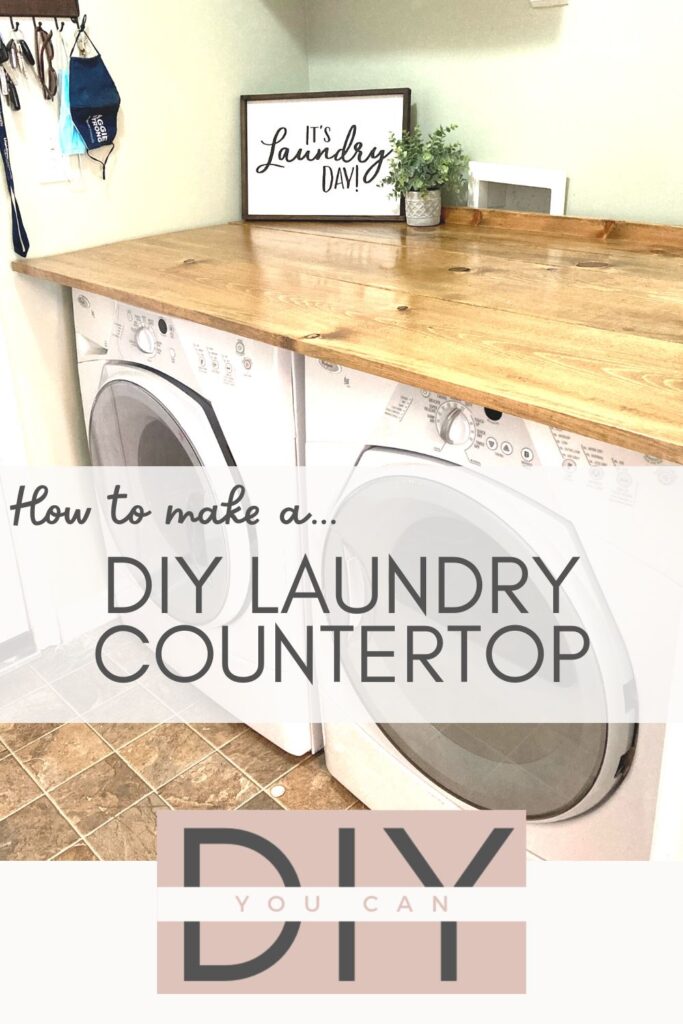
I was getting sick of random things falling behind and in between my washer and dryer. I had seen different variations of laundry room countertop ideas and I wanted to give it a shot. So I took to learning how to build a DIY laundry countertop, sometimes called a “laundry topper”. There are a lot of variations on this project, so find the one that fits your style best. But I liked the ease and cost of doing a topper out of simple wood boards.
This countertop over washer and dryer is a great beginner-friendly DIY project. And it’s fairly affordable too!
Supplies
- (1) 1x2x8
- (3) 1x8x8
- (1) 2x4x8
- Wood Glue
- 1 ½” Pocket hole screws
- 1 ½” Brad nails
- 2 ½” wood screws
- 120 grit and 220 grit sandpaper
- Wood conditioner
- A stain of choice (I like this one and this one)
- Lint-free cloth or staining pad
- Polyurethane or Polycrylic
Tools
- Saw (circular or miter saw would work great)
- Pocket hole jig (or this one is good too, it’s more affordable just not quite as user-friendly)
- Brad nailer (optional)
- Level
- Drill
Overview of How to Build a DIY Laundry Countertop
Below is a brief overview of how to build a countertop for washer and dryer. Continue Scrolling for in-depth descriptions.
- Measure and Cut
Measure the width of the space you want the counter to cover. Cut your 1×2 and 1x8s to match the width. Cut 2×4 into four 24″ pieces (this may be different depending on your laundry space).
- Assemble
Attach the three 1x8s together using wood glue and pocket holes. Add the 1×2 along the back edge.
- Sand
Sand the entire surface with 120 grit, then 220 grit. Dust off all particles.
- Apply Wood Conditioner
Generously spread the wood conditioner all over the surface. Wipe away any excess.
- Apply Your Stain
Rub the stain against the grain. Wipe the excess stain off moving the direction of the grain.
- Apply Top Coat
Coat the entire surface in polyurethane.
- Install Cleats/Wall Mount
Locate and mark the studs in your laundry room. Measure 1″ above the laundry machine. Predrill holes and screw 2x4s into wall studs. Use a level to insure each piece is level.
- Install the Countertop onto Your Washer/Dryer
Place topper on top of 2×4 cleats.
1. Measure and Cut
My washer and dryer are side by side in a small room, so I measured the width of the room and cut my boards to match the width. You will need to measure your space or desired width and make your own custom cut. Cut all four of your boards (one 1×2 and three 1x8s) to the same length. If they are slightly off, you can take a sliver off with a circular saw after the four boards are attached to each other. This will create a seamless, even look. For tips on using a circular saw head to this guide.
Cut a 2×4 into four 24″ pieces. These will be your wall cleats (or the boards supporting the DIY Laundry Countertop) when you go to install.
2. Assemble DIY Washer Dryer Countertop
I attached the three 1x8s together using wood glue and pocket holes every 6-12 inches. Screw together using 1 1/2″ pocket hole screws. For some guidance on making pocket holes, make sure you visit How to Use a Kreg Jig for Perfect Pocket Holes.
Another option is to use a solid piece of plywood in place of the 1x8s, I just like the look of the three pieces attached to each other. And I found it to be more affordable than a sheet of plywood.
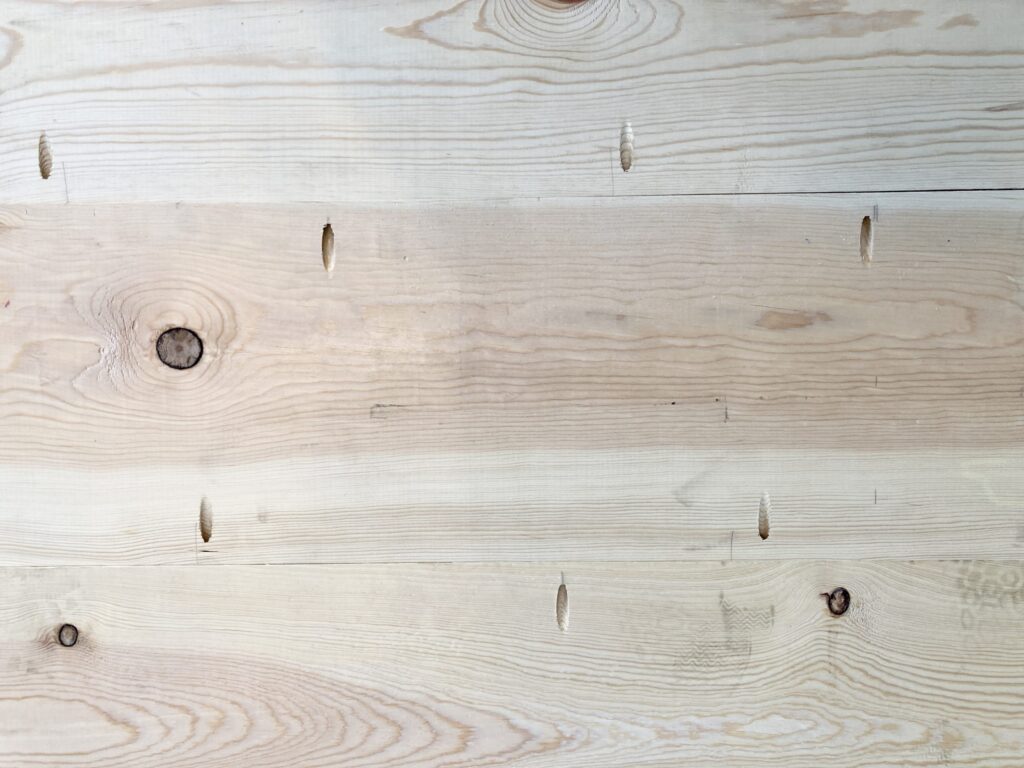
After the 3 1x8s were connected, I added my 1×2 along the back edge with wood glue and 1½” brad nails (get tips on using a brad nailer here). This 1×2 is the back lip to make sure things don’t fall behind your laundry machine. If you don’t have a brad nailer, you could pre-drill holes and screw it together with 1½” wood screws.

3. Sand Countertop for washer and dryer
After that I did a thorough sanding with 120 grit, then I followed up with 220 grit. For extra tips and tricks on sanding, visit my blog post: What Type of Sandpaper Do I Need for my Project? You’ll learn more about sandpaper than you ever thought you needed to know. But, if you’re anything like me, you’ll love it.
Then I gave it a quick wipe down to make sure all dust particles were removed.
4. Apply Wood Conditioner to Your Laundry Countertop
Before staining, it is important to apply a wood conditioner. It might be tempting to skip, but I promise it is worth it. It absorbs into the wood, so when you apply your stain, the stain absorbs evenly. The even absorption prevents weird blotches and spots in your staining job. Use an old rag to generously spread the wood conditioner all over the surface. Then wipe away any excess conditioner that didn’t absorb in the wood.
Let the conditioner dry according to the time indicated on your can. It is typically 20 minutes – 2 hours before staining. If you wait more than 2 hours, the conditioner doesn’t work as well. It becomes more of a sealer rather than a conditioner. So set a timer so you don’t forget.
Staining wood can seem intimidating, but we have a whole post to help you learn everything you need to know about staining.
5. Apply Your Stain to Your Laundry Countertop
Once your wood conditioner has set for the recommended time, you can apply your stain. There are so many great options out there. For this specific project, I used a mix of different stains I found in my garage. But there are a lot of beautiful options out there to pick from. If you need a little help choosing, I really love this guide from The Amish Craftsman on 10 Tips For Choosing the Perfect Wood and Stain.
To apply the stain, use a lint-free cloth (or staining pad) I start by rubbing against the grain then I wipe the excess off in the direction of the grain. The longer you let the stain sit, the darker it will absorb. I like to let it sit for about 5 minutes because it is easier to go darker (just more coats) than it is to go lighter (sanding). Let the stain dry for 12-24 hours or the specified amount on your can.
This is a video of staining some bench seats for my camper trailer, it gives a quick visual on starting against the grain, then wiping off with the direction of the grain.
6. Apply Top Coat on Laundry Countertop
Alright, you have done your wood conditioner, you’re done staining, now you are ready to seal and protect your beautiful work. There are a variety of top coat options, for this project I used this polyurethane.
This polyacrylic is a great option too, you will need a few more coats but it will have a smoother finish.
Get all your top coat questions answered over at this post.
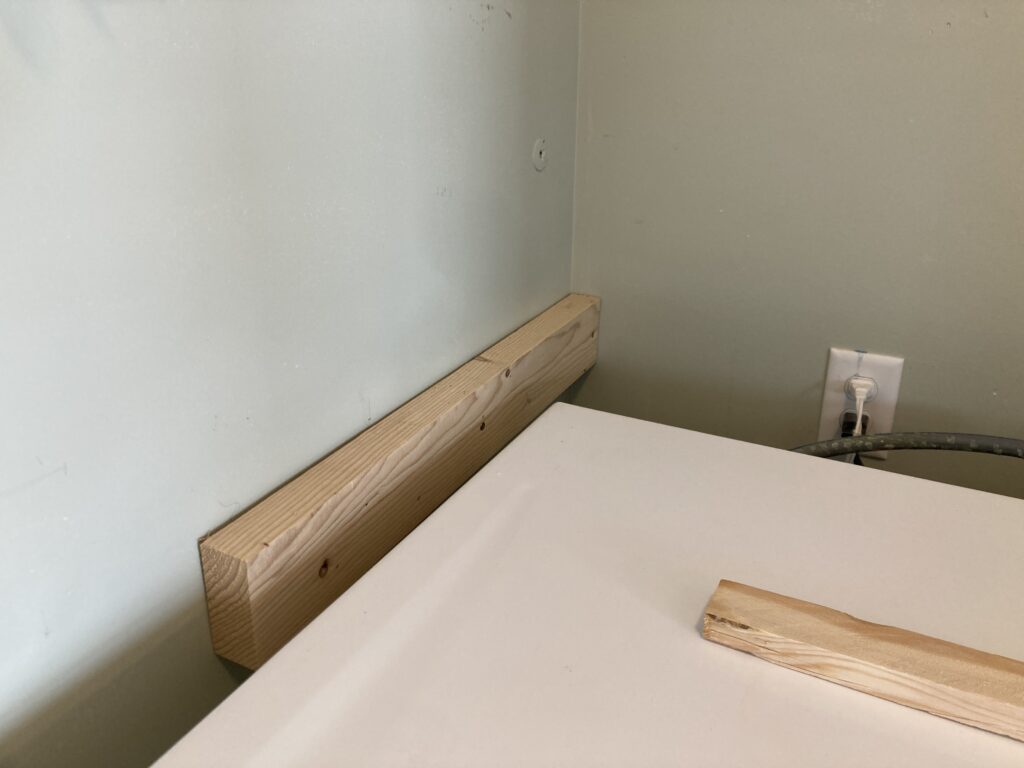
7. Install Wall Cleat/Mount
This step will look different depending on your laundry room setup. My washer and dryer are set between two walls. So I took my 2×4, and cut it into 4 equal pieces. 4 – 24” pieces.
Using my stud finder, I located and marked the studs on the three walls surrounding my washer and dryer.
Then I made marks measuring from about an inch above my washer to the ground.
I pre-drilled holes and screwed my 24” 2x4s, into the studs using 2 1/2″ wood screws. I installed one on each side wall and two along the back wall. Then I used a level to insure they were all level and equal in height. I placed one on each side wall and two on the back wall.
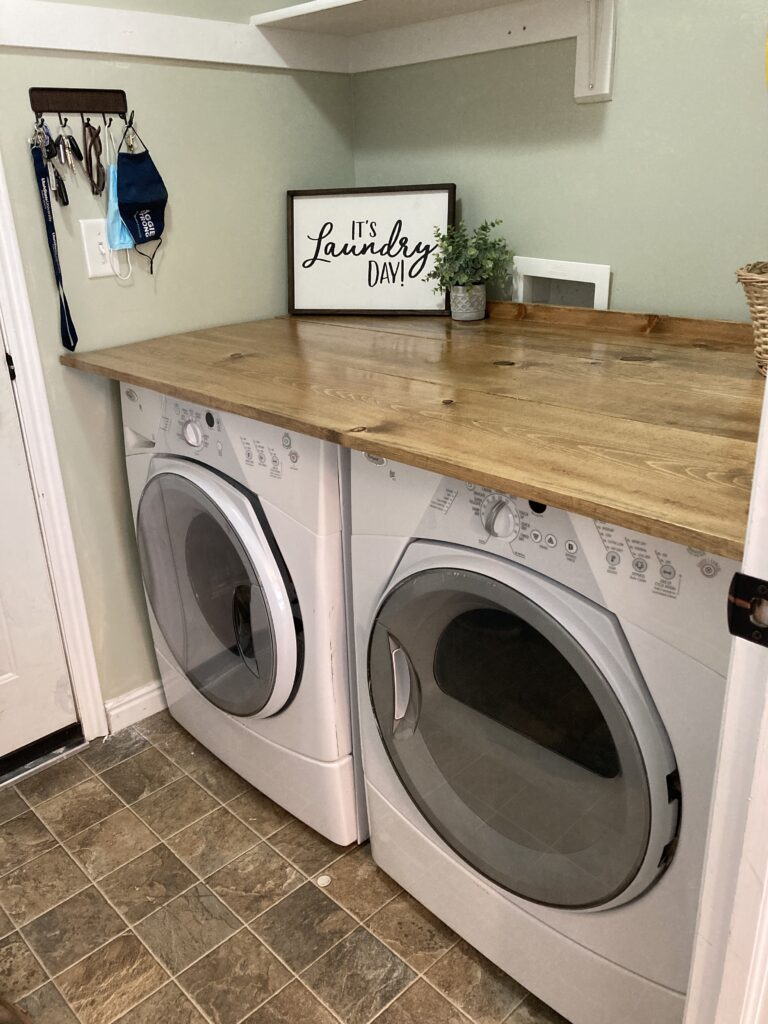
8. Install Countertop Over Washer and Dryer
Then I placed my topper on top of my 2x4s. I used the 2×4 method instead of just setting the topper directly on my washer/dryer because I didn’t want the vibration/movements of the washer/dryer to mess with the topper.
An important reminder with this project: make sure you still have fairly easy access to your water and power source. This is why I didn’t attach my laundry topper to the supporting cleats.
And there you have it! You now know how to build a DIY laundry countertop.
Doing laundry is a mundane, tedious task. I have a set rule that I only do laundry on Thursdays and only on Thursdays (unless there’s something desperately needed). I just push to get it all done in one day that way it doesn’t haunt me the other days of the week. But, let me tell you, doing laundry is a lot more fun when you have a cute laundry room to do it in!
This inexpensive laundry room countertop over the washer and dryer makes for a great laundry folding station. But my favorite part of having it is not losing random things in between and behind my washer/dryer! What laundry day/room hacks do you have? Any other fun Laundry room countertop ideas?
Send me all your laundry room organization tips in the comments below because that is my next goal for this room.
Like this Washer-Dryer Countertop? Pin it!