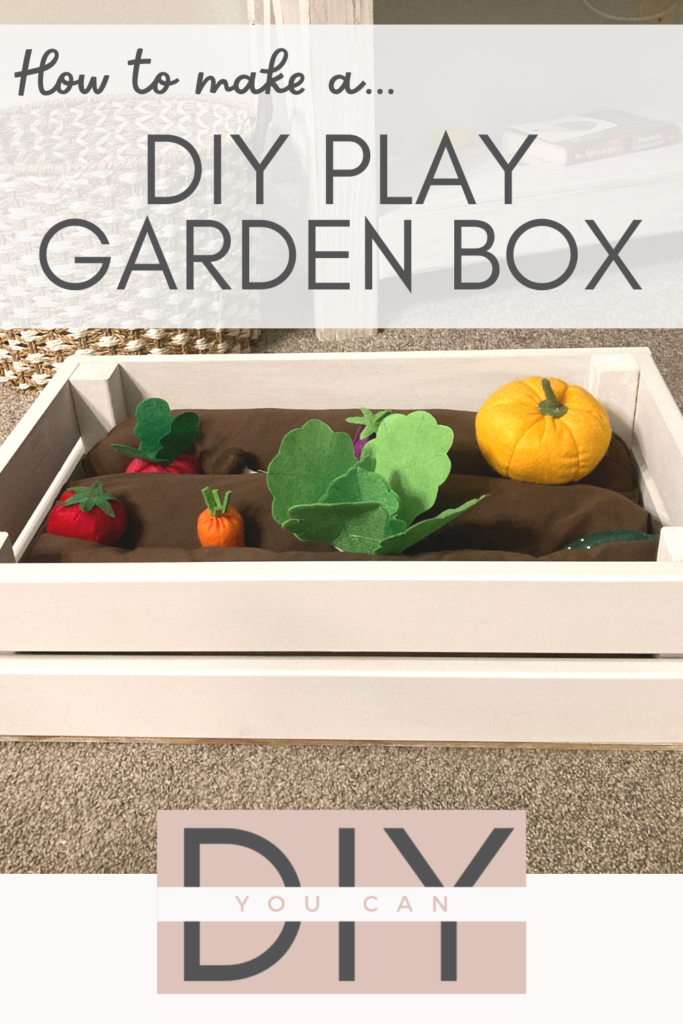
Create a garden toy for 1 year olds that’s affordable and easy to build with our Childrens Gardening Toy guide!
This post may contain affiliate links. I try to make my posts as helpful as possible and have great products easy for you to access. The use of these links provides me a small commission at no cost to you. As an Amazon Associate, I earn from qualifying purchases.
It was my niece’s birthday and I wanted to get her something special (she’s my only niece, and she’s absolutely adorable IMO, so it had to be good). A while back we were at a children’s museum with amazing garden toys for 1 year olds. My kids absolutely loved it. They pretended to plant, water, harvest, and cook their “vegetables”. This memory popped into my head and I decided to try to make a miniature DIY version of the children’s gardening toys. And it turned out great! Plus, it is a great way to give a second life to your used grocery bags (see step 5).
If you’re looking for garden toys for 1 year olds (or any age for that matter), look no further! Childrens gardening toys are perfect for encouraging pretend/imaginative play. Imaginative play is critical in a child’s brain development. It helps develop a variety of skills including language, social and emotional skills. If you’re interested in learning more about this, check out this interesting article from Left Brain Craft Brain on 7 Ways Research Indicates Pretend Play is Vital for Brain Development.
In addition to the benefits of imaginative play, this toy garden also is a great educational experience for understanding where our food comes from and can encourage healthier eating habits.
This toy is a win all around, it is DIY friendly and so great for kids’ brains! Let’s dive into how to make a DIY Play Garden.
Tools Needed:
Supplies for Toy Garden:
Alright, here are the supplies. But to be completely honest, I made mine mostly from scraps I had on hand. So look at all your scrap pieces before going out and buying these supplies, you can definitely swap out these materials for similar ones you have on hand!
- (2) 1x3x8 Primed Trim (or for significantly lower cost but will be a rougher more textured material 1x3x8 Furring Strip Board)
- (1) 2x2x8 pine
- 12″ x 24″ Hardboard (or other thin plywood)
- 1.5-inch brad nails
- Wood Glue
- Wood filler
- Sandpaper
- Paint
- Brown fabric
- Needle and thread
- Used Grocery Bags
- Toy vegetables (or veggie printable found at the bottom of this page)
Below is a quick overview of how to build a children’s gardening toy. Continue scrolling for detailed steps.
- Make Your Cuts
- Assemble
- Wood Fill and Sand
- Paint
- Make “Dirt”
- Purchase or Make Vegetable and Fruit Inserts
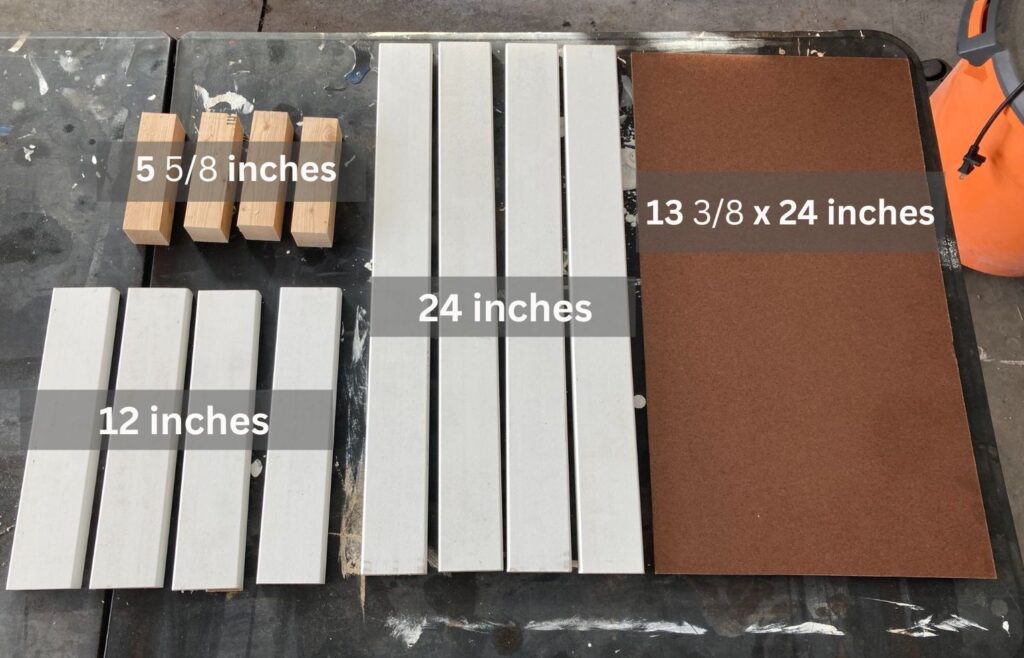
Step 1: Make Your Cuts
- Cut 1×3 primed trim into four – 24” pieces, and four – 12” pieces
- Cut 2×2 into four 5 5/8” pieces
- Cut the hardboard into a piece measuring 13 3/8 x 24″. If you don’t have a saw capable of this large of a cut, you can have it cut at your local hardware store.
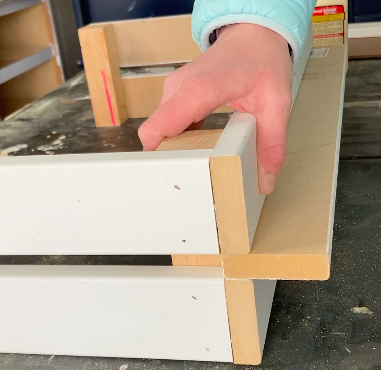
Step 2: Assemble Toy Garden
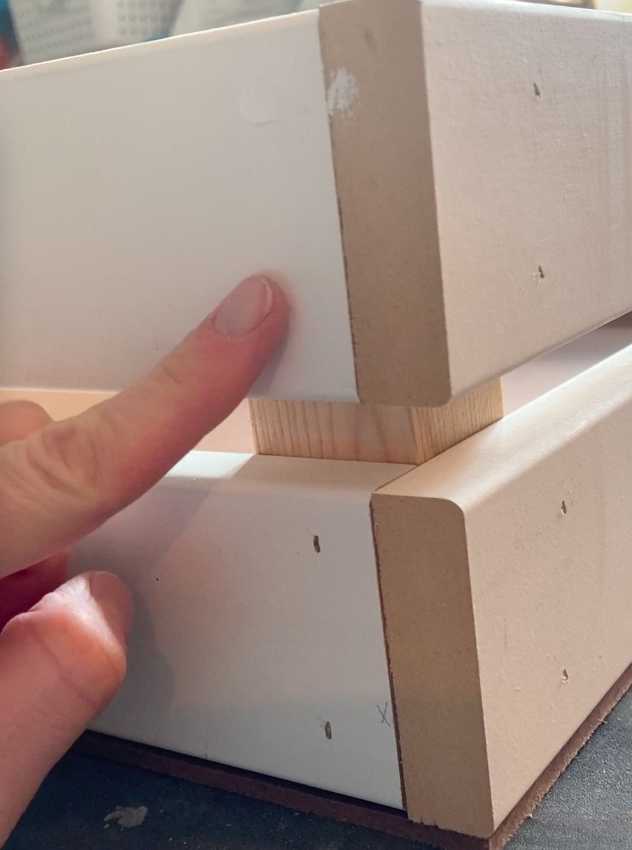
- Take your 1×3 – 12” inch pieces and attach them to the 2×2 pieces with wood glue and your brad nailer. The gap in the middle is the thickness of your 1×3 board. You want the top and bottom to be flush with the 2×2. Repeat with all four pieces.

Keeping the corners flush, attach your 1×3 – 24” pieces to the sides you just completed. Do this with all four 24” pieces with wood glue and your brad nailer.
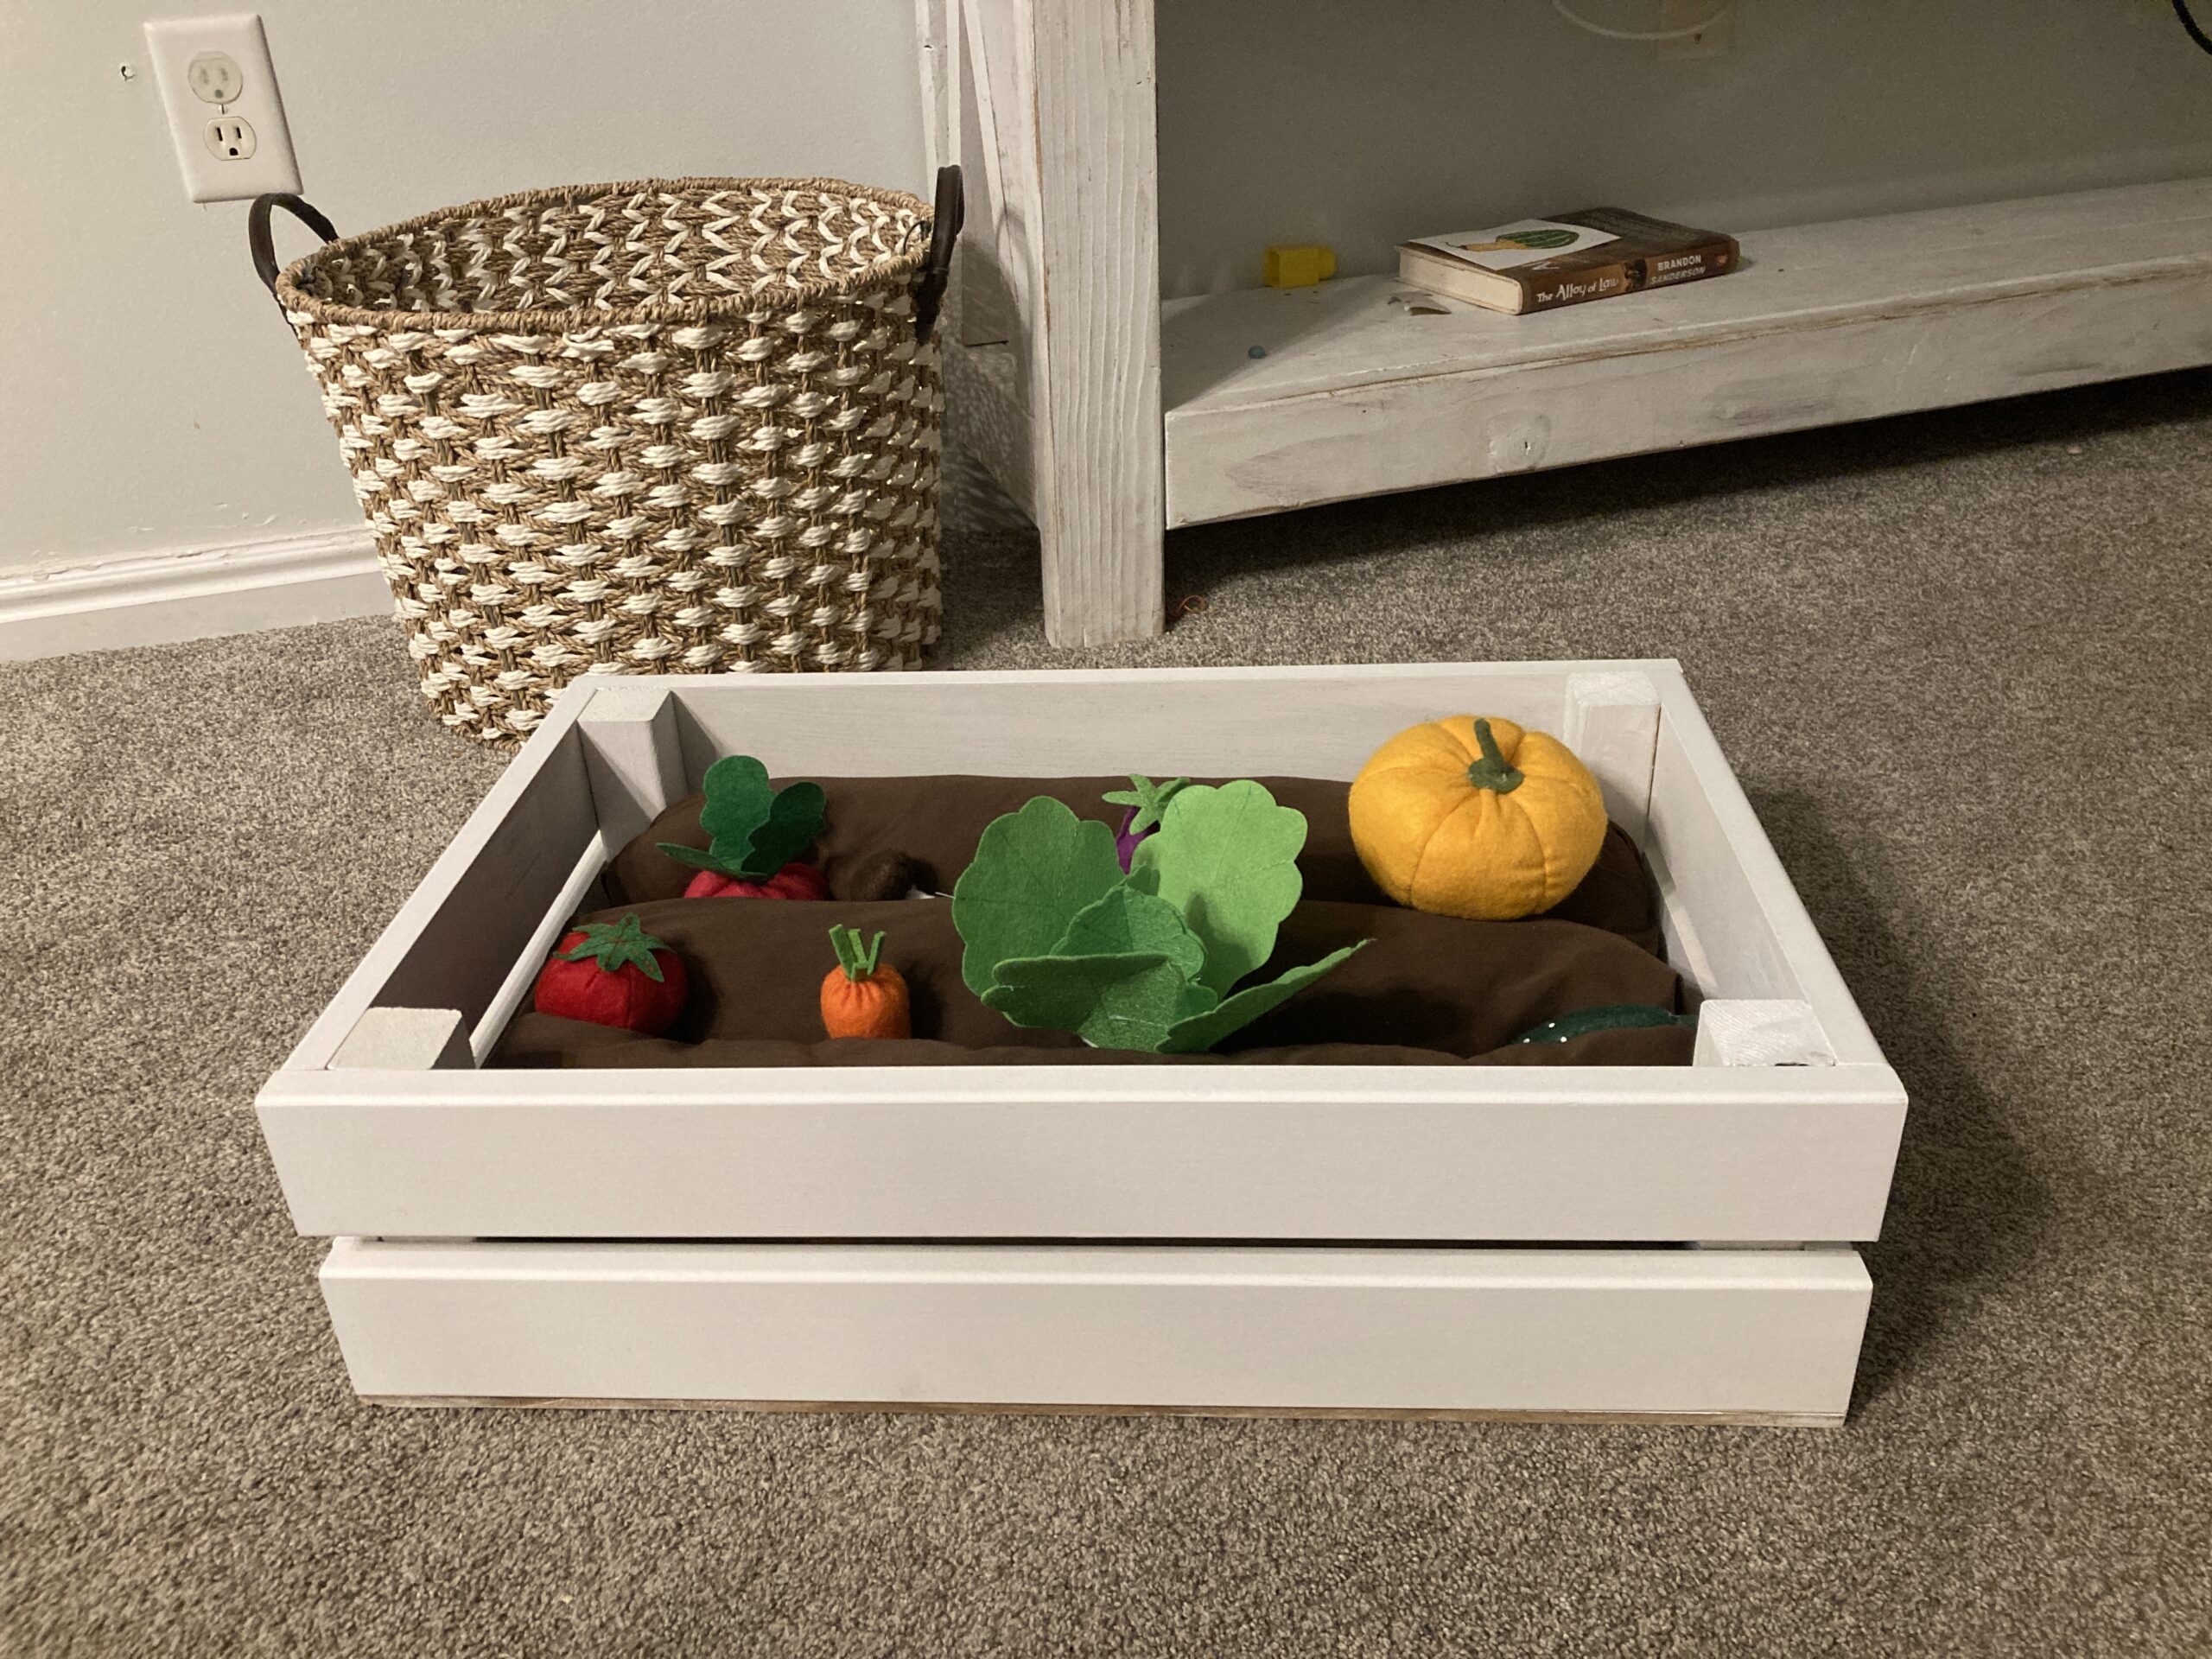
Now you should have a nice square box. Take your hardboard and brad nail it to the bottom of your box.
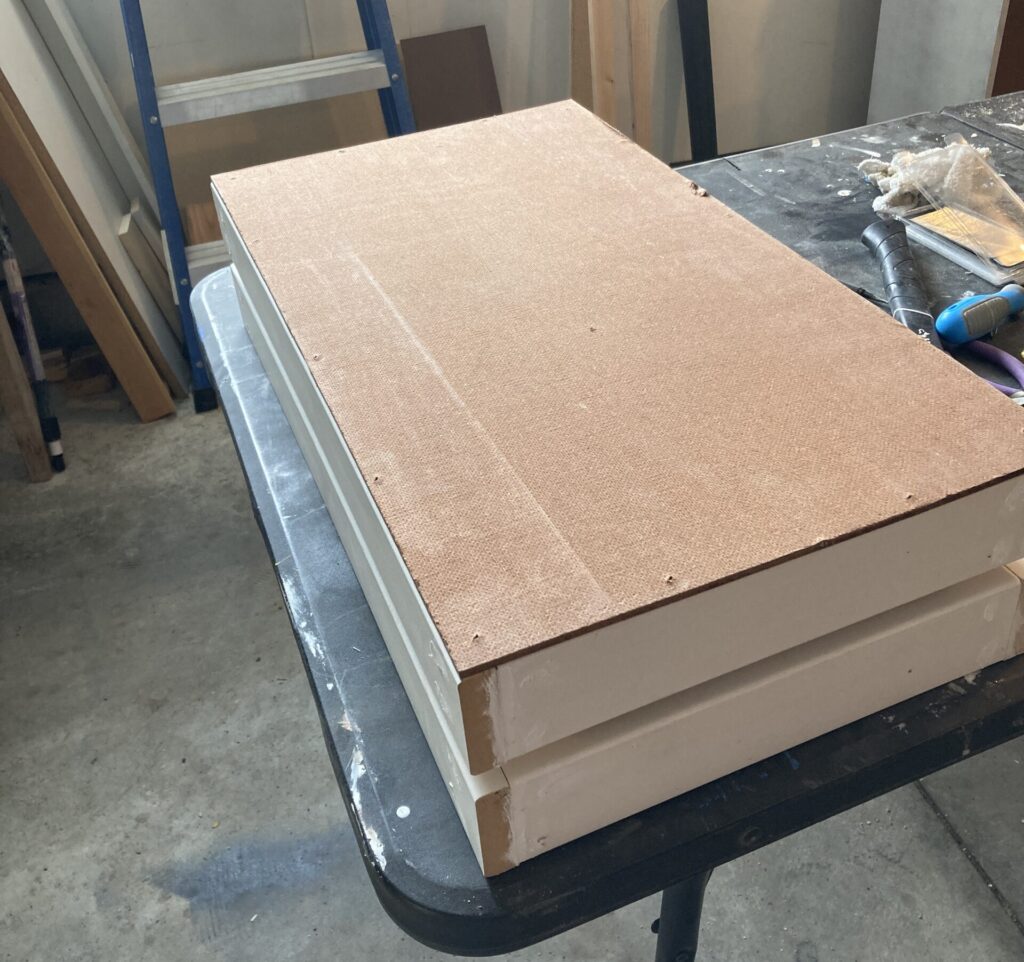
Step 3: Wood Fill and Sand
- Press the wood filler into all nail holes and gaps. Allow drying time then sand until smooth.
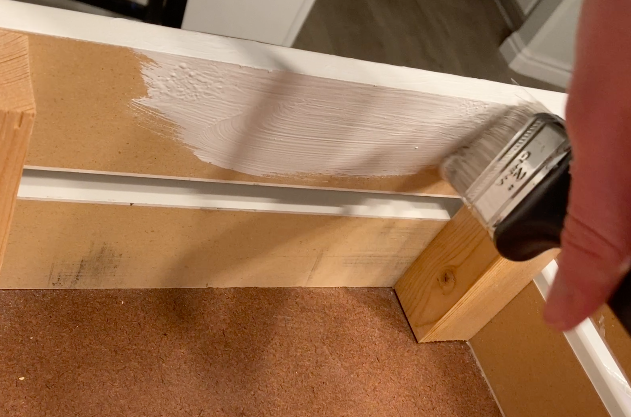
Step 4: Paint
- Wipe down the entire surface, insuring all dust particles have been removed. Then it’s time to paint. I used Ultra White from Behr because that is what I had on hand.
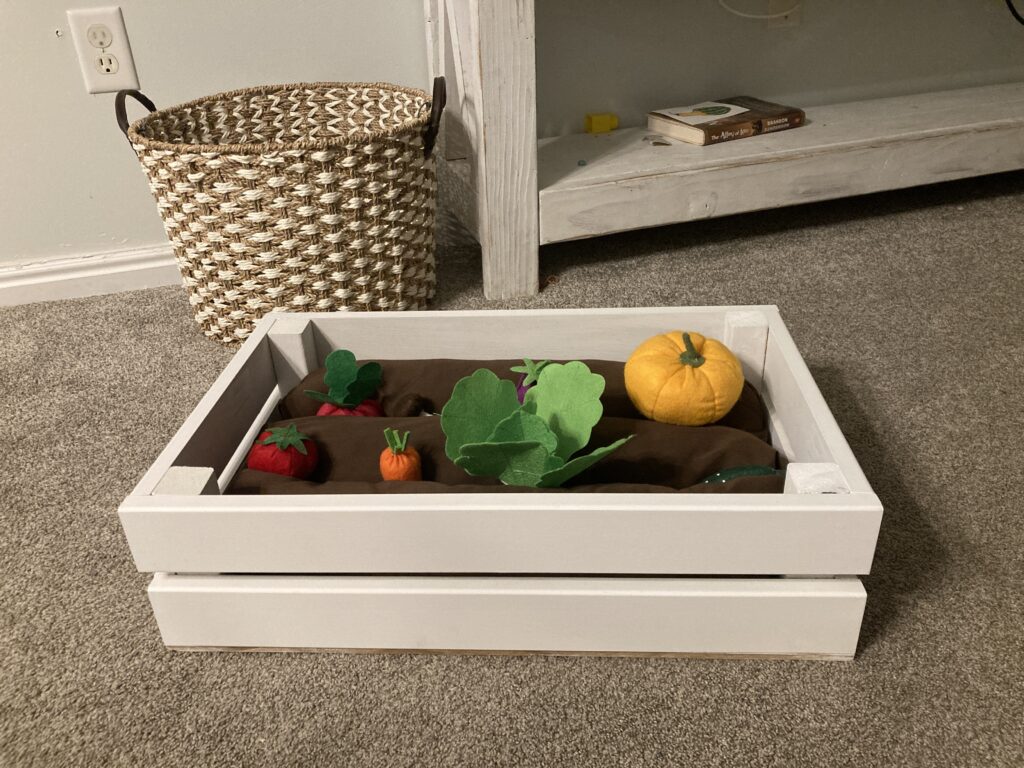
Step 5: Make “Dirt” for Toy Garden
- Cut your brown fabric (I used old brown bed sheets from my mom’s house!) into three pieces that are roughly 12″ x 28″.
- Pin the long sides together sides of your fabric together and sew a straight line down each long side using either a sewing machine or needle and thread.
- Pin one short side, and sew closed. Leaving one end open for stuffing.
- Using all of those old plastic grocery bags you’ve been hoarding, fill each brown tube. Really pack the bags in there, you want it to be firm, but also leave yourself room to stitch it closed. For me, it ended up being about 30 bags per tube (Should I be ashamed I had that 90+ bags on hand? ).
- Once you feel it is firm enough, fold the top edge slightly in for a clean edge, and fold the fabric together. Kind of like wrapping a present. Sew the last edge together. Repeat this for all three pieces.

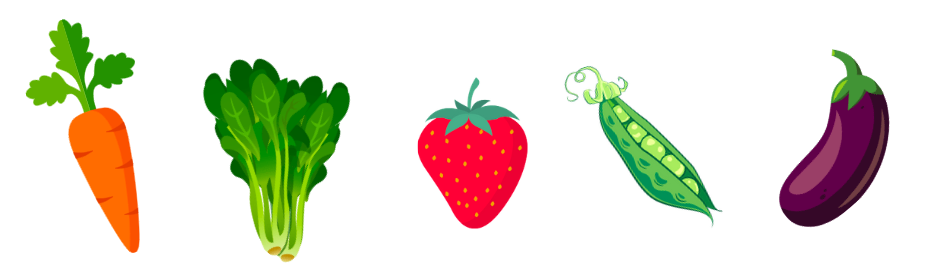
Step 6: Purchase or Make Vegetables & Fruits for Your Garden
- Place the “dirt” you’ve made inside your garden and now it’s time to add your produce! The vegetables in my example picture below are from oriental trading and have unfortunately been discontinued. But this toy food set from amazon looks really cute! If you are looking to save a few bucks, below is a free printable with vegetables/fruit you can print and laminate. There are two of each so you can laminate them together to make them double-sided.
- If you wanted to add a special touch, you could get the word “Garden” in vinyl letters to post on the side of your toy garden box. These vinyl stickers from Amazon would work great!
Click on the link below to download the childrens gardening toy free vegetable printable:
I hope you enjoy building this low-cost, fantastic DIY toddler toy! Better yet, I hope it is well-loved once it’s done!
If you take on this project, please drop a comment below! I’d love to hear how it goes.
Looking to save this post on Garden Toys for 1 Year Olds? Pin it on Pinterest!