This post may contain affiliate links. I try to make my posts as helpful as possible and have great products easy for you to access. The use of these links provides me a small commission at no cost to you. As an Amazon Associate, I earn from qualifying purchases.
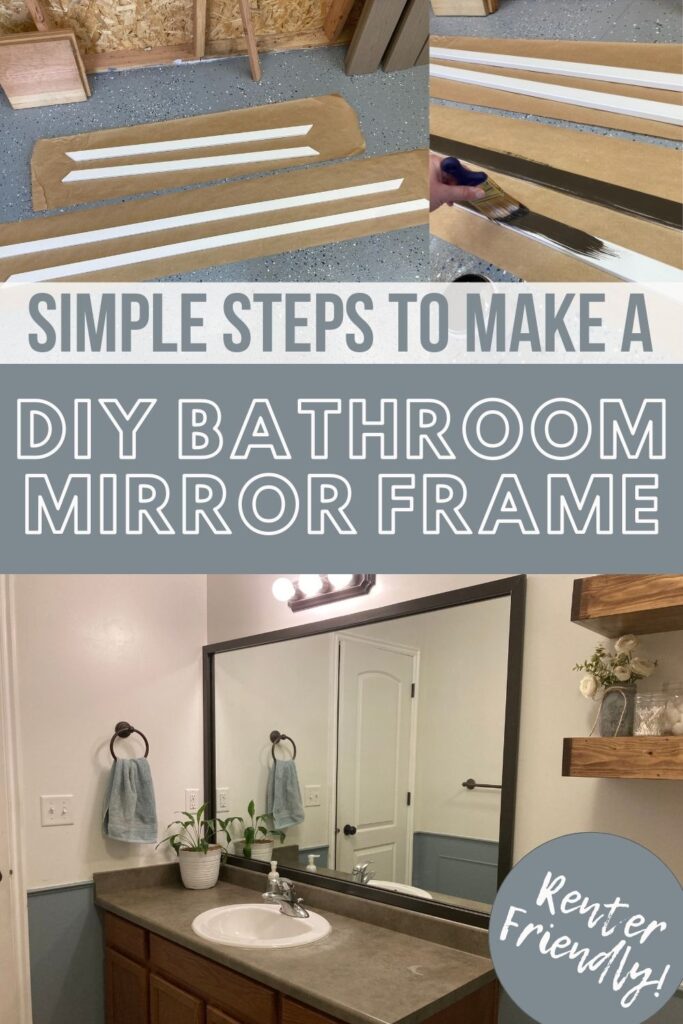
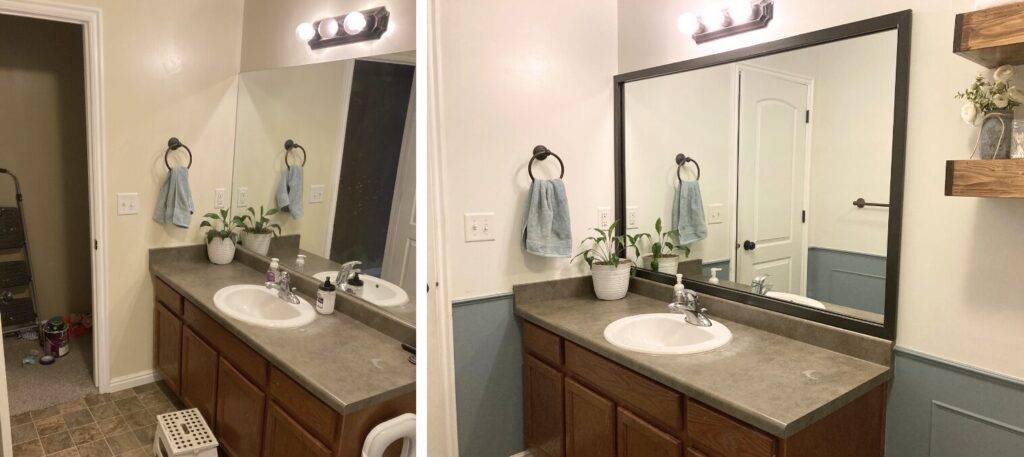
This DIY Bathroom mirror frame is a simple, fun, and affordable way to update your space. I was able to do this DIY for only $30. This is a great quick project perfect for beginner DIYers! And it’s renter-friendly.
Join me as I share these simple steps to create your own DIY framed bathroom mirror.
Steps to Create a DIY Frame for Mirror
Step 1: Buy/gather your supplies to build your DIY Bathroom Mirror Frame
- Trim (length depends on the size of your mirror, I bought 3 – 8′ pieces, see below)
- Wood filler
- 2-inch flat corner braces
- Paint & primer
- Command Strips
There are so many fun options when it comes to trim. I went with a simple modern straight edge. But there is also this pretty trim that looks more like a picture frame. Take a moment to peruse the moulding aisle and find what fits your taste.
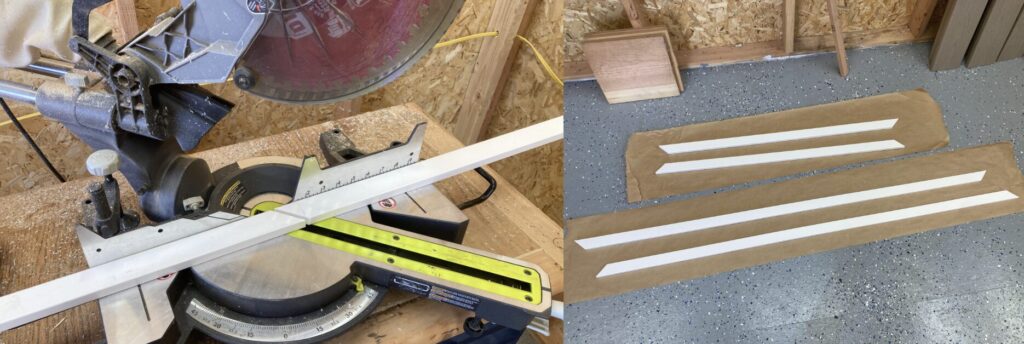
Step 2: Make Your Cuts
Depending on your bathroom mirror size, your cuts will vary. These are the measurements for the cuts I made. Cut each end at a 45-degree angle.
- Two long pieces: 63 1/4″
- Two short edge pieces: 40″
I made these cuts using my miter saw. If you don’t have a miter saw, this miter box is a great affordable place to start!
If you are looking to learn more about using a miter saw, make sure to check out my Ultimate Miter Saw Guide.
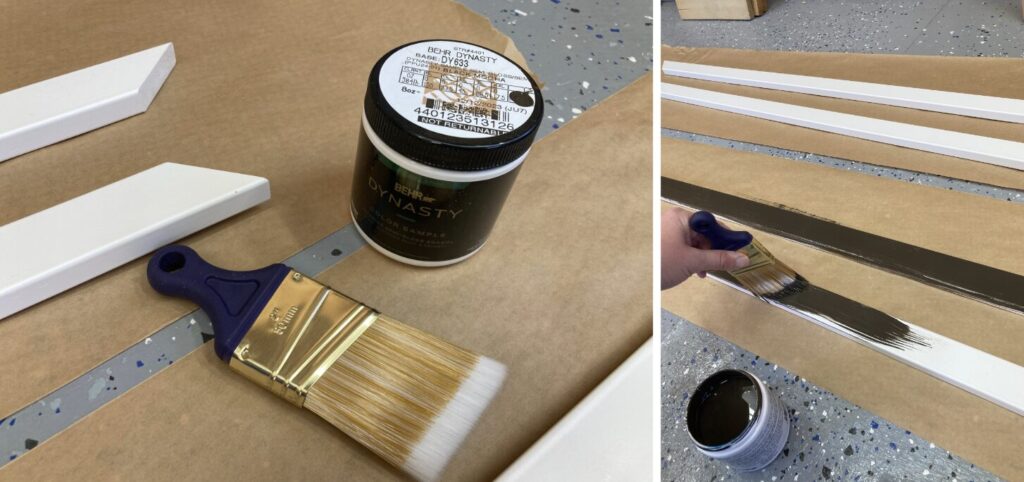
Step 3: Prime and Paint
Start by applying a coat of primer. Once it has fully dried, Lightly sand it with 120-grit sandpaper.
For some cool tips on using sandpaper, make sure to check out this post.
With your color of choice, apply 2-3 coats of paint. I went with a blackish-brown color. I did two coats, lightly sanding between. Then I did an additional touch-up coat once it was all assembled.
You could also do a wood stain if you’re using wood, I think that could look so pretty!
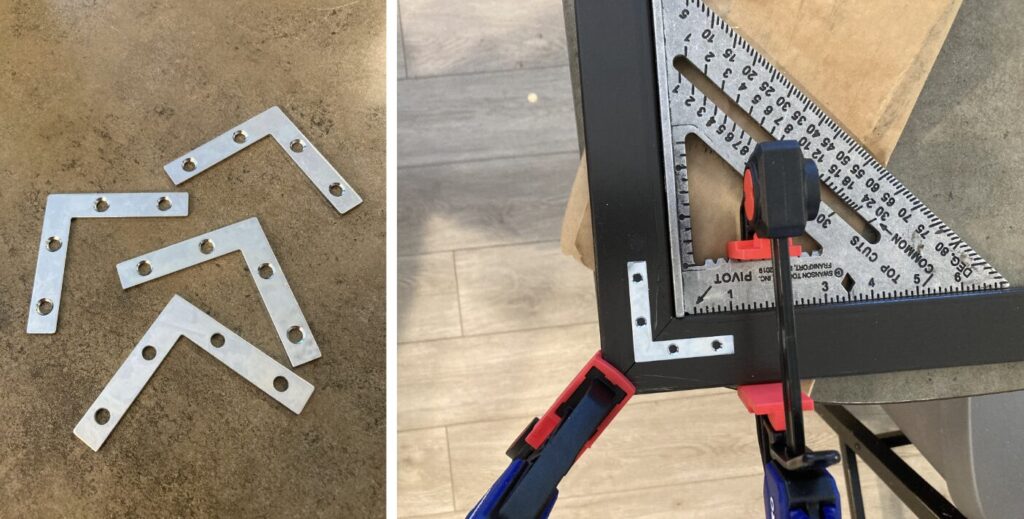
Step 4: Connect Pieces Using Brackets
Start by lightly coating your corners with wood glue. Then use two-inch flat corner braces to connect each piece.
I used my speed square and some clamps to keep it nice and square during this step. But there are also 90-degree angle clamps that would be helpful! Or you could probably get away with eyeballing it.
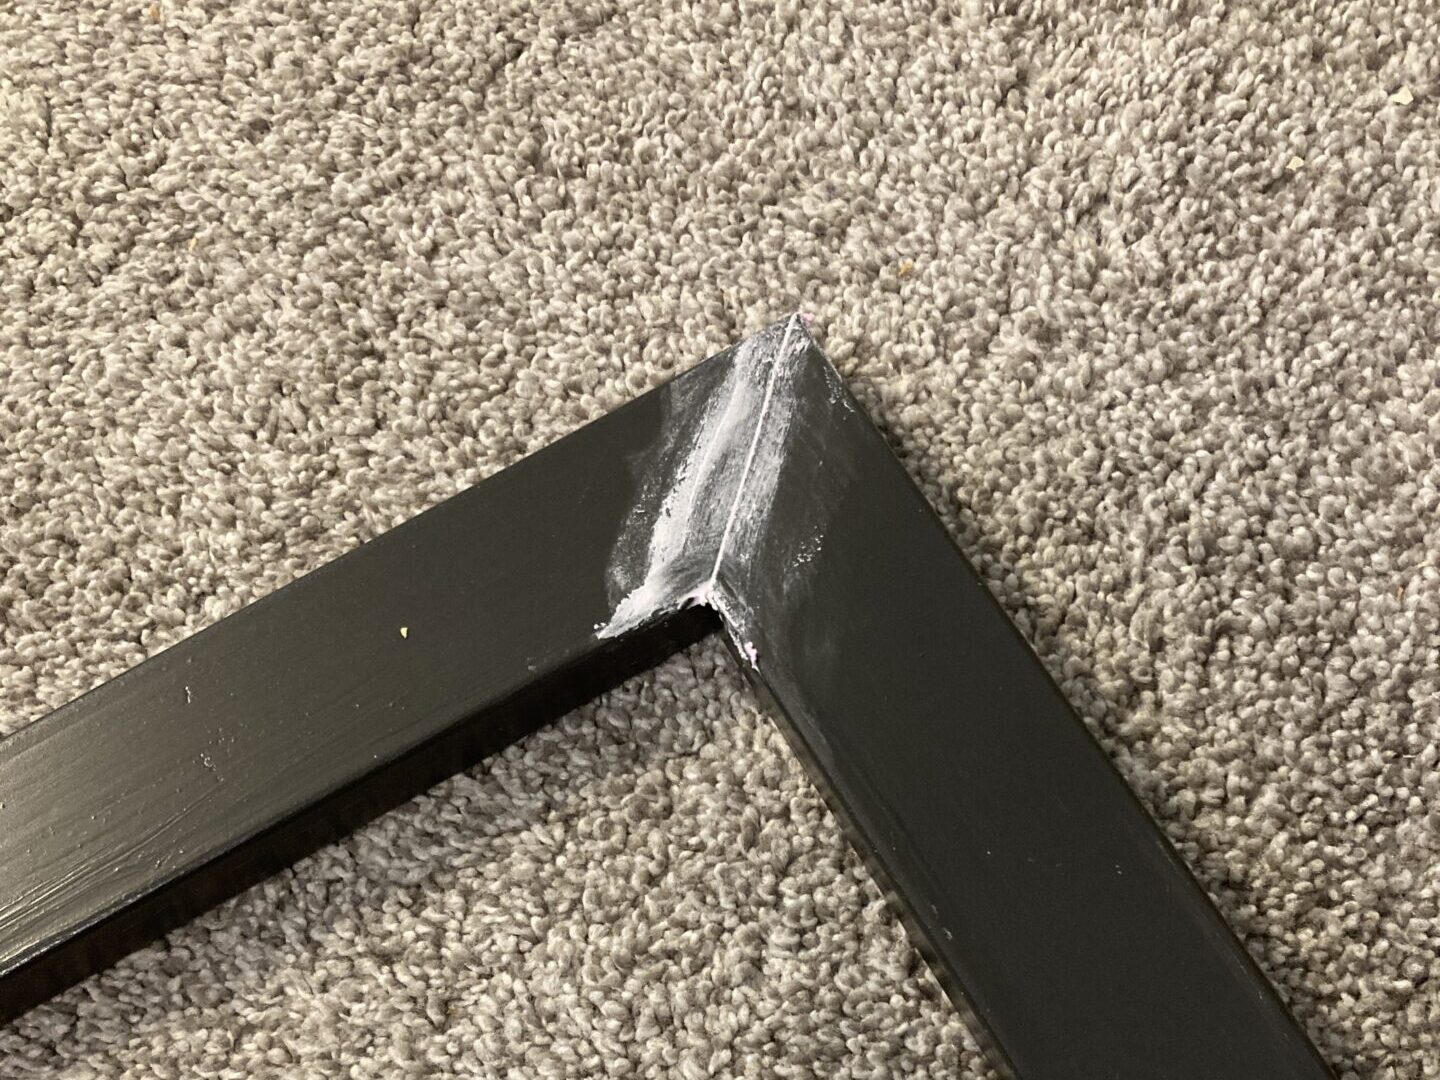
Step 5: Wood Fill and Sand
Apply wood filler to each of the corners. Allow it to dry completely and sand it flush.
For more tips on how to use wood filler, check out our wood filler guide.
Once you have sanded the wood filler flush, apply a touch-up coat of paint.
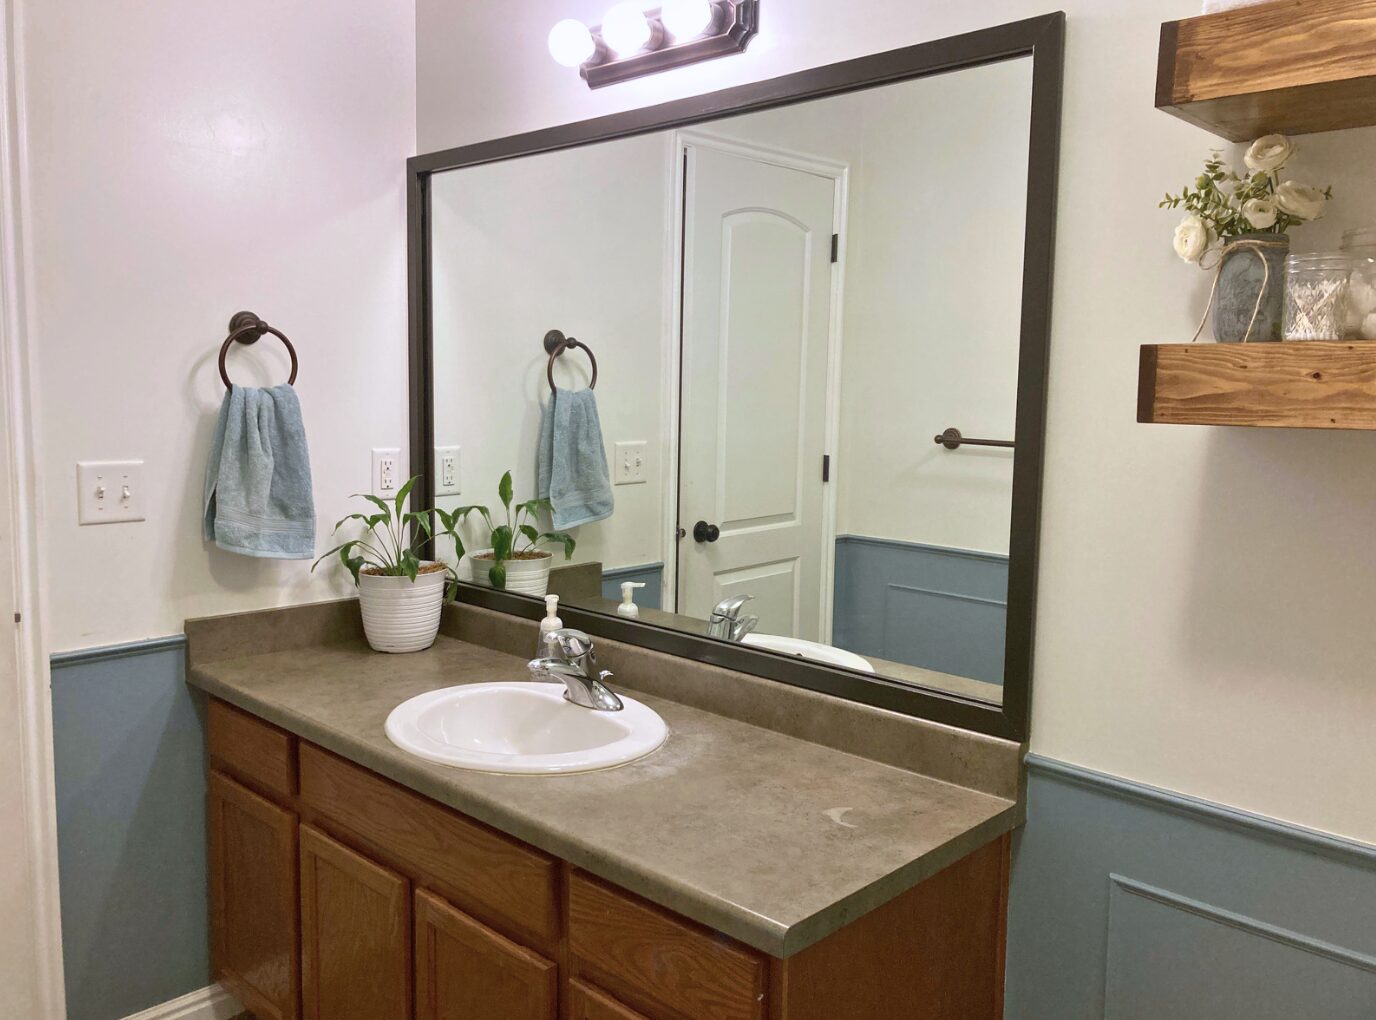
Step 6: Attach Your New DIY Bathroom Mirror Frame
Now for the fun part! Let’s hang up your DIY bathroom mirror frame.
I used command strips to hang mine up. Which also makes this very renter-friendly!
Follow the steps on your command strip package. For mine, I pressed four strips onto the back of my frame, and then I pressed it onto the mirror. Then I took the frame down and pressed each side of the command strips, holding for 30 seconds. I let the strips sit for an hour, then I put it back up and I feel pretty confident it’s not going anywhere!
A simple upgrade that makes such a difference. I love mine! Now to update my counter and cabinets… add hardware and a new faucet… the fun never stops! I love the DIY life.

How did your DIY bathroom mirror frame turn out? Tell me about it in the comments! I’d love to hear from you!
Affordable Bathroom Updates
If you like this DIY bathroom update, you’ll love these projects!
Pin “Bathroom Mirror Frame DIY” to Pinterest